Conservatory
This room contains solutions for the following systems (notice that on phones, the table might only be displayed in landscape mode):
| System Type | Components |
|---|---|
| Lighting |
|
| Climate Control |
|
| Home Entertainment | None |
| Security and Alarm |
|
| Pet Care | None |
| Control and Automation | None |
Description of the solutions in this room
One of the light sources required some investigations before arriving at a solution. The lights in question are a set of spotlights stretched across the room under the ceiling, using small halogen light bulbs. These were controlled using a manual wall dimmer switch, but with a special twist in that the spot lights were connected to power plugged into a wall socket, i.e., not directly connected to the dimmer switch. The initial solution was to replace the old dimmer with a Koogeek smart dimmer, which worked well for a couple of years. Sadly, it turned out that the quality of this dimmer was quite poor and it broke, which also caused the transformer for the spotlights to almost “explode”.
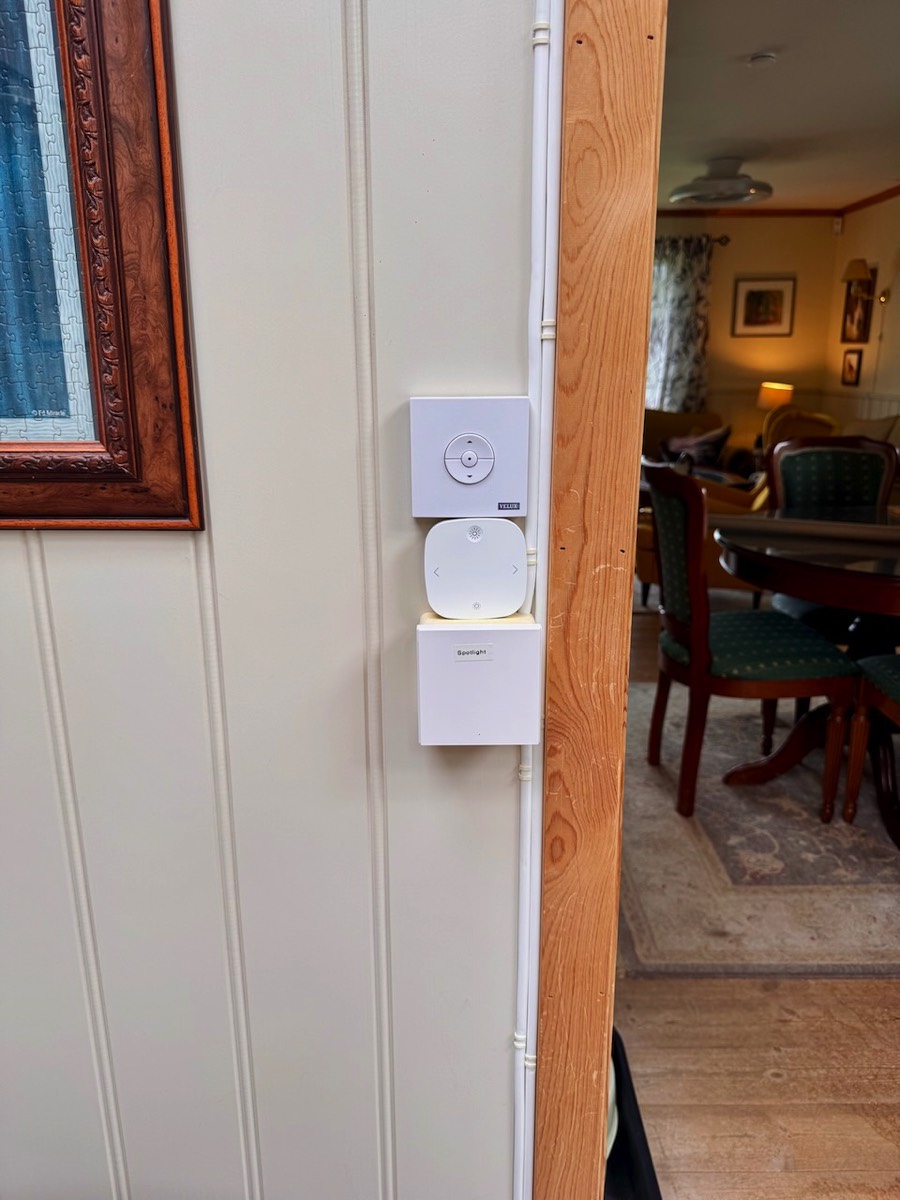
That was when I discovered that transformers for this type of spotlights are almost impossible to obtain anymore, which meant the spots had to be replaced with LED versions. The smart dimmer was replaced by an Aqara smart wall switch, see picture below, and for a long time the lights were turned on/off using the, though without any possibilities for adjusting the brightness. Gradually, the bulbs, using the GU10 socket, were replaced with smart versions, of the type IKEA color bulbs, see picture below. These are also possible to dim and change color of using an IKEA Styrbar remote, also shown below.
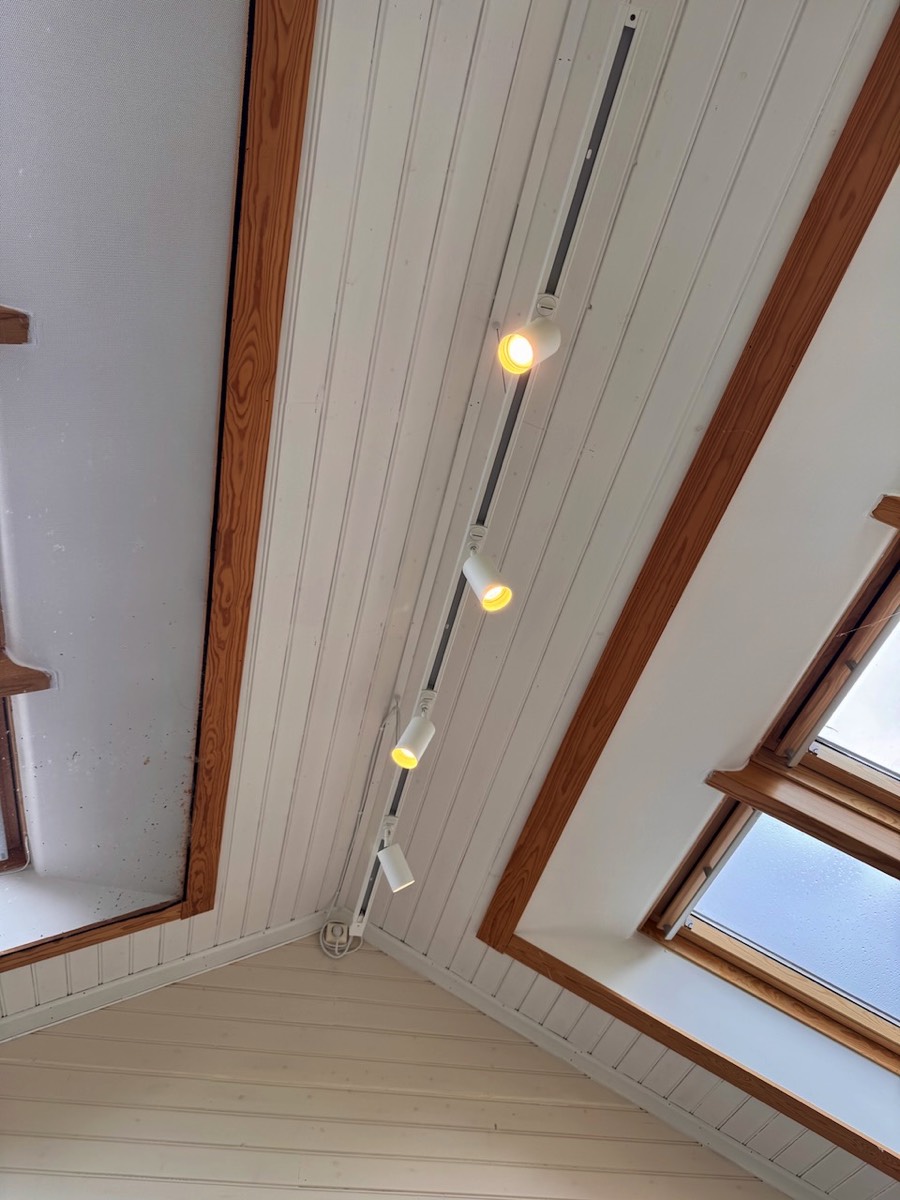
Row of spot lights underneath the ceiling, with smart bulbs, controlled by an Aqara smart wall switch (above this, a “remote control” for the skylight has been mounted, see description below)
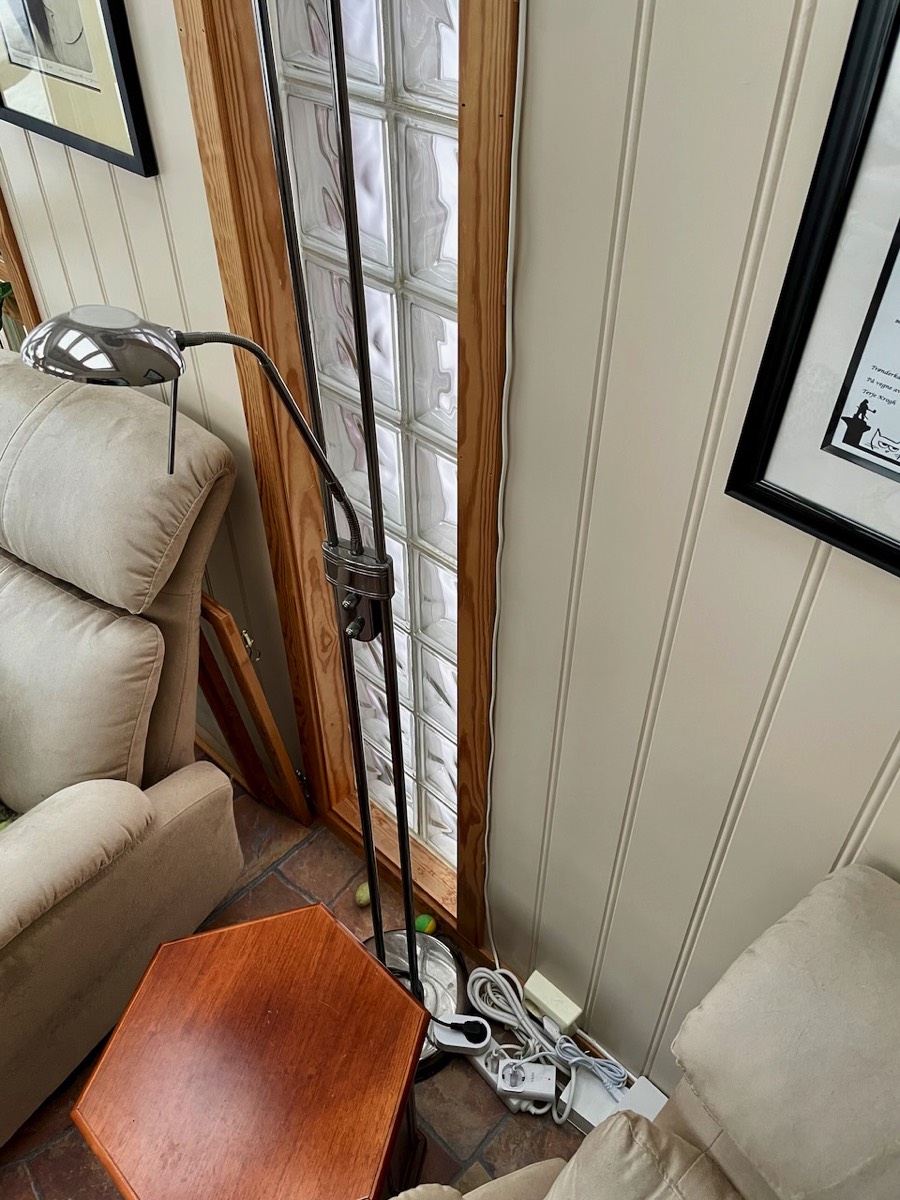
The second light source in the room, controlled using IKEA Trådfri smart plug, is a floor lamp with a halogen bulb, see picture below. This lamp has a built-in dimmer, while the smart plug of course only can turn on/off the lamp. Both solutions work very well and both light sources are programmed to turn on automatically when it starts to get dark, as part of a Apple Home scene called Evening Lights (and off as part of the Good Night scene).
IKEA Trådfri smart plug with connected floor lamp
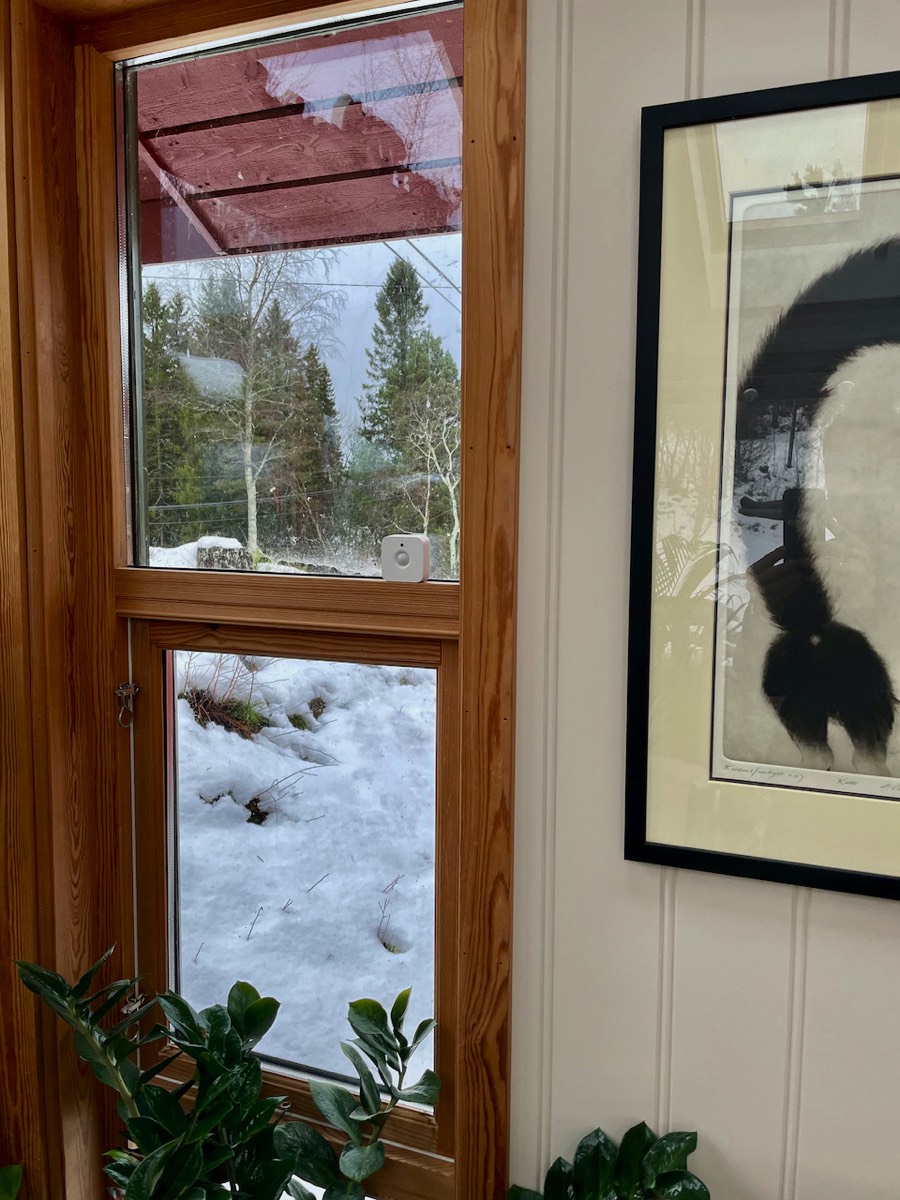
In addition, a Philips Hue motion sensor has been installed at a suitable spot in a window, see picture below, to that is doesn’t register motion unless we actually are in the room. This is used in a routine that turns on the light at motion and if the light level is below a certain level, since there are so many windows in this room that extra light is only required when it is fairly dark. The light level measurements are also used in a routine to control the lights in the living room.
Hue sensor that registers both motion and light levels
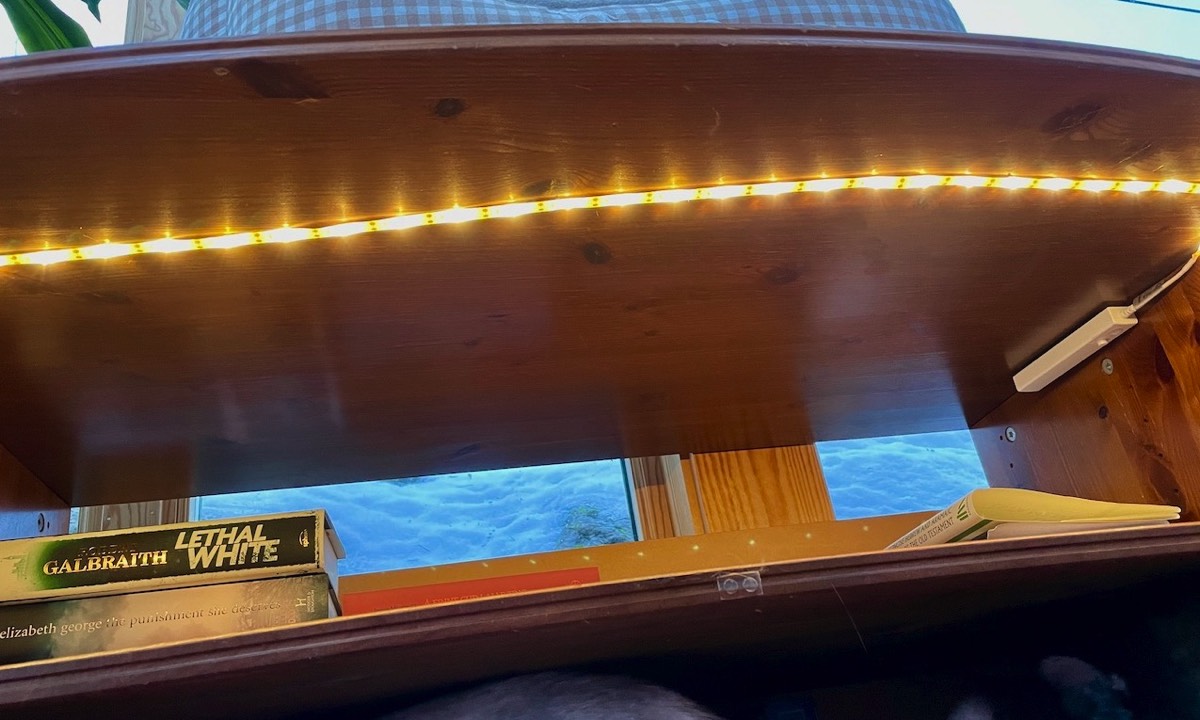
After a simple LED light strip with a built-in motion sensor was taken out of use from somewhere else, it was installed in a book case, see picture below. This gives some extra light when looking for a book, but the batteries don’t last that long.
The electrical floor heating underneath the laminate flooring was for a long time controlled by a Heatmiser neoStat-e thermostat, but after some years, it packet it in and was replaced (although an external temperature sensor still remains even if it is not connected to a thermostat any longer and it provides temperature measurements) by a Namron Zigbee Edge smart thermostat. It is strictly speaking placed on the wall in the adjacent kitchen, see pictures below. Having had several Heatmiser thermostats fail after a few years, the time was ready to try a different brand and this from Namron looks good and having both a touch screen and a physical wheel button, it is in fact easier to operate than thermostats with only touch screens. The primary connection is to Homey, where the official Namron app supports all their products, and from there it is also exposed to Apple Home.

Namron thermostat that control the under-floor heating in the conservatory as well as a heatmiser temperature sensor which is no longer connected to a thermostat

In a house in the middle of Norway, it is far more often a need for heating than cooling, but during warm summer days the house can get very warm. In such cases, we can of course reverse the heat pump for cooling, but this uses some electrical power and it not very effective. The other solution is to open doors or windows, but to date we have had to do this manually by physically opening a knob/handle. Now we have installed motorized opening/closing of one of the Velux skylights here in the conservatory. These skylights were installed back in 2007, but Velux sells motor control also for older windows and this was quite easy to install, see pictures below.

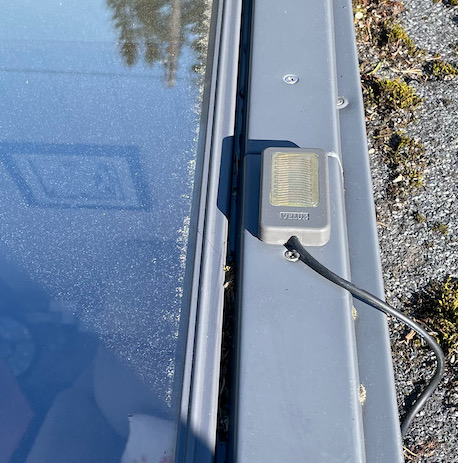
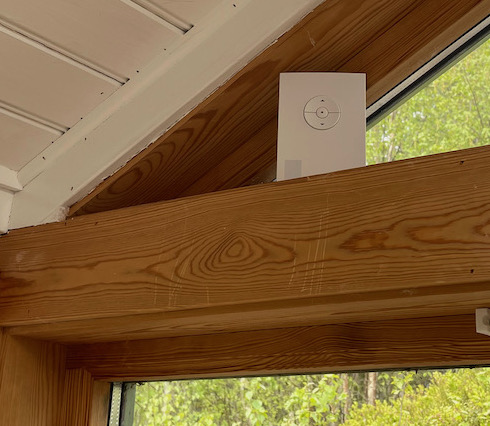
Left, skylight with motorized control installed, middle, rain sensor for automatic closing, and right, contra unit for the motorized control, which unfortunately is rather big, and we have partly hidden it behind/underneath a chair, and on top of this, the base station for the Velux system (see description below)
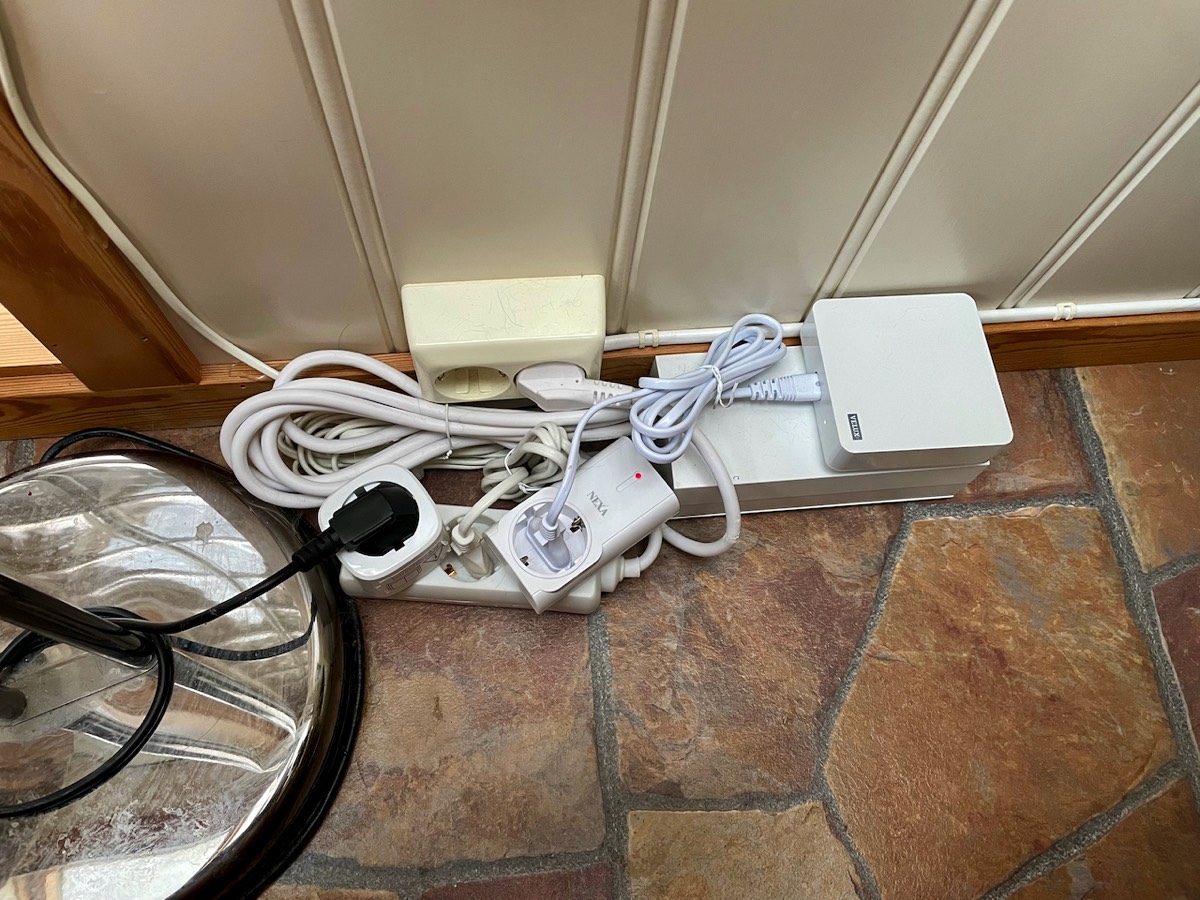
This basic solution makes it possible to control the skylight using an old-fashioned remote control (as well as automatic closing based on a rain sensor), but no app control. This can, however, be achieved through a fairly recently launched product, Velux Active with Netatmo, which includes a base station, a combined sensor that measures temperature, humidity, and CO2 level, as well as a "departure" switch (which can be used to close and lock windows when leaving home). This last component is something we have not bothered to install, but we have added a manual wall switch to open/close the window manually. Unfortunately, we have seen that the base station frequently loses connection, either completely or with Apple Home, so a Nexa smart plug has been installed to allow rebooting it easily.
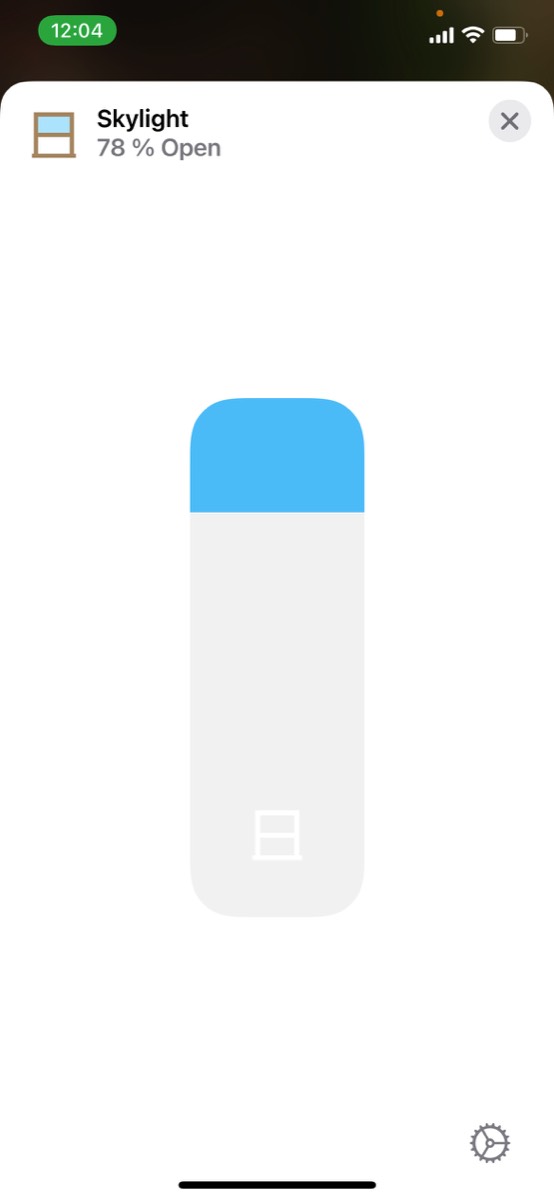
This solution makes it possible to operate the window either using a dedicated Velux Active app or Apple Home, as Velux Active with Netatmo supports that, see screenshots below.
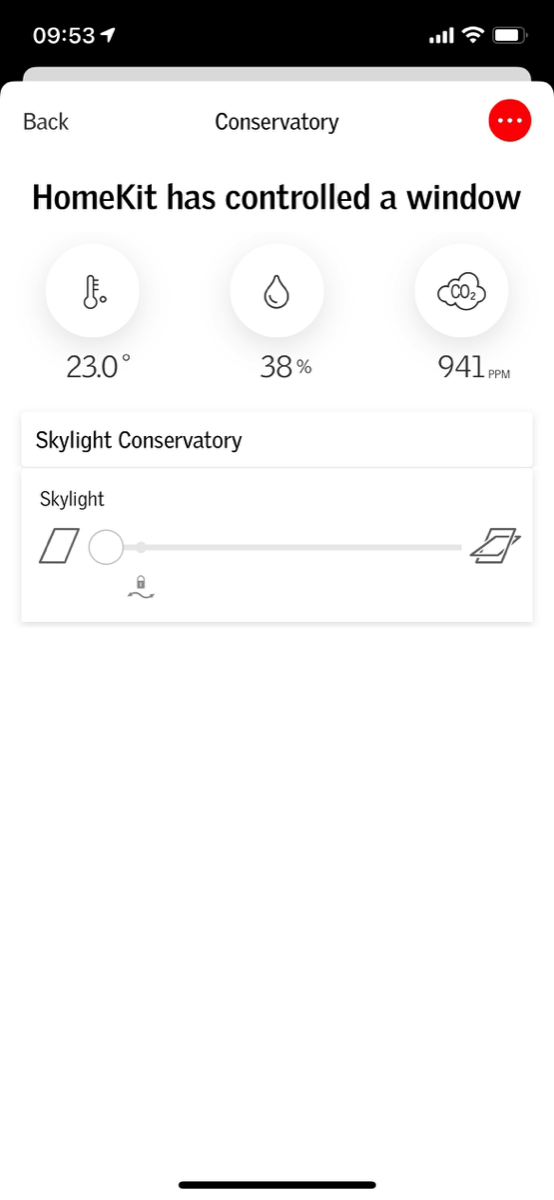
Screenshots from respectively the Velux Active and Home app
Both the Velux app and Apple Home gives opportunities for defining automated opening and closing, based on temperature or other parameters, and on defined weekdays/time periods, or the skylight can be opened manually as needed. We have so far not tested this during a whole summer, but the first impressions of this combined motor and app control of the skylight are good and makes it possible to open the window no matter where we are to air the house.
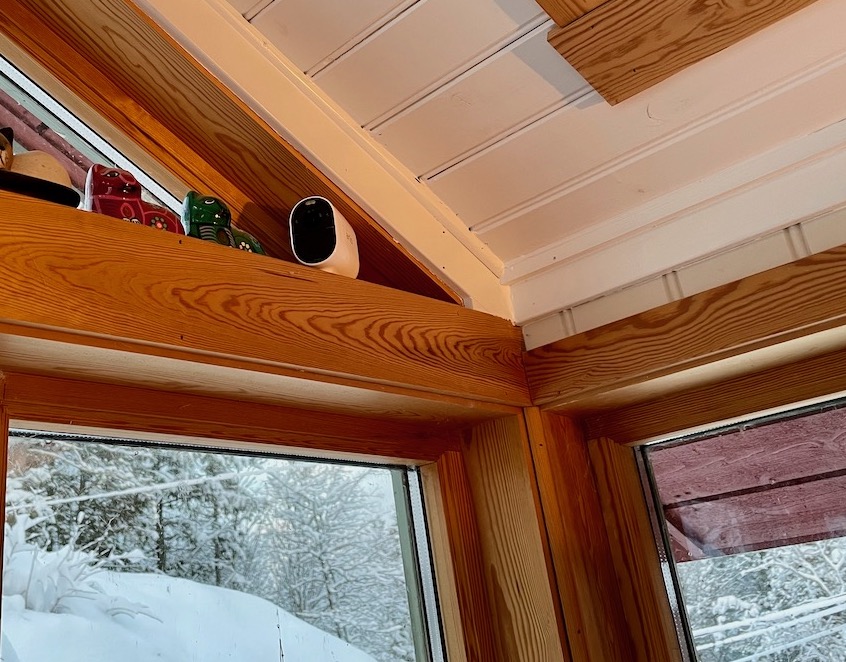
As part of the Verisure alarm system installation, we also got an Arlo smart camera, and it has been placed on the window ledge here in this room, which has so many windows, so that the camera shows both the room and the area outside. It is connected to Apple Home via a base station, which is placed in the living room, and can be accessed through the Arlo app, the Verisure app, and Apple Home. This camera is arguable the “weightiest” we have and the image quality is good. It also has a built-in motion sensor.
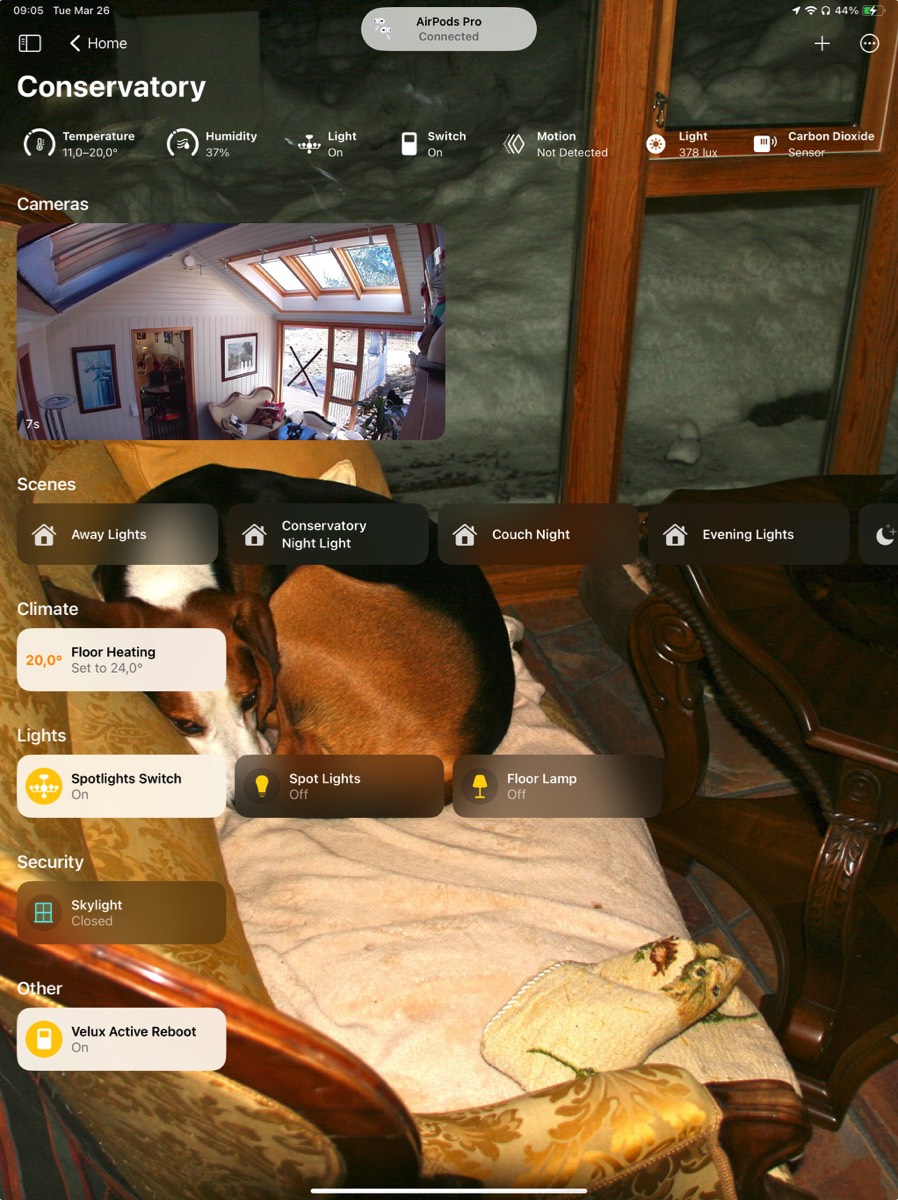
In the Home app, the devices are shown as in the screenshot below.
The devices in the room