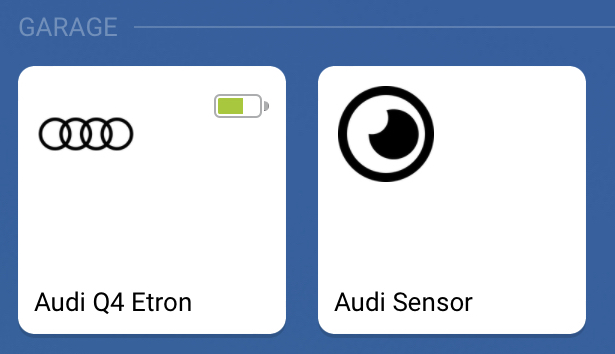
Garage
This room contains solutions for the following systems (notice that on phones, the table might only be displayed in landscape mode):
| System Type | Components |
|---|---|
| Lighting |
|
| Climate Control |
|
| Transportation |
|
| Security and Alarm |
|
| Pet Care | None |
| Control and Automation |
|
Description of the solutions in this room
The garage was for a long time is not the «smartest” location on the property, but now it does contain solutions for lighting, garage door control, camera for security, and control & automation in the form of mesh WiFi. Starting with lighting, the garage has two light fixtures for traditional T8 fluorescent tubes, controlled by a manual wall switch. Since we rarely go into the garage beyond when driving the cars in/out, there was no pressing need to make the lighting smarter, except for one “use case”; both cars have electric engine/space heaters installed which are powered by connecting the cars to power through an outlet in the front grille. These are obviously used in winter time and being able to find the grille outlet and plug in the cars required either manually turning on the ceiling lights or turning on the phone flashlight. Both worked perfectly well, but it would be much more elegant with motion-controlled lights. Several solutions were investigated (and partly tested). My first idea was to replace the T8 tubes with smarter versions, so I ordered T5 LED tubes with built-in motion sensor. These also required a special type of starters and they don’t work in all types of old fixtures. In our case, they worked in one of the fixtures, but not the other. And since these would require the wall switch to be kept on all the time, this meant that the fixture where the new tubes didn’t work would have to be left without tubes. Since this was impractical in the cases where we really needed bright light in the garage, this solution was abandoned.
The next solution to test was to install a spare lamp with a smart bulb and a motion sensor. Unfortunately, this proved infeasible as the distance from the house was long enough that the bulb couldn’t connect (I tried bulbs from both Philips Hue and IKEA Trådfri). An observation in hindsight; this might have worked had I done this after later having installed smart bulbs in various outdoor lamps, as these would work as intermediate connection points on the way to the garage. I also considered installing a motion sensor in the ceiling and connected to the light fixtures, e.g., from Robus. This would probably have worked, but it would partly require a somewhat cumbersome installation (which really should be done by an electrician) and partly it would mean the whole garage lighting up every time we would drive cars in or out, no matter which time of the year.
In the end, we ended up with an additional lamp with built-in motion sensor, see picture below. This was not “smart” in that it was not online and could not be remote-controlled/programmed. But it had the advantages that it could be installed on the innermost wall of the garage and be angled so that it turned on only when we moved in front of the cars to plug in the heaters. It was also easy to install and it turned on only when there was low light so not during day/summer.
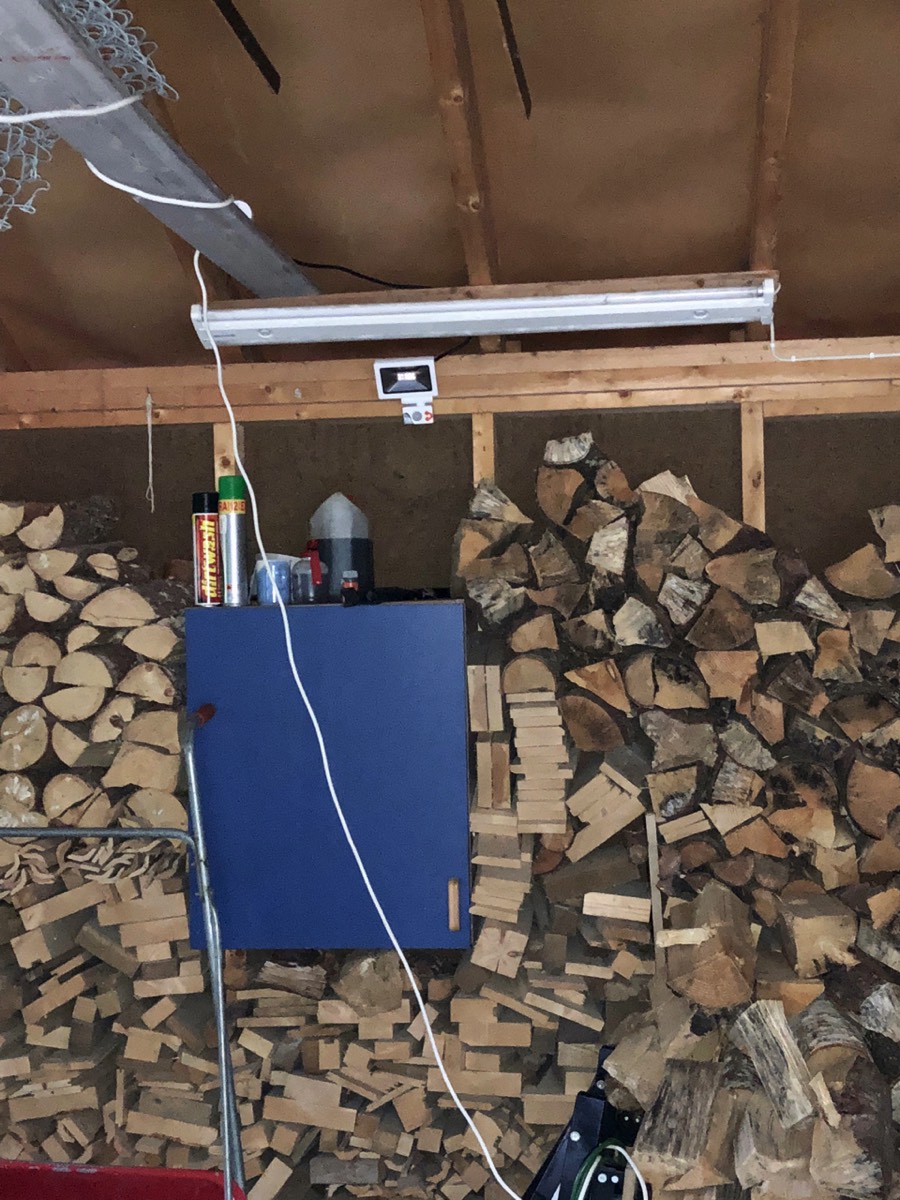
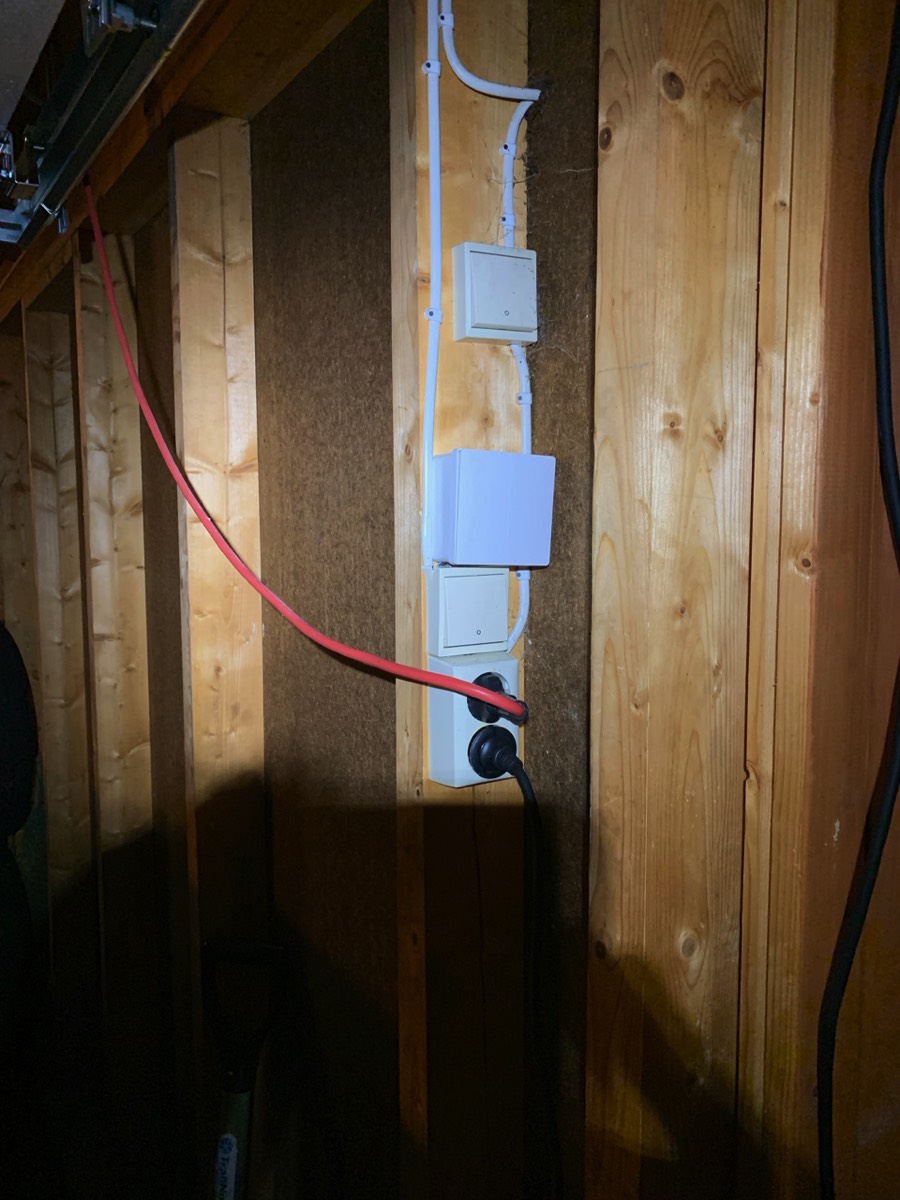
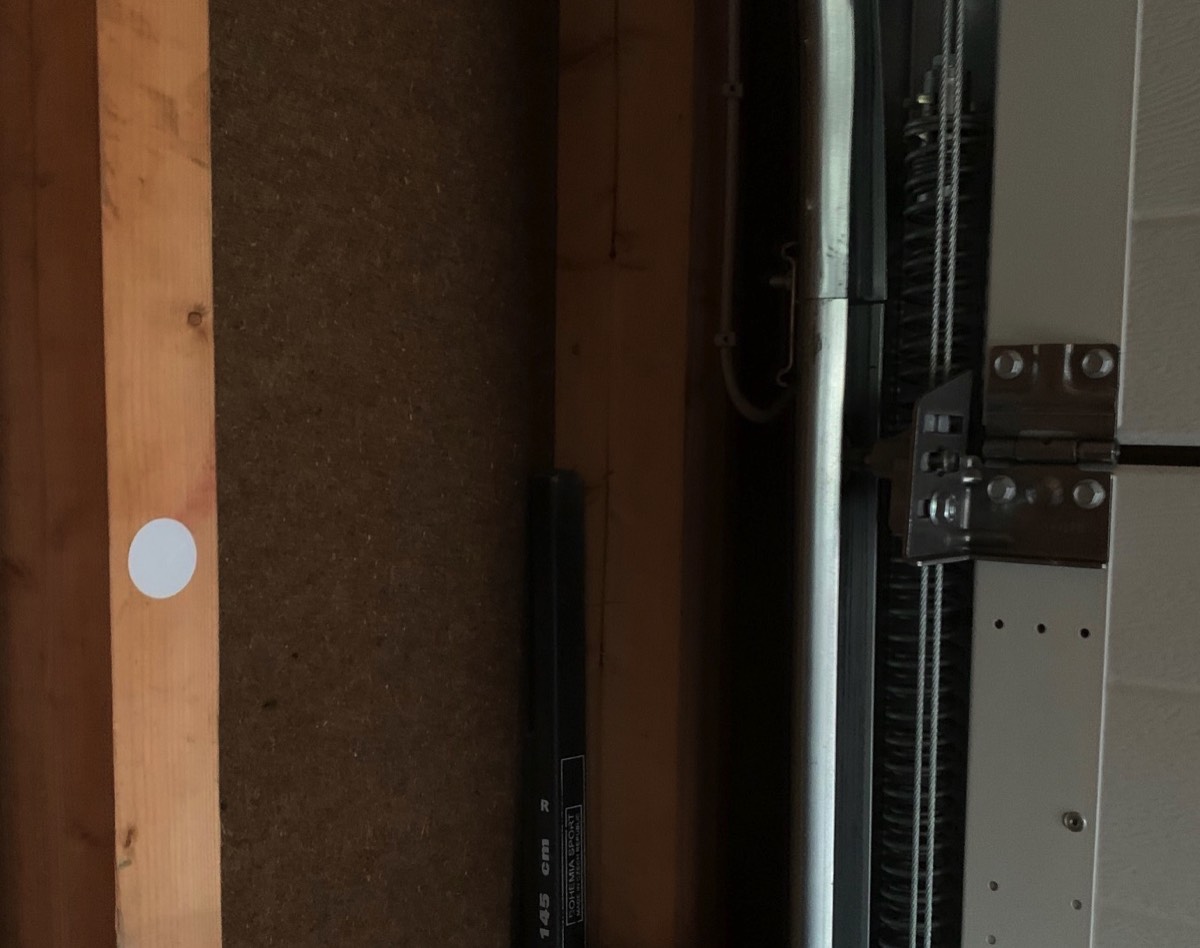
But I never really managed to accept this “halfway” solution, and when I discovered that Aqara offers a wall switch that can handle the startup load of fluorescent tubes, this was my answer. The new switch is connected after (in the circuit) the old wall switch, see picture below, and can be controlled from the Home app. In addition, it is triggered by an Aqara motion sensor, which has been installed on one of the lamps controlled by the switch, see picture below.
Aqara wall switch, installed above and circuit-wise after the old switch
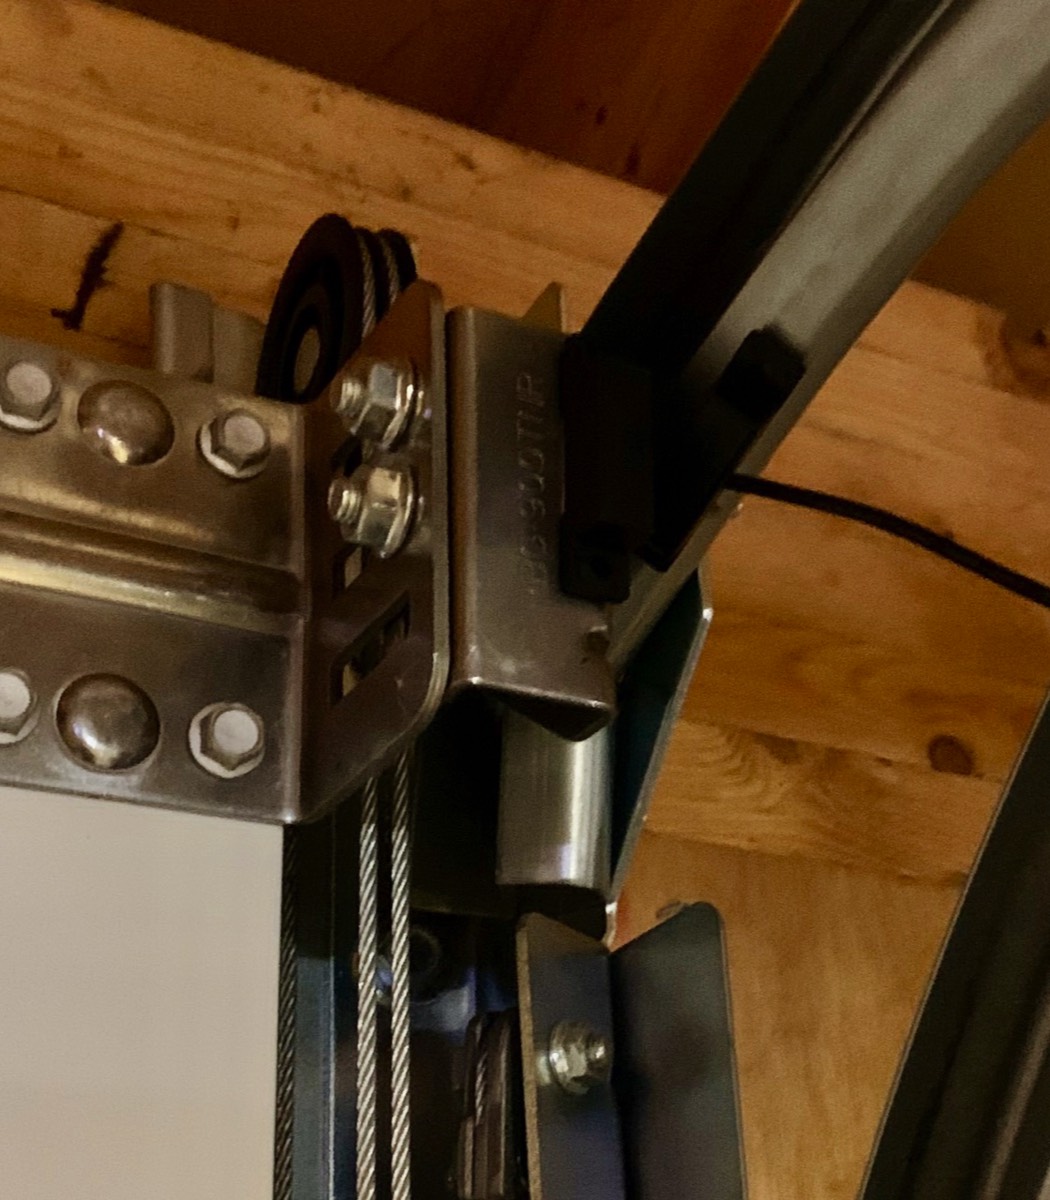
As time passed, the light tubes in the old fixtures started to need replacing, but instead, new LED lights were installed, partly more of them around the ceiling and partly with much brighter light, see picture below.
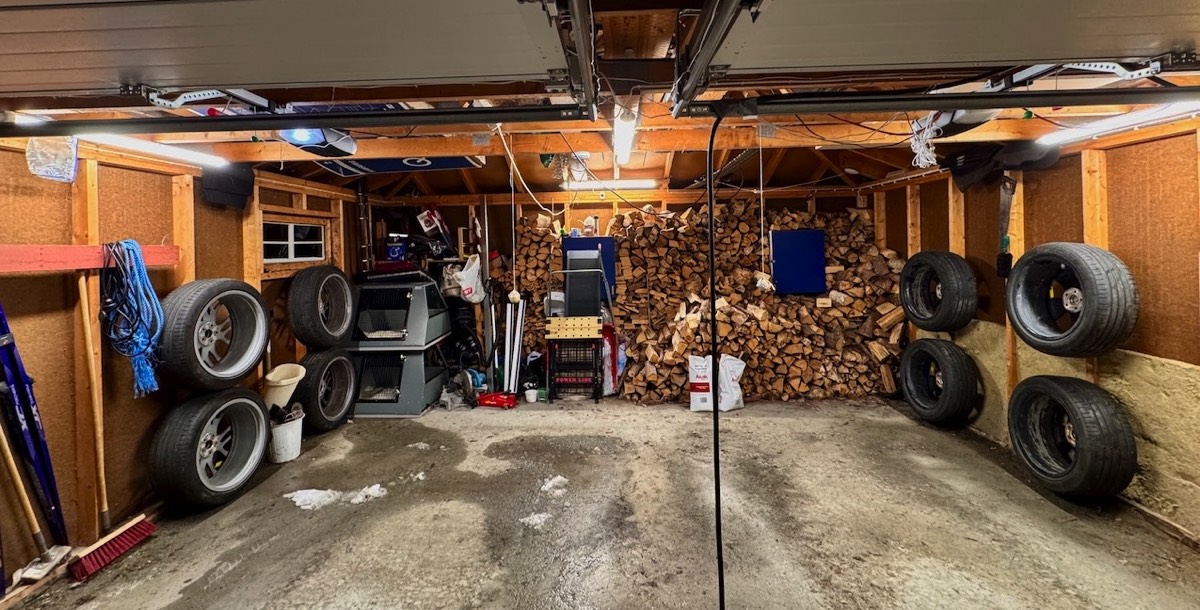
LED lights, with Aqara motion sensor barely visible between the garage doors
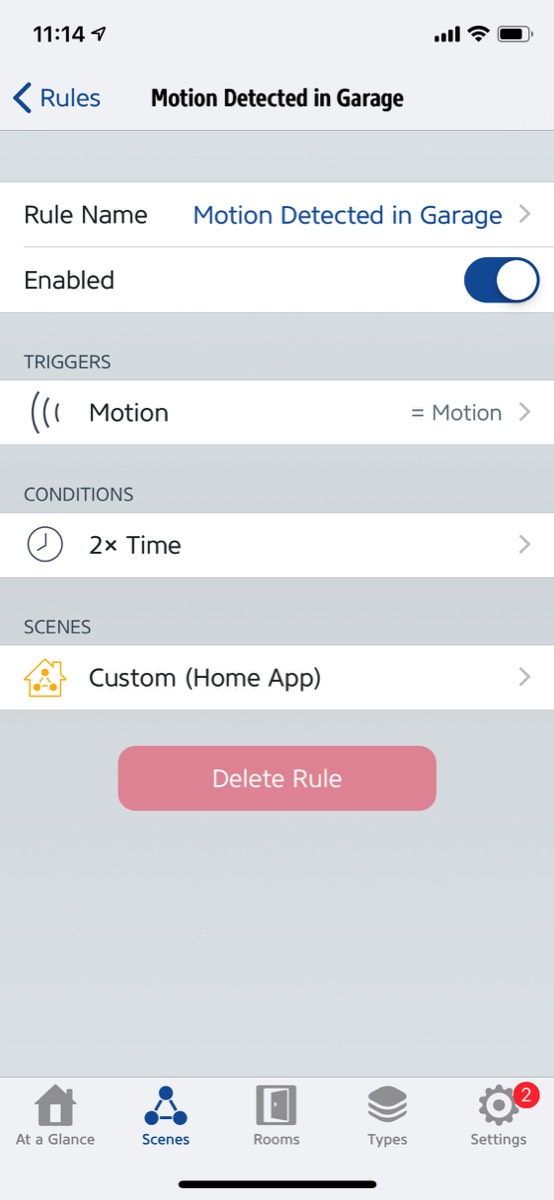
The programming of the lighting control is very little complex, see screenshot below, where the lights turn on at motion and off again after 10 minutes. This only happens during periods when it is light outside, though, as conditions have been set restricting when the light should turn on. This is programmed in the Eve app, since this can not be achieved in the Home app.
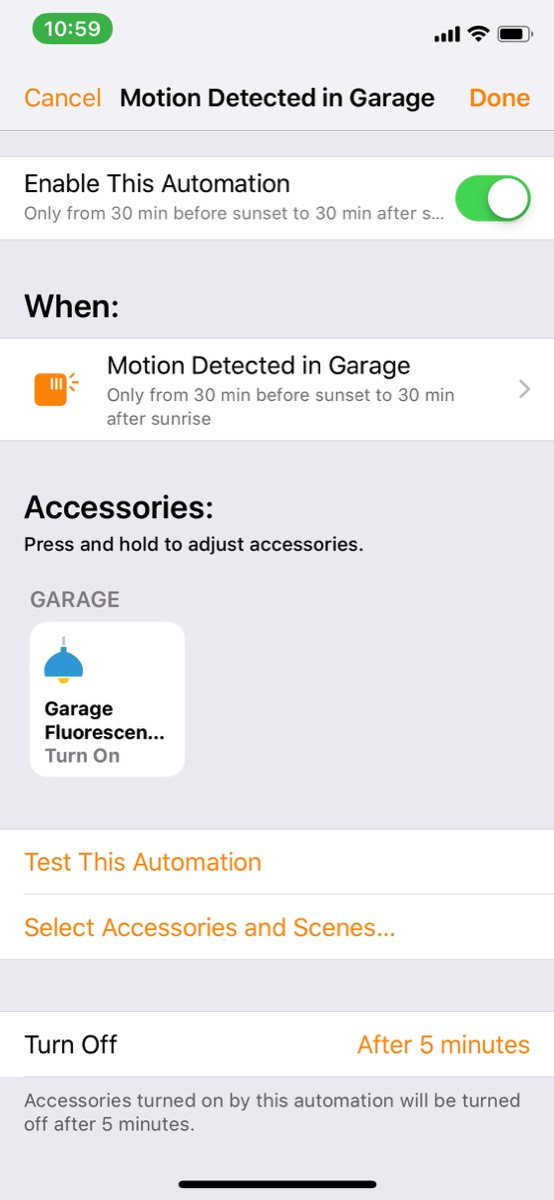
On the left, the programming of the light in the Home app, but this has been set up in the Eve app, shown on the right
The other garage solution is for controlling the garage gates, which already had motors controlled by remote controls. This was another project that required some research; there are several alternative products available, but all with their pros and cons. Some solutions considered were; Gogogate 2, Chamberlain MyQ, Aeotec Garage Door Controller, and Fibaro Roller Shutter (now in version 3), but none of these really fit my needs. They were either no Apple Home compatible (which at best could be solved via Homebridge) or it would be quite expensive to equip both garage doors with the required components.
A main point in this investigation was the benefits that could be achieved. One benefit is to be able to remotely control the garage doors from anywhere, typically when outside the range of the manual remote control; this is useful in being able to close the garage if having left home forgetting to do so or letting someone into the garage when away from home. However, I also wanted a solution that would automatically open the (right) garage door when arriving at home in one of our cars (and close it automatically when leaving home). This could somehow be achieved with several of the alternative products I looked at, either via IFTTT or through setting up a rule in Apple Home based on whether our iPhones are within a defined geographic area. But none of the ones mentioned above could distinguish between us arriving home by car, on bike, or on foot. They would therefore open the garage whether there was a need for it or nor (this is admittedly a case where an Android phone have helped solve this case, apparently they allow distinguishing between whether the phone is connected to car bluetooth or not and thus signal to the garage doors to open only when arriving home by car).
In the end, we went with Tailwind iQ3, which combines a control unit (connected to the garage door motors) and a vehicle sensor, see pictures below.
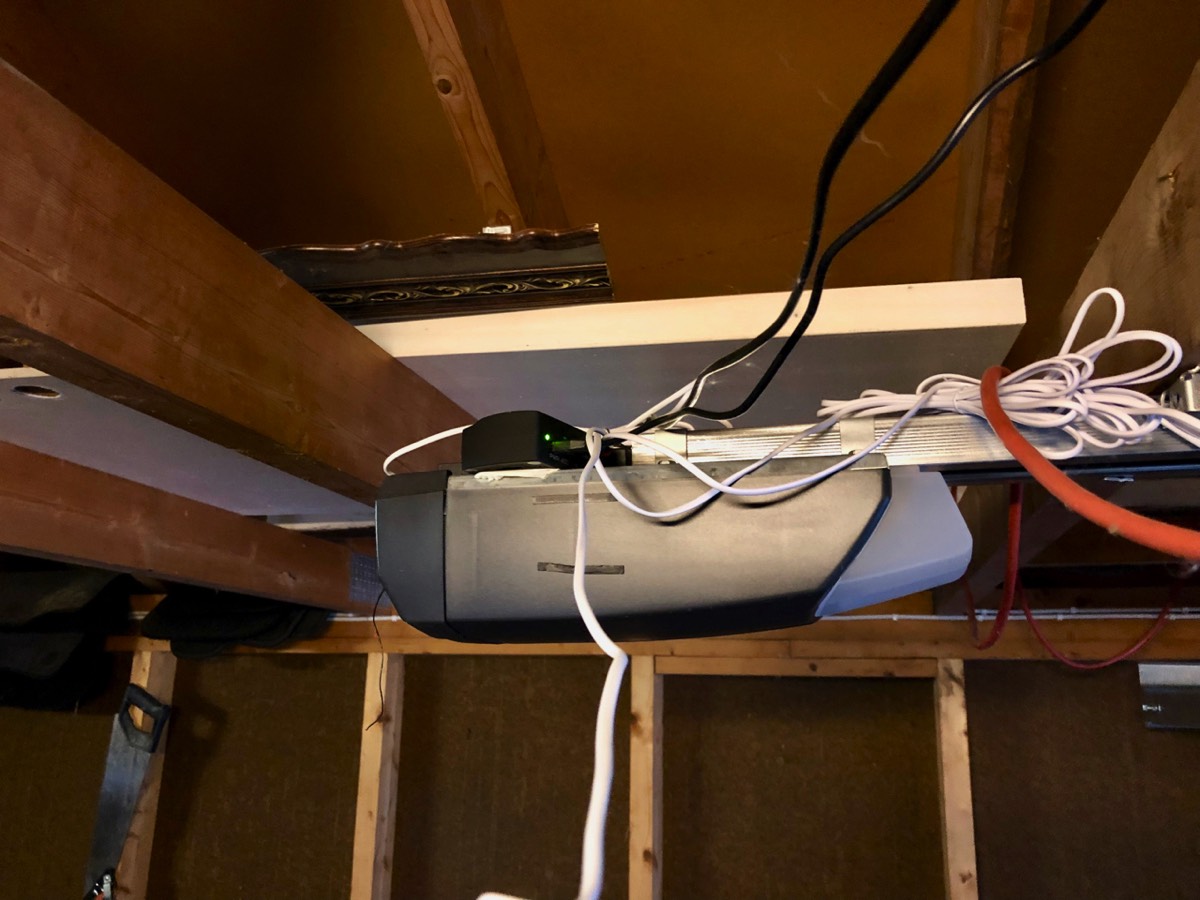
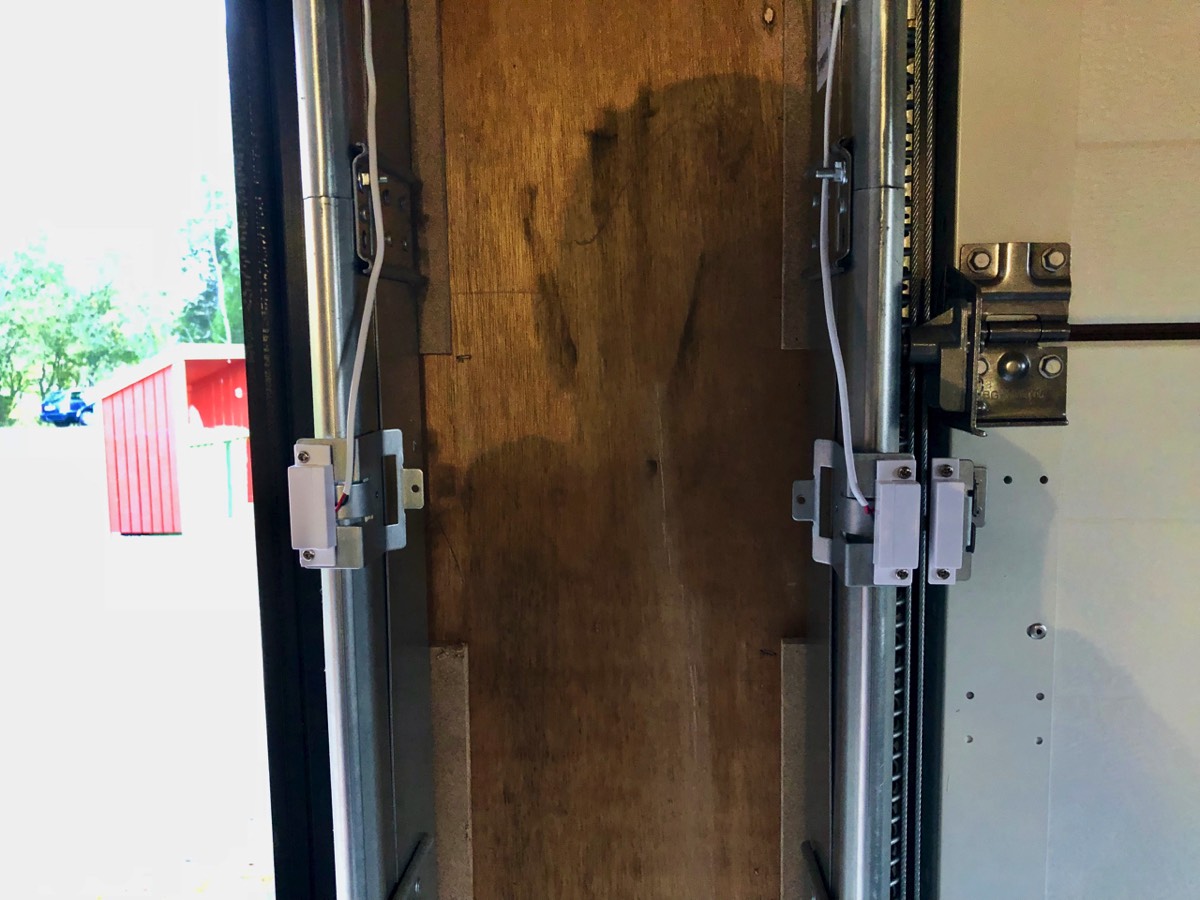
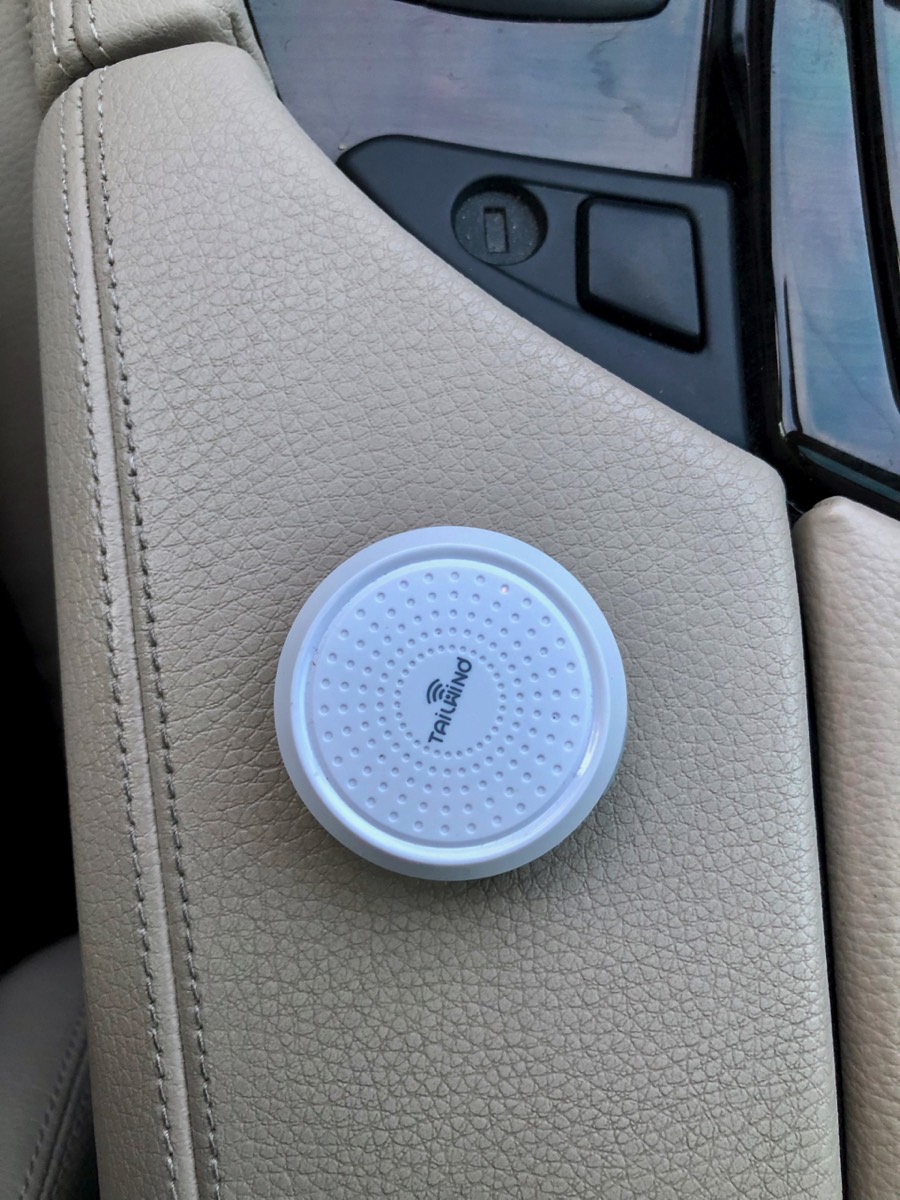
From left, it is not easy to see from this picture, but the Tailwind iQ3 base station is simply placed on top of one of the garage door control units and connected with two wires (Tailwind provides detailed explanations of how to connect the base station to many different types of motors), the door sensors are easily installed on the garage door rails, and the little vehicle sensor, which we keep in a dashboard or door compartments
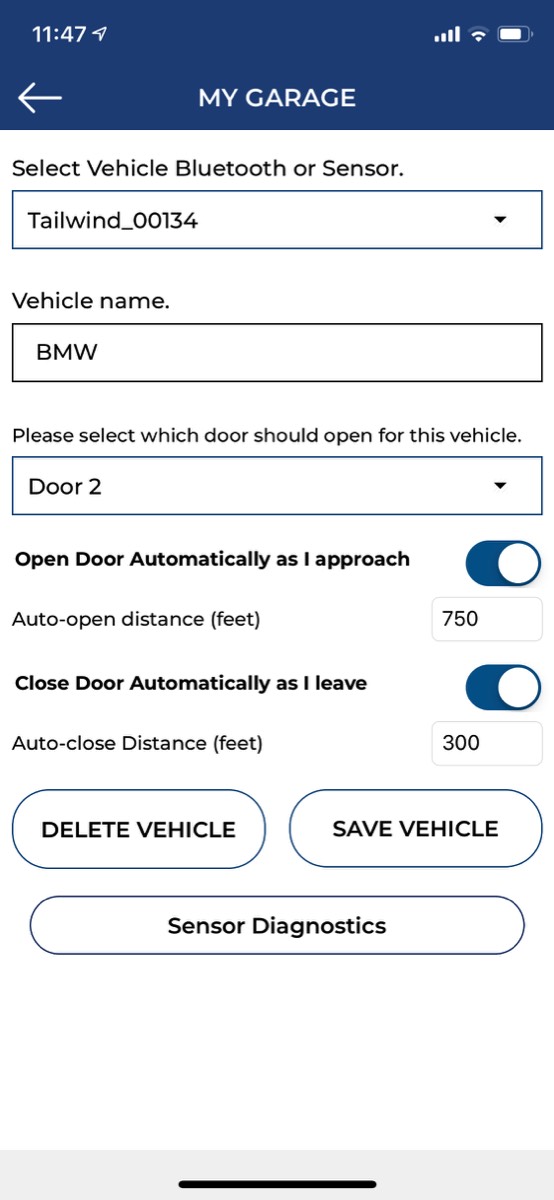
In the Tailwind app, settings for how far away from the garage the phone should be before the door opens/closes are defined, see screenshots below.
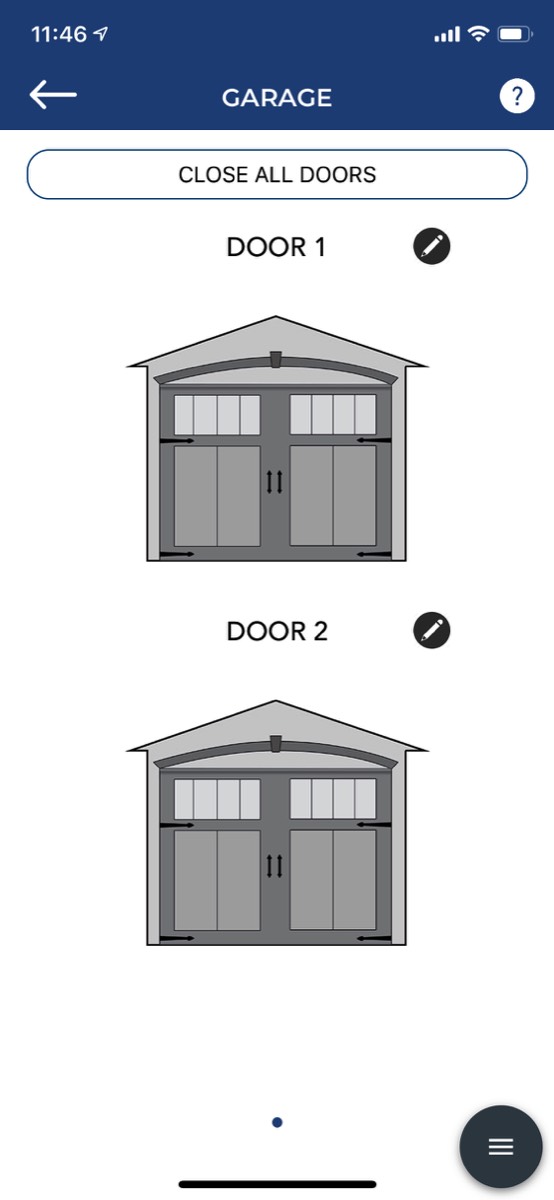
On the left, status display for the garage doors in the Tailwind app
On the right, settings for distances for opening/closing
Tailwind is a small company in Canada, but has offered exceptional customer service as well as excellent installation videos, making the installation very easy to perform. I should mention that in the beginning, I had some issues getting the right distance settings (a “wrong” setting meant that the signal was being transmitted just as the phone was migrating between WiFi and 4G and we also had a couple of cases where the distance was set so low that the door started closing before having backed fully out of the garage). After having tweaked this, combined with updates to both firmware and the Tailwind app, this now works very well, and it is very satisfying seeing the garage “welcome us home” when arriving.
Later on, Tailwind released a new version of their app with support for Siri Shortcut. This was even better, as we can now simply talk to our phones wherever we are and ask Siri to open/close the garage doors. Then iOS 13 added support for NFC tags to trigger Siri Shortcuts. We have exploited this by putting two small tags by the front door in the outer hallway, which respectively open the left and right garage door, and equally two tags inside the garage doors, which close the doors, see pictures below. This means we can simply hold the phone near the right tag to open or close the desired garage door. In the fall of 2021, Tailwind issues a beta firmware update that added Apple Home support, which works perfectly.
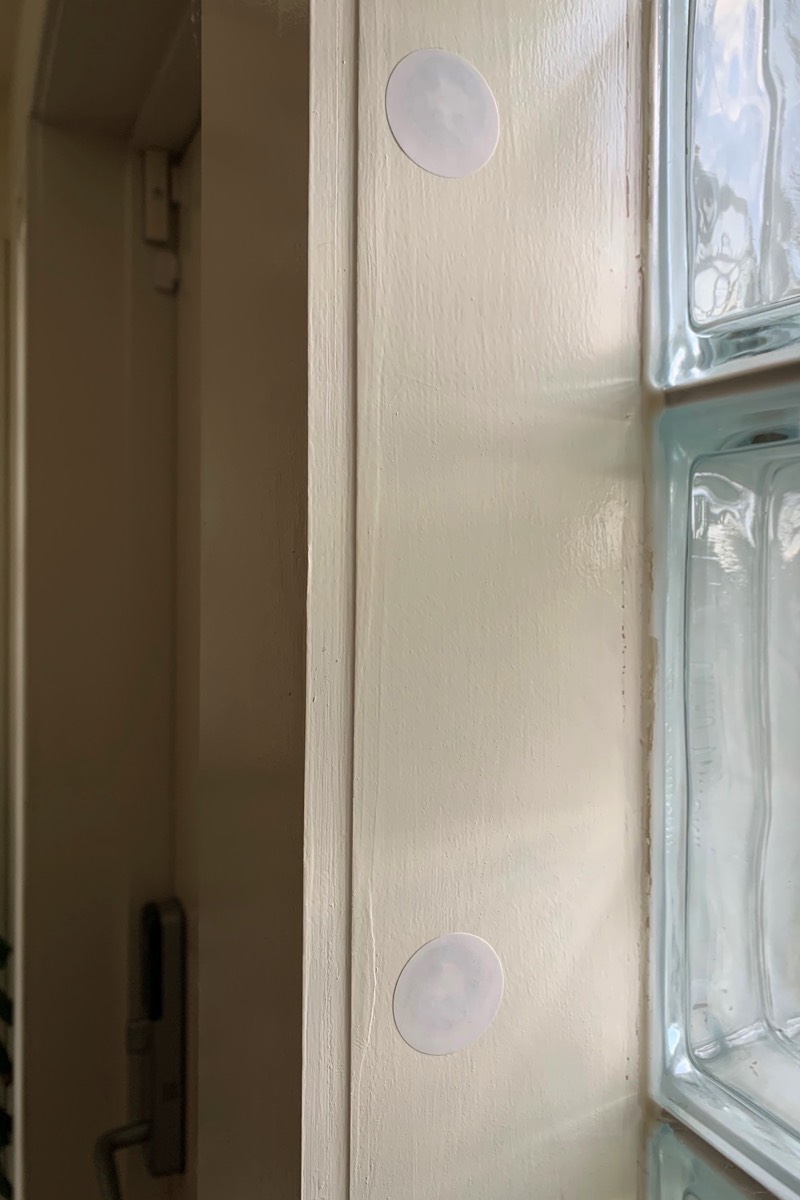
NFC tags (covered by white badges) respectively in the outer hallway and the garage (only one shown in the garage, they are located next to each door)
I commended Tailwind above, but there have been some minor frustrations with that solution. Partly there have been periods where the automatic opening at arrival home has not worked consistently and partly I have experienced a bud where the door will open automatically even if I arrive home on foot and not in my car. Tailwind has been very helpful in trying to solve these issues, but have not quite succeeded. When I saw that Meross had launched a rather reasonably priced opener with Apple Home compatibility, Meross Smart WiFi Garage Door Opener MSG100HK, I acquired also this one (had I gotten the integration of Tailwind to work earlier, I had probably not bought this one). It was installed "in parallel" with the opener from Tailwind, see picture below, and I was therefore able to utilize wire clips and other stuff put in place when that was installed. After I was sure the Apple Home integration of Tailwind worked, I uninstalled the Meross opener, since it was no longer needed.

Meross garage door opener installed together with the Tailwind device on top of the garage door motor (left) and the door sensor (right), which is much less sturdy than the Tailwind sensor
The light control has over time been extended, by utilizing the door sensors of the Tailwind garage door opener, which is exposed in Apple Home, to also control the lights. We would occasionally notice that the motion sensor did not pick up motion in the garage, but now the light turns on also when the door is opened (and it is after sunset), and off again after five minutes. The advantage of maintaining the motion sensor is that the light then stays on if working on something in the garage.
Finally, the last installed device here is an Aqara G2H camera security camera, see picture above. This allows to see whether something untoward is going on in the garage and determine which of the cars are home or away at any given time.

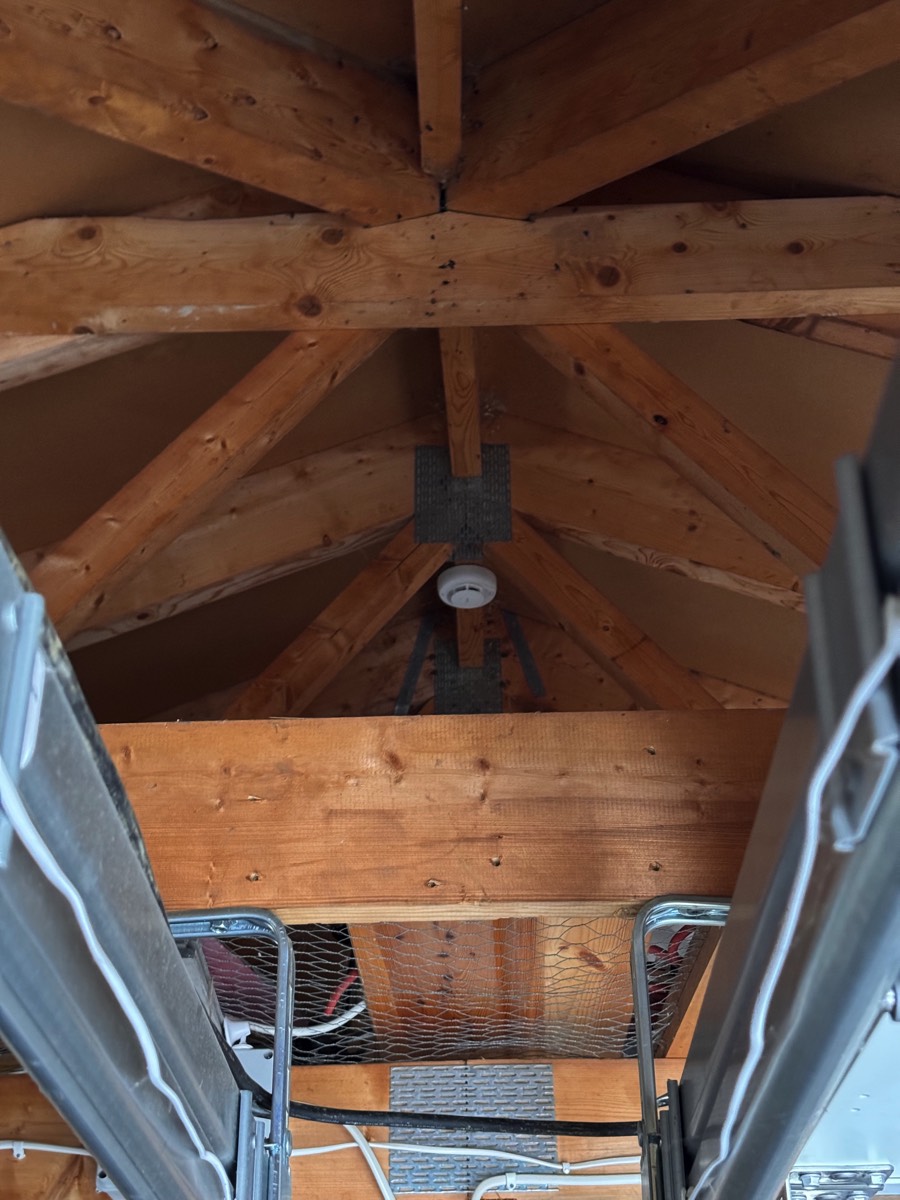
Through the Verisure alarm system, we have a number of smoke detectors in the house itself, but we had none in the garage. Especially after buying an electric car and installing a charger, see below, it was desirable to have a smoke detector here as well. We landed on one from Aqara, which is also Apple Home compatible. It looks more or less like other detectors and has been installed in the ceiling, see picture below
There is also an access point for the UniFi WiFi here, an AP Lite, see picture below.
Aqara smoke detector
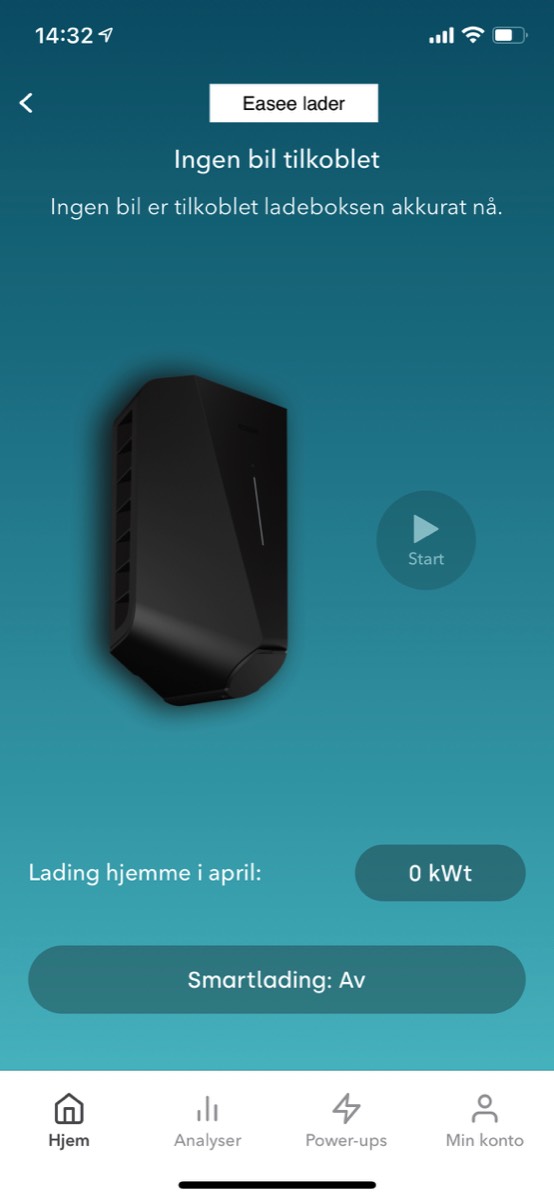
The last installed device in the garage is an Easee charging robot for electrical vehicles, see picture below, installed April 2021, while our first electrical car is due for delivery in the fall of 2021. The choice of Easee was strongly related to the fact that Tibber has support for Easee, and since Tibber also is integrated with the solar panel system this makes it possible to optimize charging based on when we produce our own power or rates when we have to buy power from the grid. This means the charging robot is shown as a device in the Tibber app, see screenshot below. Via Homey it is also exposed to Apple Home, but there only as a “switch” that is on or off (see the device overview screenshot at the bottom).

Left, Easee charging robot
Right, screenshot from the Tibber app
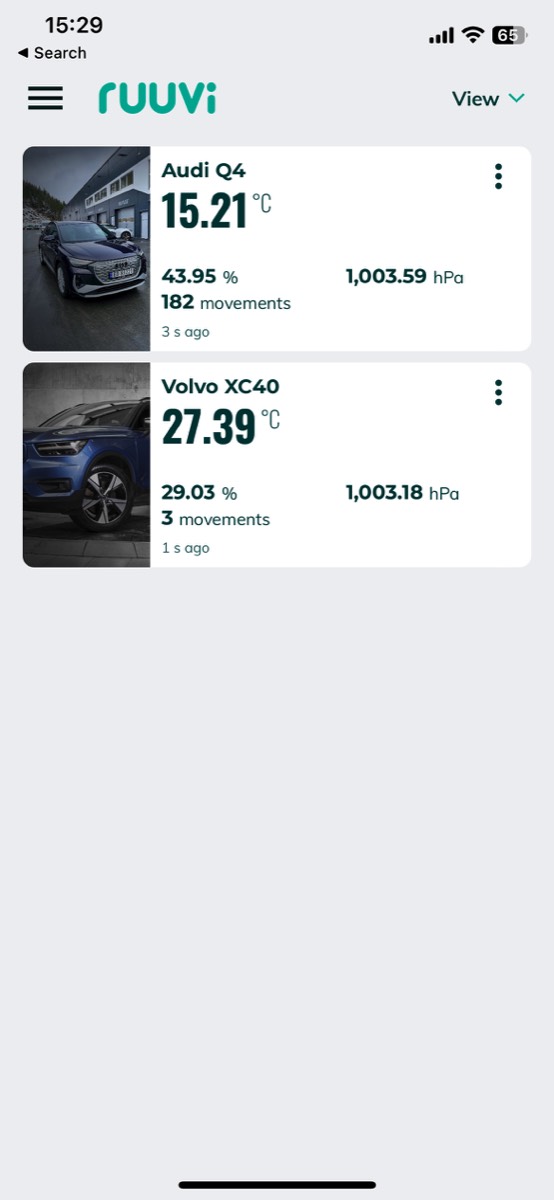
While not technically a device in the garage, but in both of the cars that “live” in the garage, we have a multi sensor placed in the car. This is a Ruuvi tag, which is a sensor that measures temperature, humidity, pressure, noise, and acceleration, see screenshot below. We use this to monitor the temperature in the car when we leave it with our dog inside, and if it gets too warm or cold, we can use the app associated with the car to start the climate system. The Ruuvi sensor can be integrated into Homey, and from there into Apple Home.
Dette er strengt ikke en enhet i selve garasjen, men i begge bilene som “bor” i garasjen har vi en multisensor. Det er en Ruuvi tag, som er en sensor som måler temperatur, luftfuktighet, lufttrykk, støy og akselerasjon, se skjermbilder under. Vi bruker denne for å overvåke temperaturen i bilen når vi forlater den med hunden vår i bur i bilen, og dersom det blir for varmt eller kaldt kan vi bruke appen for bilen til å starte klimaanlegget. Ruuvi-sensoren kan også integreres i Homey, men jeg har ikke lykkes i få den inn i Apple Home.
I have since discovered that there is an Audi app for Homey. This gathers some data from the car and show it in various screens in Homey, see below, but not all data can be obtained from the car Furthermore, the connection is only “one-way” for some aspects, i.e., the correct status is shown, but it cannot be changed from Homey, this apples for example to locking of the doors. In practice this means that the added value of integrating the car into Homey is limited, and it cannot be exposed to Apple Home.
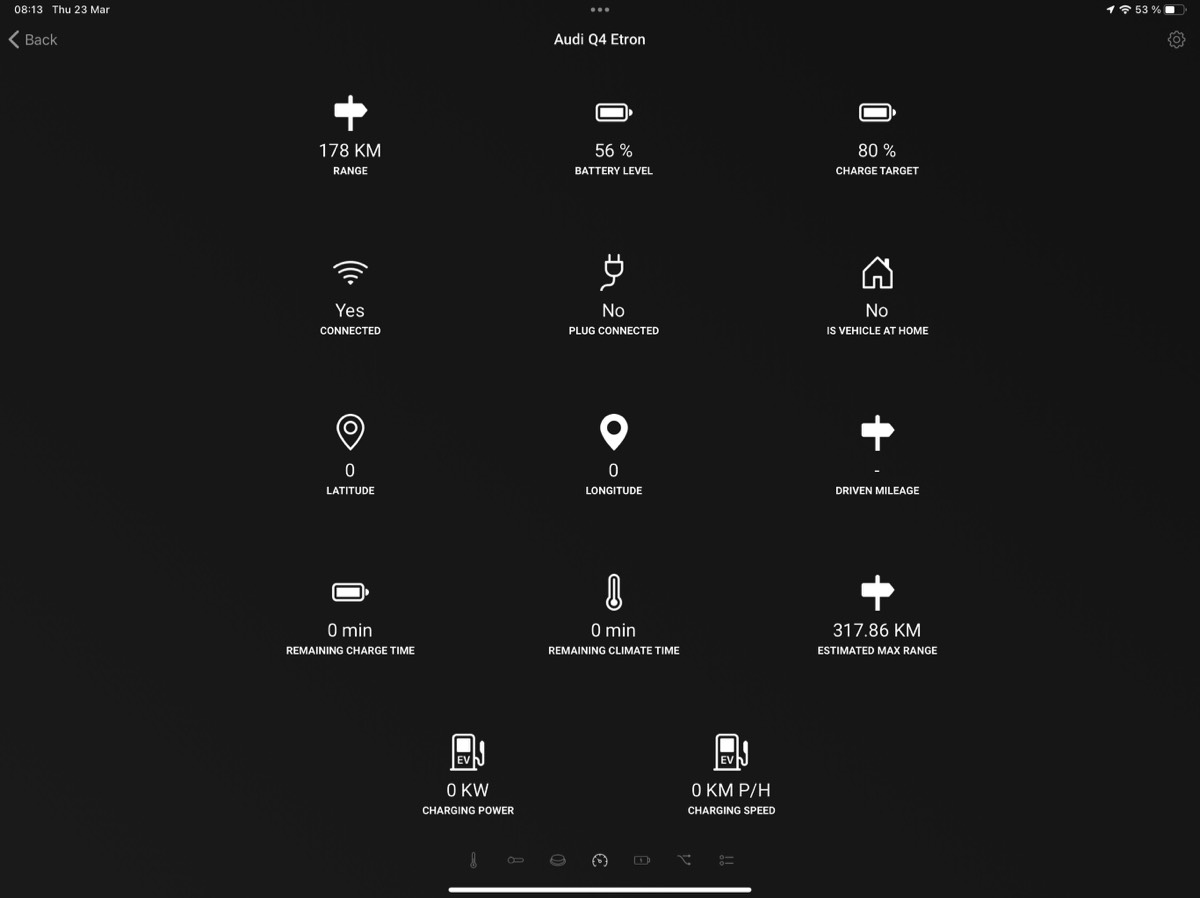
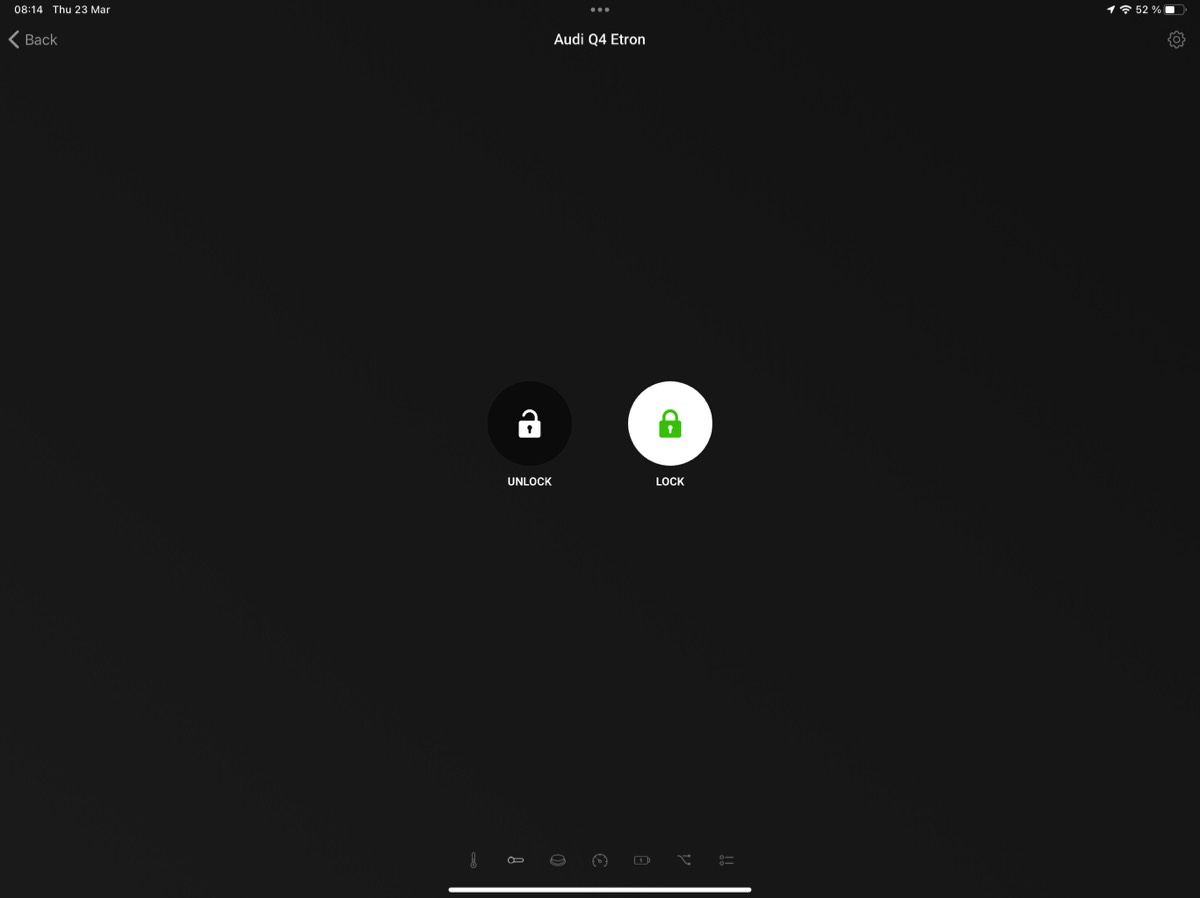
Some of the screenshots from Homey for the Audi
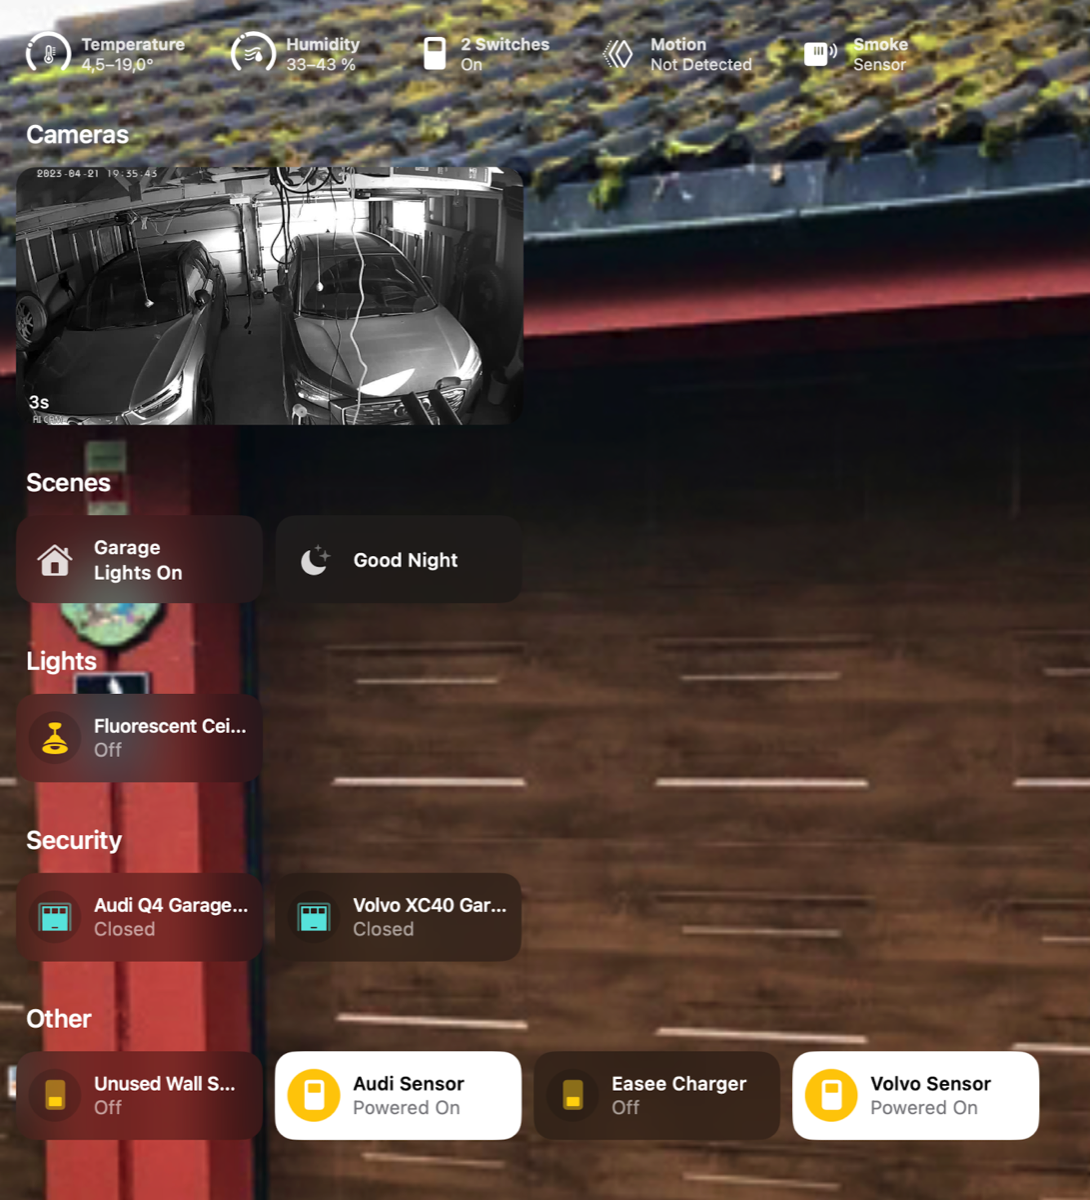
This means the room view of the garage in the Home app looks like this:
The room view for the garage in the Home app