Guest Room 1
This room contains solutions for the following systems (notice that on phones, the table might only be displayed in landscape mode):
| System Type | Components |
|---|---|
| Lighting |
|
| Climate Control |
|
| Home Entertainment | None |
| Security and Alarm |
|
| Pet Care | None |
| Control and Automation |
|
Description of the solutions in this room
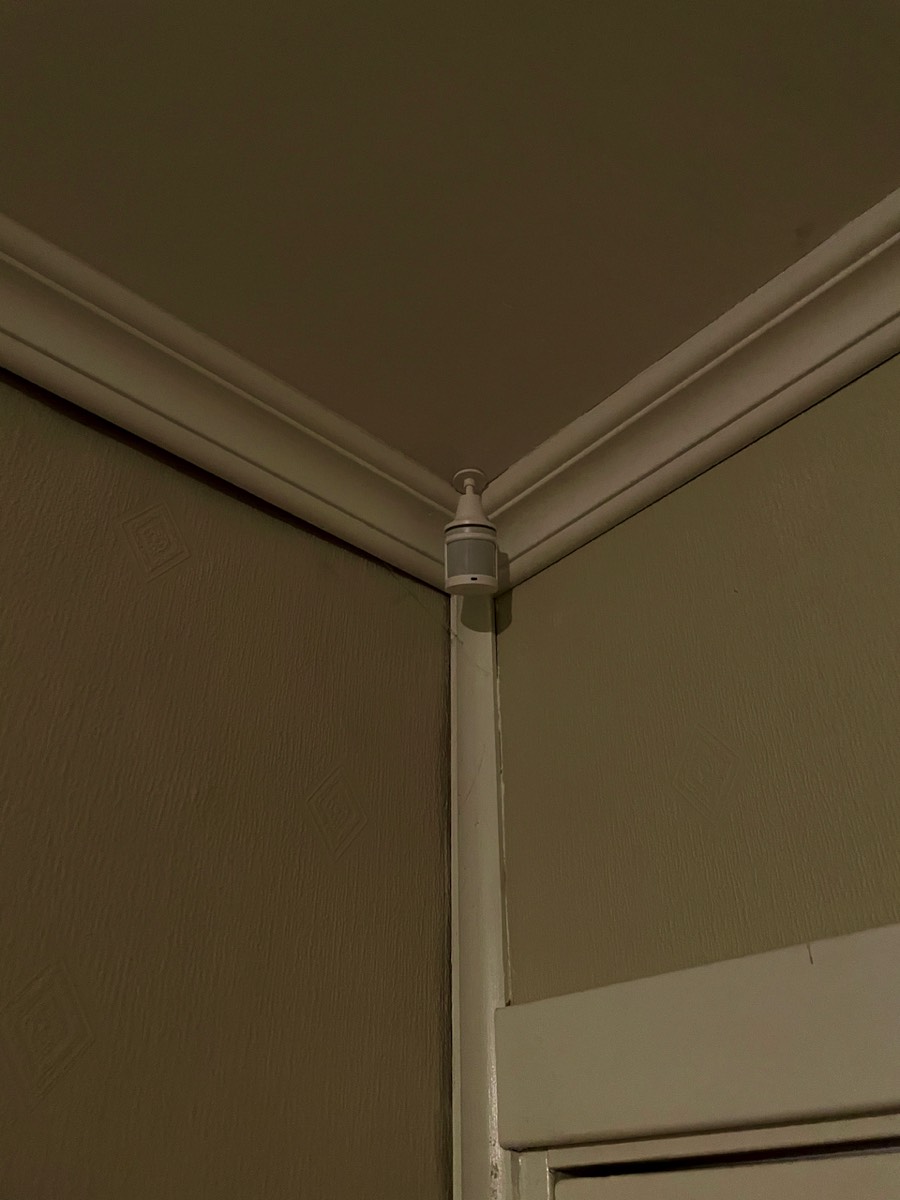
This room does double duty; as guest room for visitors and as dog room for our dog when she is home alone (notice the home-made dog cage in the picture which combines storage and dog cage into one space-saving piece of furniture…). For lighting, a ceiling lamp does the heavy lifting. It now has an IKEA Trådfri E27 smart bulb, see picture below. The light is controlled by a motion sensor from Aqara, see picture below.
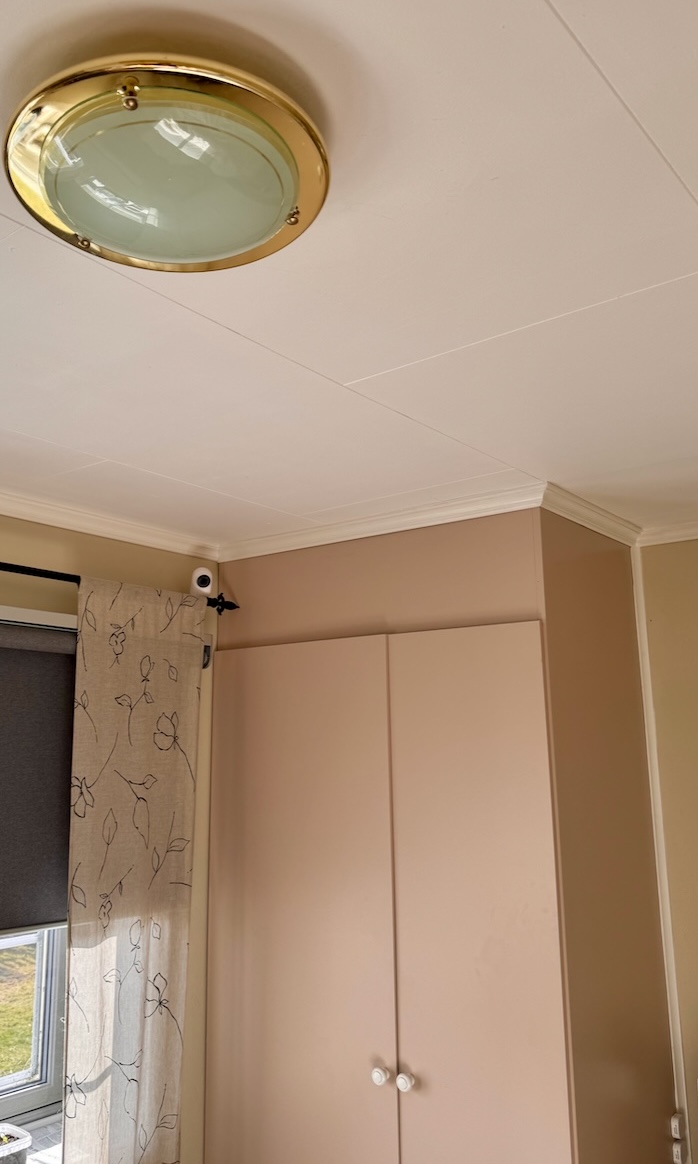
On the left, the ceiling lamp with smart bulb and the Aqara camera
On the right, Aqara motion sensor mounted right inside the door
The light control for the ceiling lamp was at first set up with very little complicated rules; when the sensor detected motion, the light went on and then automatically off again after 5 minutes of inactivity.
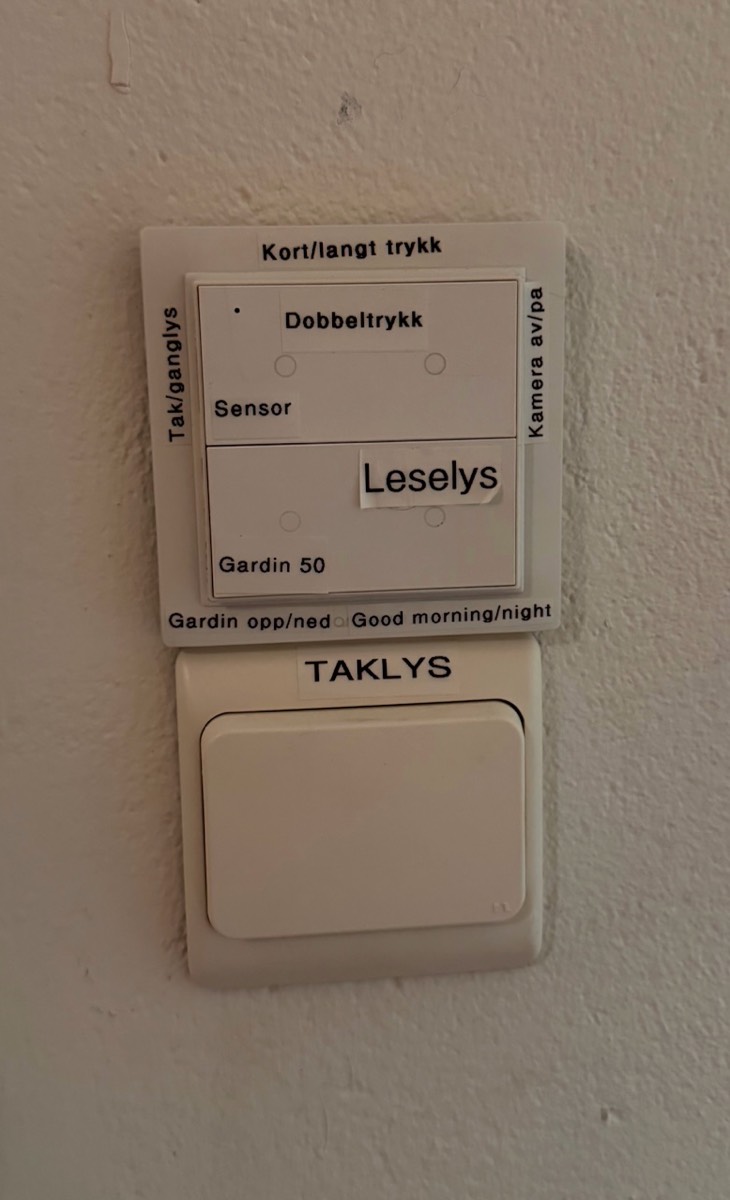
But if there are guests using the room as bedroom, they obviously do not want this routine to kick in and turn on the light if turning over in the bed. There is of course a traditional light switch here and they could simply turn the light off using this. But I generally strongly mislike people “tampering” with the manual switches since devices go offline that way (it has taken quite some effort to train my wife to keep her fingers off the switches throughout the house that have smart devices connected to them). This have eventually therefore been set up the same way as in our master bedroom, i.e., that during specified intervals the light does not turn on when motion is detected. This has been solved by creating a so-called “dummy switch” in Homebridge, called “MR Condition Light”. This is used as a condition for whether the ceiling light shall be turned on or not at motion, see screenshot below, and this condition light is partly turned on as part of the “Good Morning” scene and off as part of the “Good Night” scene and partly by using an Aqara smart switch mounted by the door, see picture below. This switch also controls the ceiling light, the bedhead lamp, and the smart blinds.
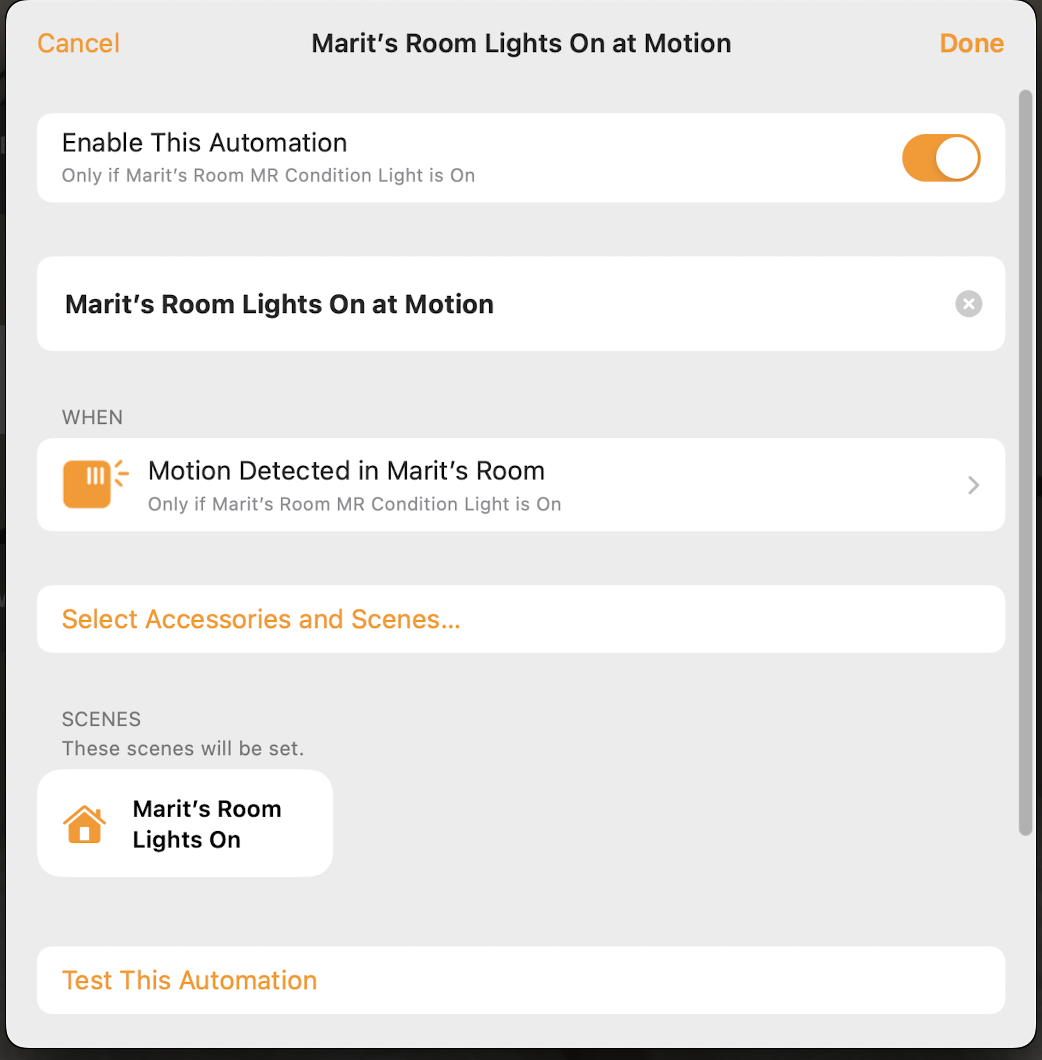
Left, programming of the ceiling light based on signals from the motion sensor and the condition light
Right, Aqara smart switch above the wall switch
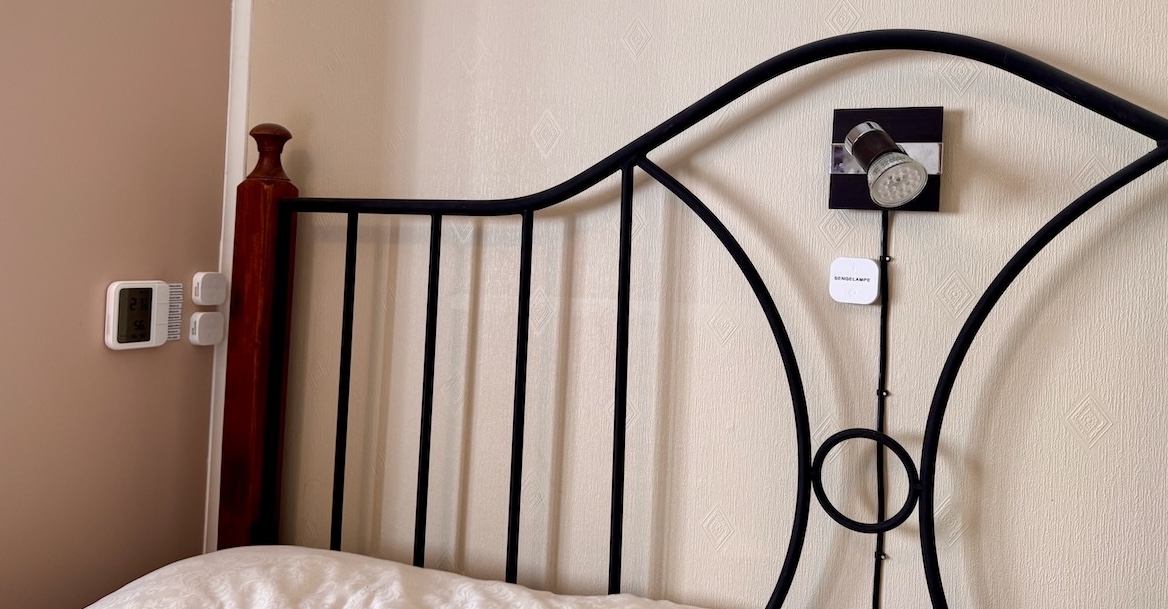
After it was “liberated” from a different room, we have also installed an Aqara Opple Wireless Scene Switcher by the bed, where each of the four buttons can be programmed for short/double/long press, in total twelve options. This is programmed to control the lights in this room, the blinds, outdoor lights, and the scenes Good Morning/Good Night as well as activate/deactivate the camera.
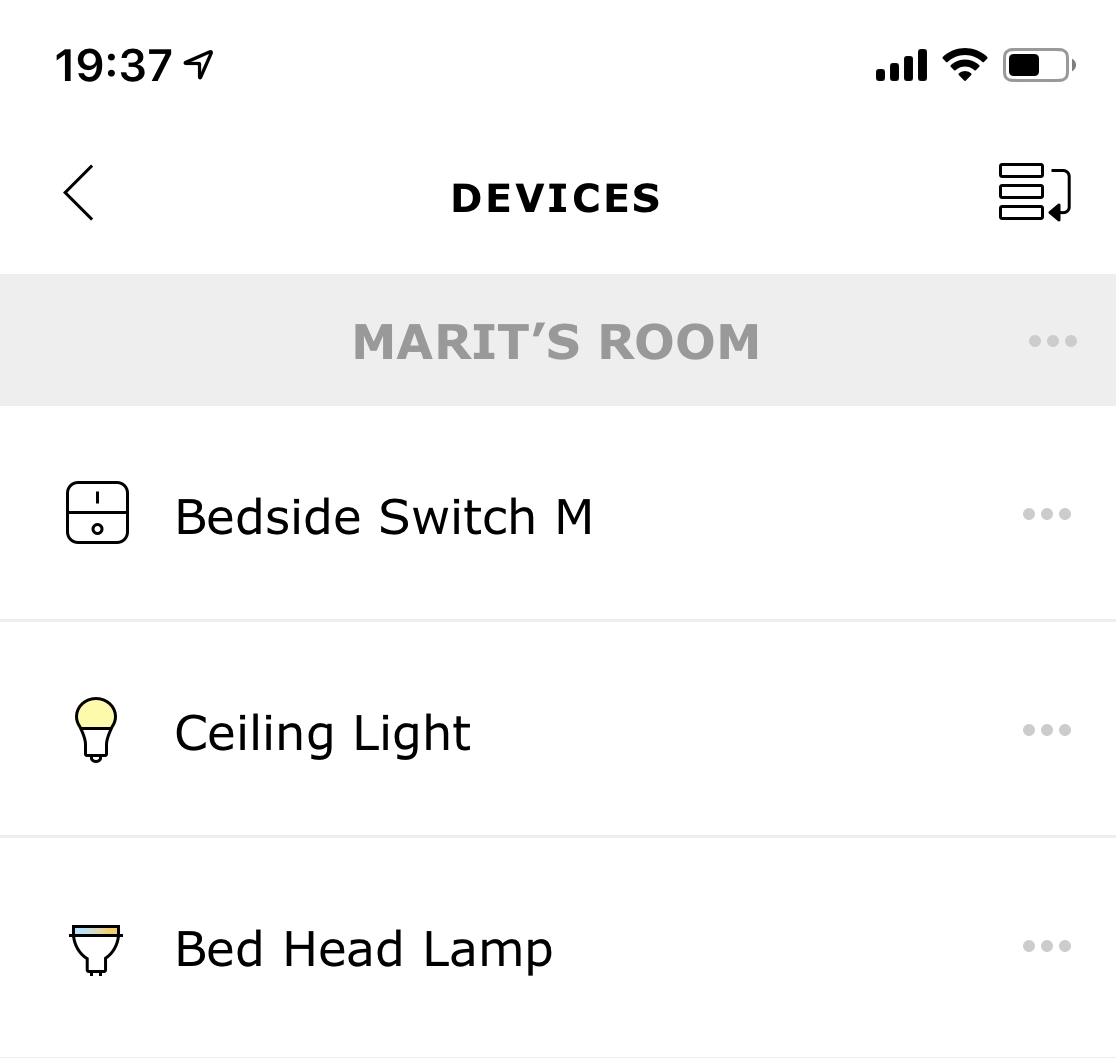
Then there is a lamp by the bed, with a smart bulb, an IKEA Trådfri U10. This lamp is controlled by an IKEA Trådfri wireless switch, placed directly under the lamp, see picture below. This switch works as other control devices from Trådfri, by only being possible to program in the IKEA app by placing them in the same room as lights to be controlled by it, see screenshot below. In addition, an Aqara combined climate sensor and smart switch has also been installed, also shown in the picture below. This has three buttons, each of which can be programmed for single, double, and long press, so this controls both the ceiling lamp, the bedside lamp, the curtains, and the heater.
Screenshot from the IKEA app, where light and switch are “programmed” by placing them in the same room
Also here we had the classic challenge that if someone turned off the physical wall switch (which in this case was an xComfort wireless switch, with a relay in the ceiling box above the ceiling lamp), the smart bulb would lose connection and this no longer be remotely controlled. Since the wall switch here was a wireless switch, it wasn’t a feasible solution to replace the switch with a smart version and neither was it an option to install a smart relay behind the switch. This challenge therefore remained unsolved for a while, but I had a smart Fibaro relay left over from the downstairs bathroom, and this put me on to the idea of having this installed above the ceiling lamp instead. An authorized electrician was consulted, who confirmed that this should work, and he turned out to be right–he was able to install this so that both relays fit in the wall box/hollow of the lamp itself. That allows controlling the ceiling light from a phone or other device, even if someone turns off the manual wall switch.
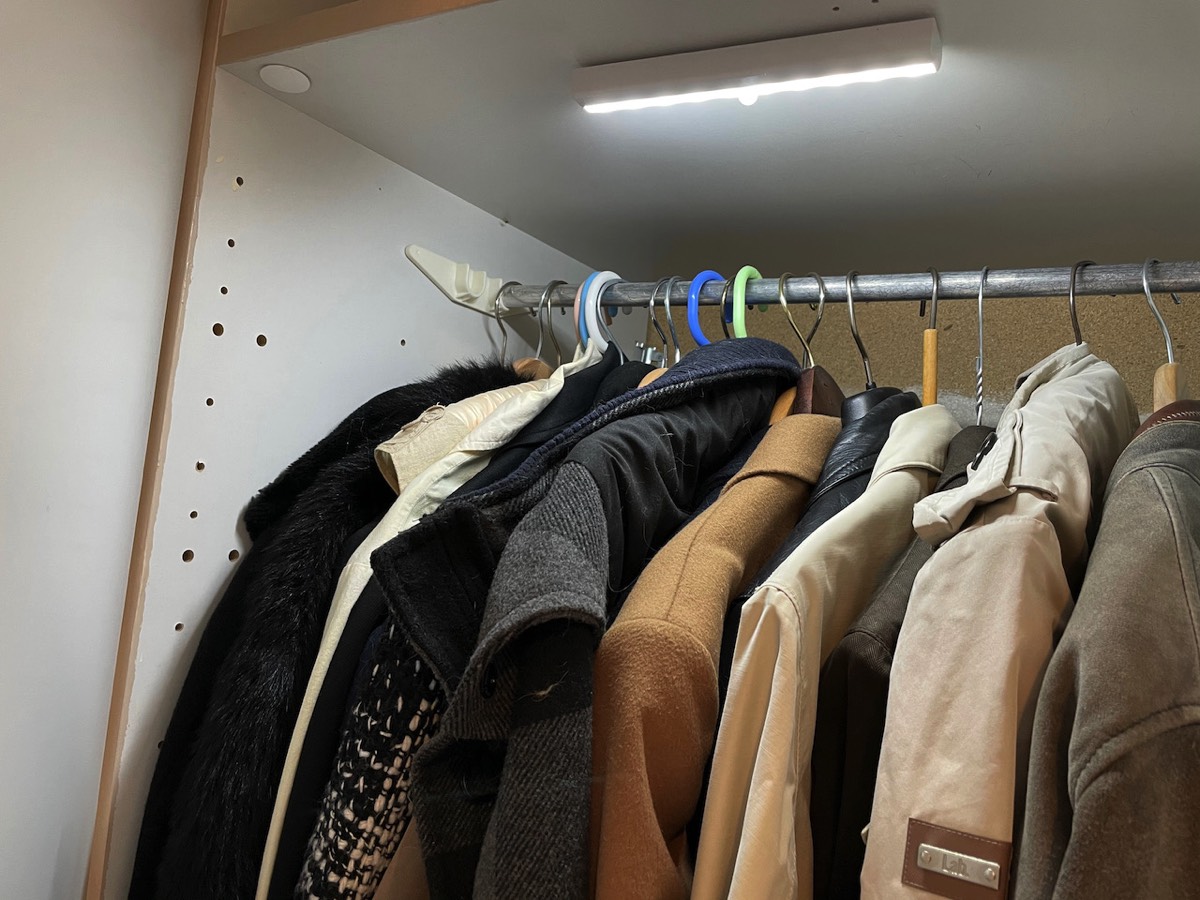
Also in this room we have a LED light panel with a motion sensor, of the type we have several of elsewhere in the house, here installed in a clothes closet, see picture below. It provides a little extra light in the closet and turns on/off automatically.
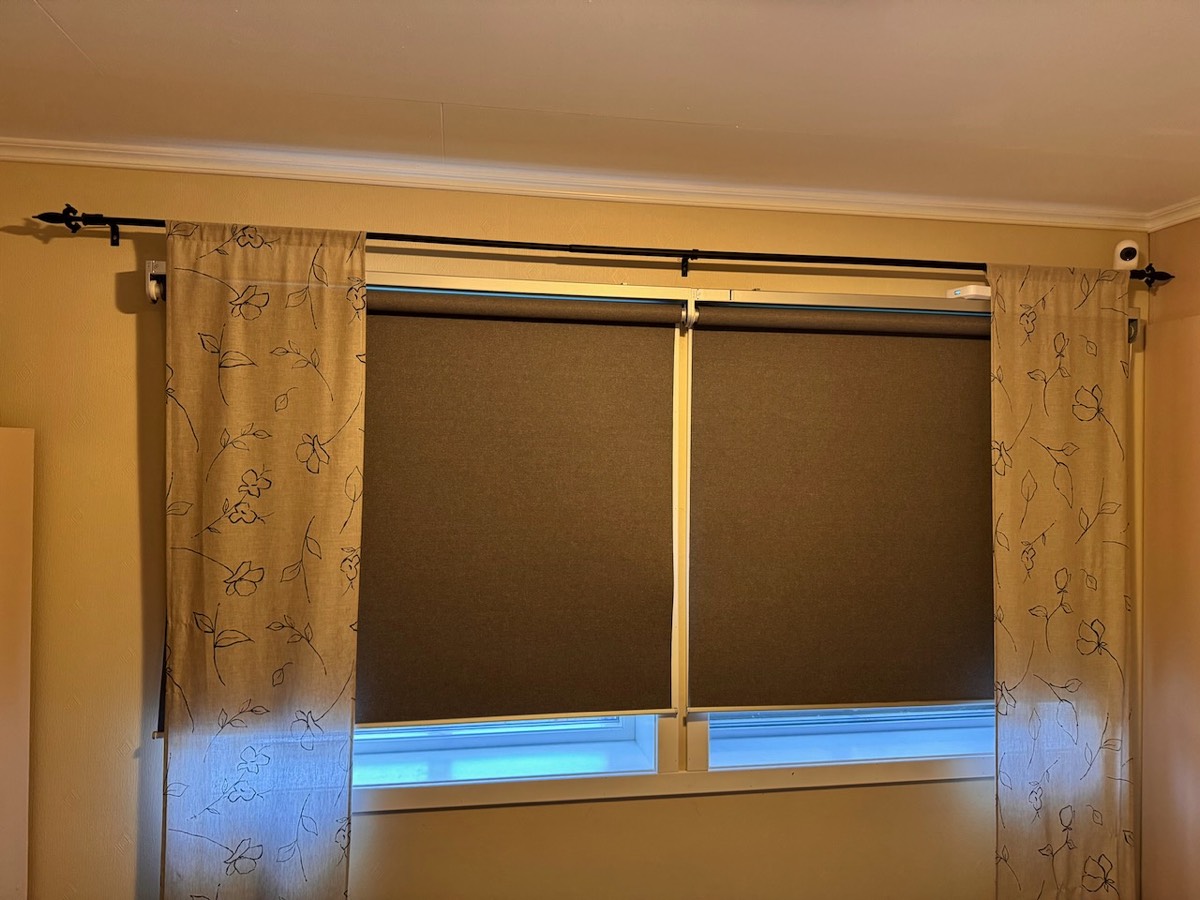
We have a camera here for keeping an eye on the dog. Originally, this was a Logitech Circle 2 camera, but after years of having problems with the camera going offline, it finally broke down completely. It was replaced by an Aqara G2H camera, which has been placed on top of the curtain rod, as shown in the picture below.
For a long time, we had old-fashioned manual blinds covering the two windows in this room, but these gradually became annoying in that they were difficult to open. We therefore installed two IKEA Fyrtur smart blinds, see picture below. These can be operated using buttons on the blinds themselves, but as mentioned above, there are also remote controls attached with the blinds, and these have been placed by the bed (as shown in the picture further above). The blinds work perfectly and they are easy to operate, now also from the bed.
The Fyrtur blinds in almost closed position, with the Aqara camera on top
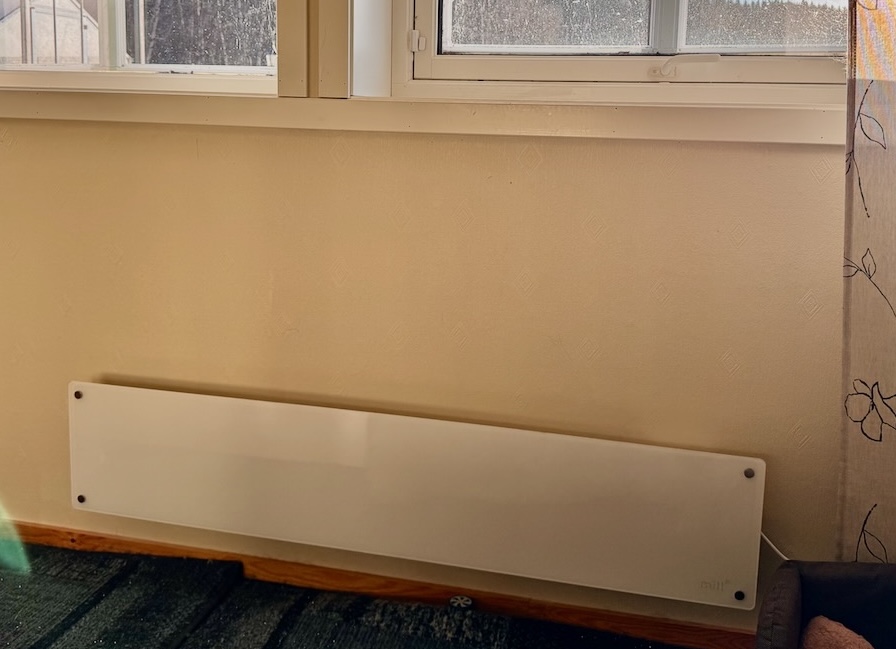
For a long time, we have had an old-fashioned panel heater (old-fashioned in the sense that it is not online in any way, but it has a built-in thermostat), controlled by a Mill WiFi Socket. The heater was old and would get very hot on the front surface, which could be risky if the cats accidentally pushed a toy or bed up to it. It was therefore replaced with a Mill smart panel heater, see picture below, which both gets much less hot and which can be controlled directly without the need for the smart plug. The heater is of so-called generation 3, which contrary to previous generations, is much easier to get connected and most importantly can be converted to Matter and thus integrated directly into Apple Home.
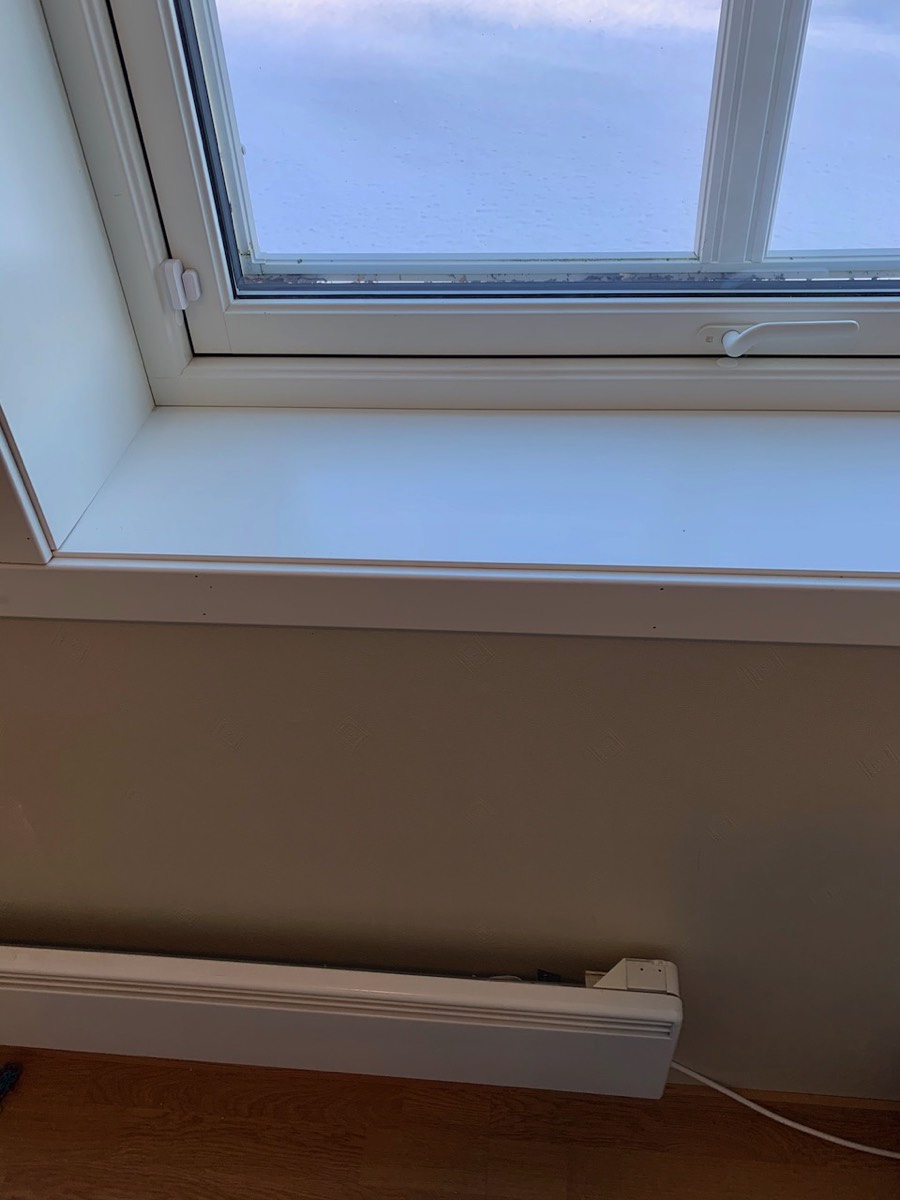
As in the office, where we also have an electric panel heater, we wanted a solution where the heater would turn off if the window was opened for airing. The idea is of course to avoid using unnecessary energy by having the heater trying to compensate for the cooler air from the window, and this has been solved using an Aqara window sensor, see picture below. This has been programmed using two simple routines, where open window turns the smart plug off and closing it puts it back into the automatic program mode.
Aqara window sensor controls the heater on the wall below
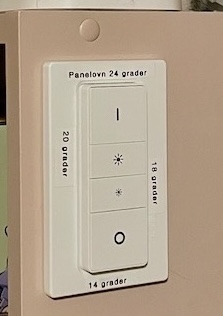
In addition to guests staying in this room being able to use the control panel on the heater itself to adjust the temperature, we also have a Philips Hue dimmer switch here to control the heater, see picture below. The different buttons set different temperatures.
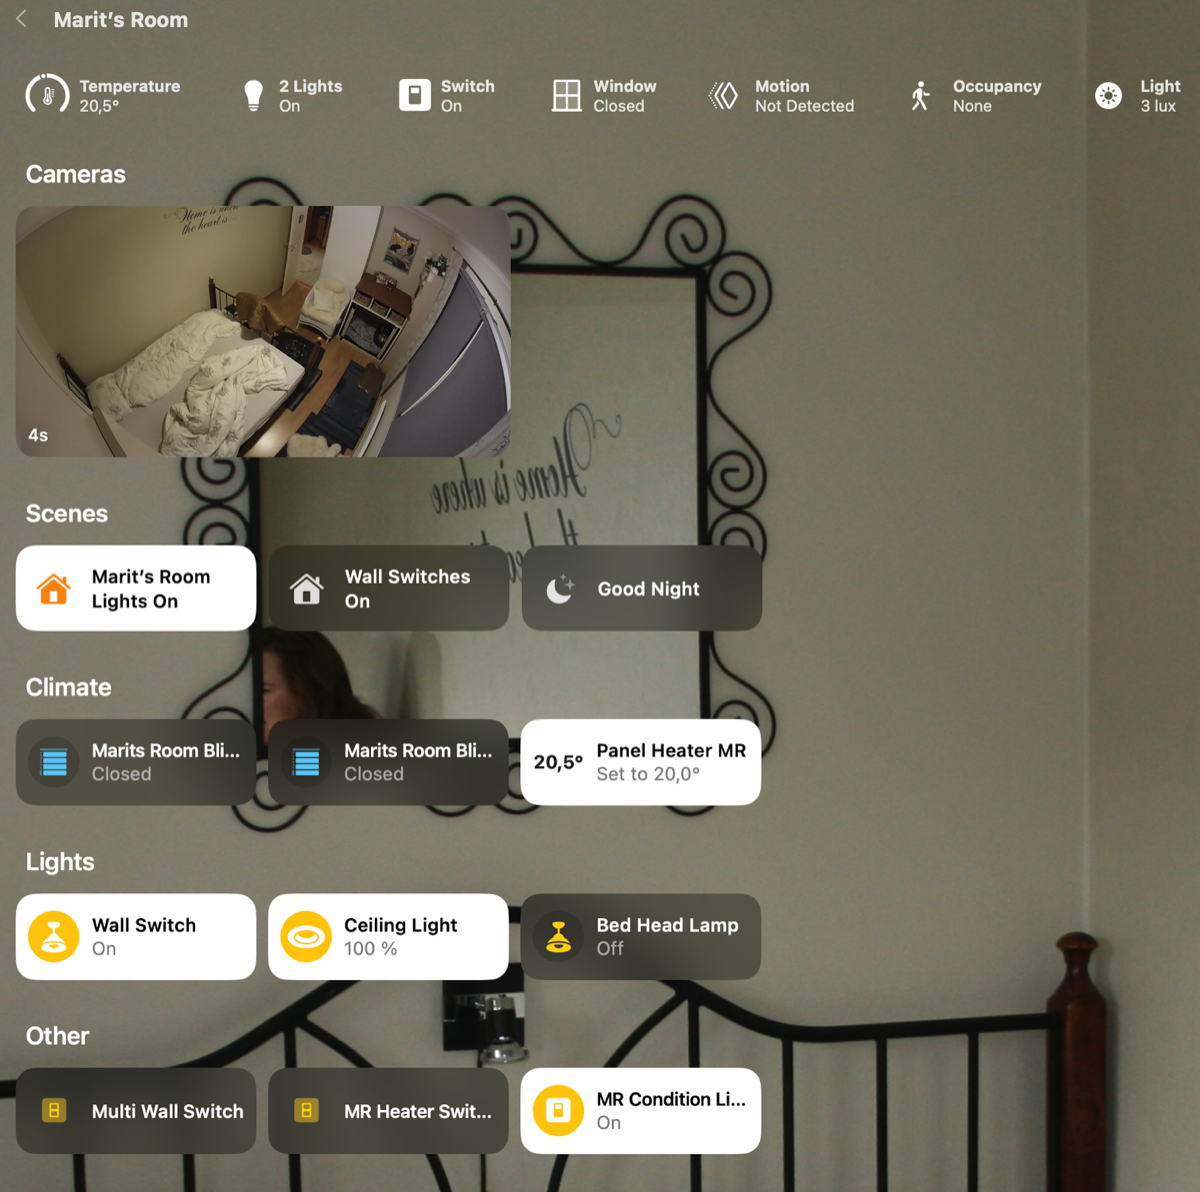
The Home app view of this room, showing both lighting and heating components as well as video feed from the camera, see screenshot below.