Master Bedroom
This room contains solutions for the following systems (notice that on phones, the table might only be displayed in landscape mode):
| System Type | Components |
|---|---|
| Lighting |
|
| Climate Control |
|
| Home Entertainment |
|
| Security and Alarm |
|
| Personal care and health |
|
| Control and Automation |
|
Description of the solutions in this room
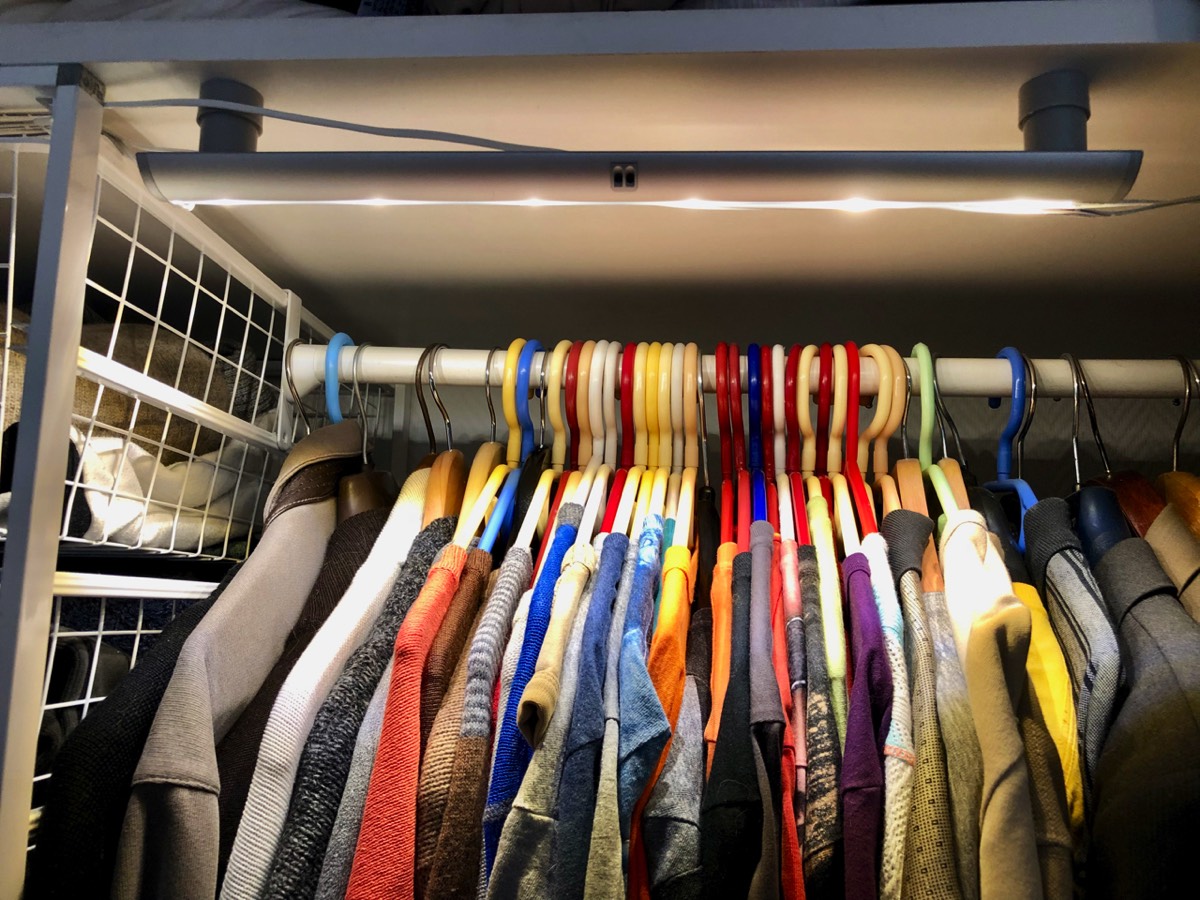
The start of the upgrade process for this bedroom came with the launch of the IKEA Trådfri driver, which is Apple Home compatible and can turn on/off as well as dim connected light sources. One of the light sources compatible with the driver is the Norrfly wardrobe light, see picture below. These come in different lengths and have a built-in motion sensor. We have installed three of these, one behind each of three wardrobe sliding doors, and they work exactly as expected. I should mention that I at first tried to «get away» with installing two longer lights, but the motion sensor failed to trigger for all three doors. There is no programming to be done, the light control takes care of it self, but I should also mention that we had a little startup problem. At the same time as we got these wardrobe lights, we also purchased lamps for the living room compatible with the Trådfri driver, and when I programmed these, I inadvertently left them out of the “Good Night” scene. So when my better half retired for the evening after I had already gone to bed, she would resort to asking Siri to turn off all lights. This also turned the Trådfri driver controlling the wardrobe lights off, and the next time we opened a wardrobe door, the light didn’t come on. It took some head scratching before I figured that out, but it illustrates an aspect of the driver; it appears in Apple Home as a light source that can be turned on/off or dimmed, but if used merely as a power transformer for the type of light like the Norrfly, it should basically be left on constantly and never adjusted. That means that commands to perform some action on all lights also will be performed on such drivers.
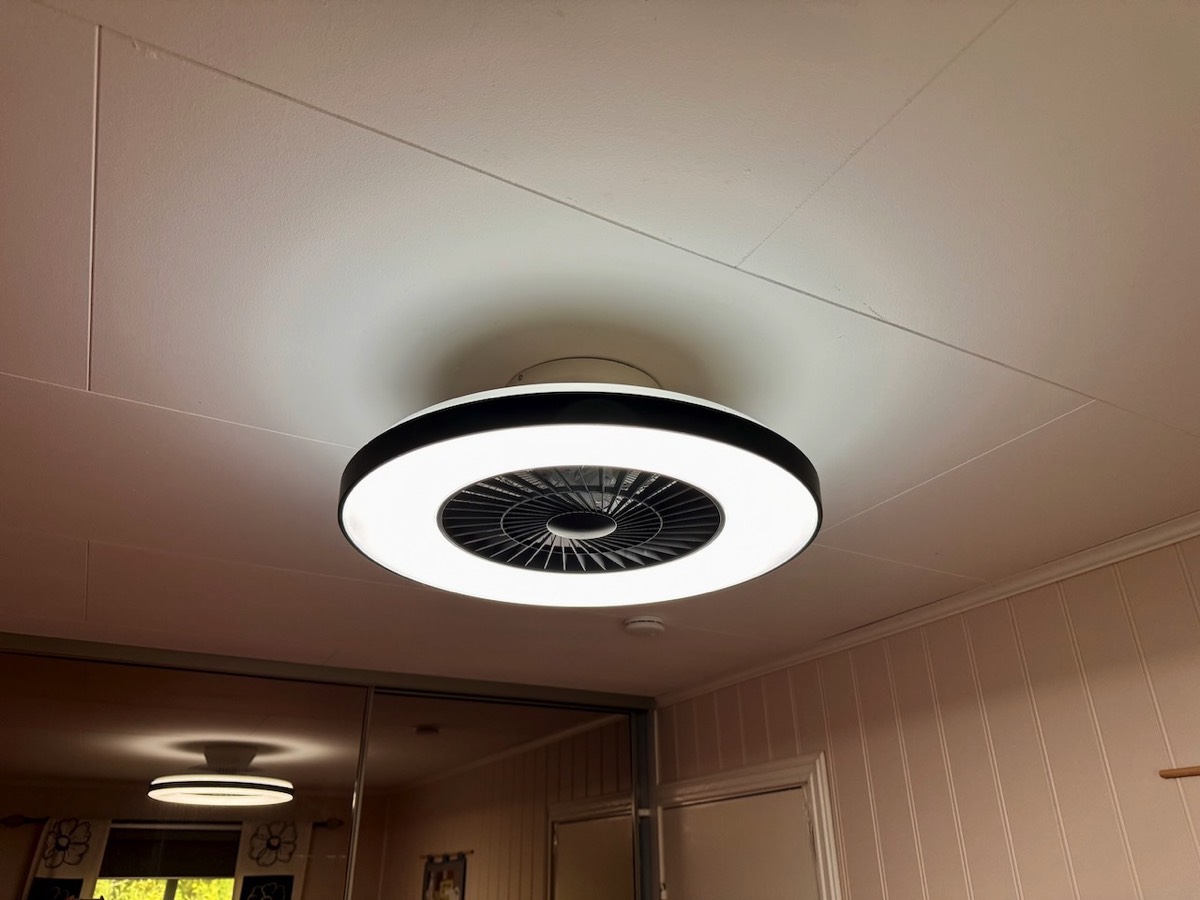
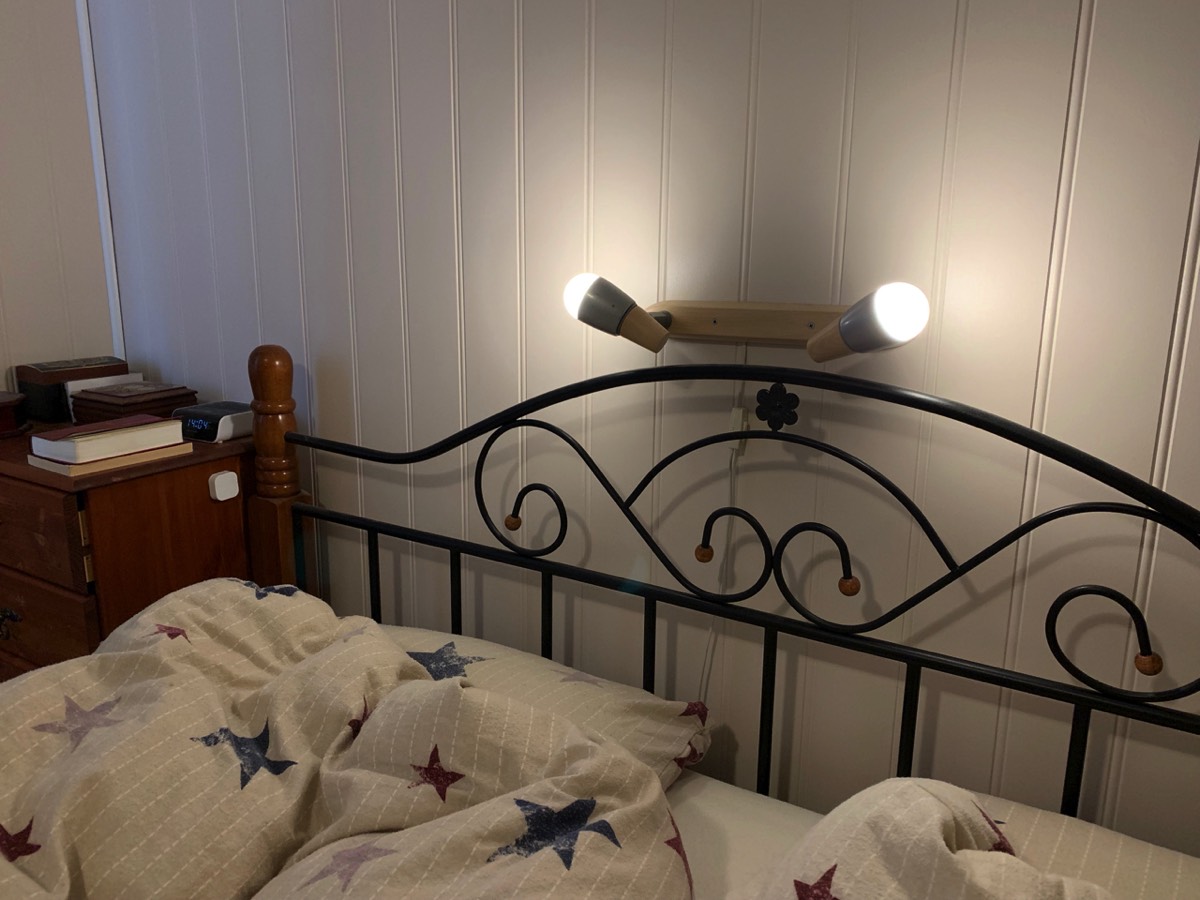
The next step was the ceiling light, which was an old-fashioned bulb on a ceiling fan. For a while thus bulb was replaced by a smart bulb, but now the whole fas has been upgraded to a smart ceiling fan with an integrated LED light source, see picture below. An accompanying remote control operates both the fan and light and has been installed on one of the nightstands, shown further down.
Lindby smart ceiling fan with LED light
The ceiling fan light is controlled using a motion sensor. This was for a long programmed so that the light turned on when motion was detected and the time was outside the time of night where we can be expected to be in bed, to avoid having the light turn on when turning in bed during sleep. This type of programming can be done in the Home app, by defining a trigger (motion) and time interval. The disadvantage of this setup was that the time interval where the light should not be turned had to be set with a wide margin, to take into account evenings where someone went early to bed og mornings where someone slept long. This meant that in many cases, we had to use a Philips Hue dimmer switch, installed above the old wall switch, if we wanted to turn on/off the light manually at times where it didn’t turn on automatically (in addition, the remaining two buttons have been programmed to turn the fan on/off manually).
This solution worked fairly well, but eventually we started using a so-called “dummy switch” in Homebridge (through this plugin). This is now the solution here, where a virtual switch is turned off at night when we go to bed and on again in the morning, in addition to being turned on/off at defined times. When motion is detected, the virtual switch is used as criterion for whether to turn on/off the ceiling light.
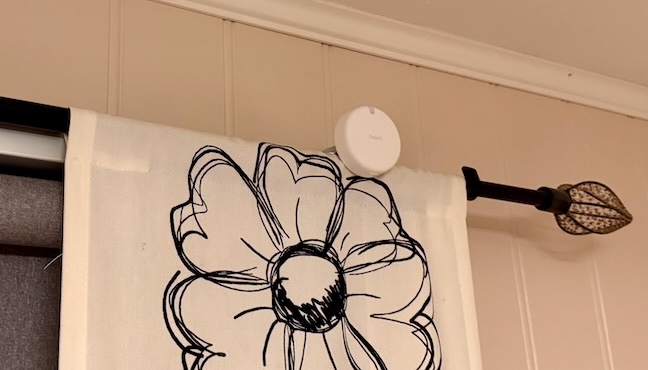
Despite this light control routine, it has still not worked perfectly, there have been times when the light has turned on when we really want to just sleep a little longer. We therefore upgraded the motion sensor to an Aqara presence sensor, of the type FP2, mounted on top of the blinds box, see picture below. With this sensor, it is possible to define zones inside the room, and it uses so-called mmWave technology to detect presence in the zones. After some experimentation, there is now one zone covering the bed and one zone that covers the rest of the room, and the sensor exposes these to Apple Home. It can then be used both to detect someone entering the room as well as an extra condition in the light control routine, so that at registered motion, the light only turns on if the virtual switch is on and there is no-one in the bed.
The lamp by the bed had for a long time only traditional bulbs, but in the end also these were replaced by smart bulbs, two IKEA Trådfri E14 smart bulb, partly because it was one of a very few light sources in the house still not «on line» and partly because the switch on the lamp cord is a little hard to find. Now this lamp is controlled by two IKEA Trådfri wireless switches, placed on the night stands on either side of the bed, see pictures below. These switches work as other control devices from Trådfri, by only being possible to program in the IKEA.
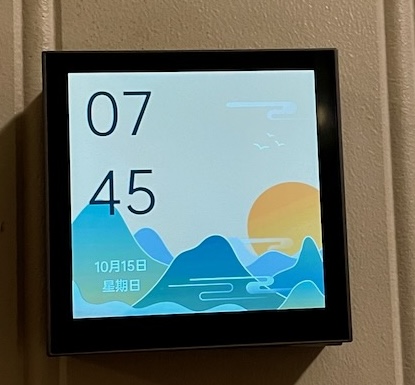
The picture also shows a Lenovo smart clock, which can be used as a base station for Google Home, and a HomePod Mini, which plays music and takes voice commands, and also measures temperature and humidity. The fan remote control is also shown, as well as a sensor/switch, described below.
Lamp above the bed with two Trådfri bulbs and a switch on either nightstand, on the right also the Lenovo smart clock and the HomePod Mini as well as some other remotes/switches

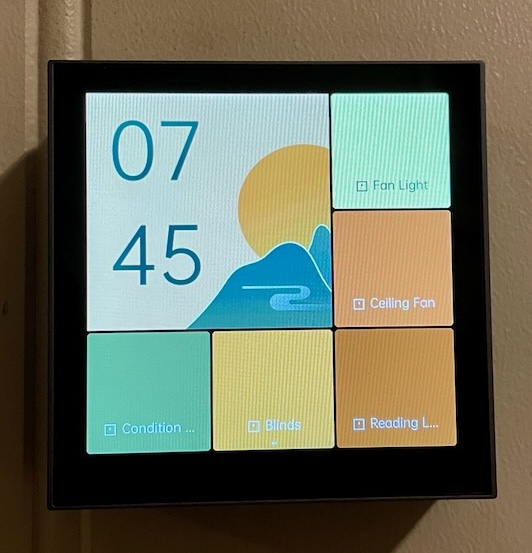
This is another room where we have replaced the old wall switch by a smart version from Aqara, see picture below, this with a LED screen. It is set up so that the “buttons” on the screen do not include the physical circuit controlled by the switch, meaning we avoid someone inadvertently turning off the ceiling light using the wall switch. In addition, the switch allows setting up as many as nine “buttons” so from this panel we can control all the lights, the fan, and the blinds.
Smart wall switch that controls the ceiling fan and light in the room. To the left, the switch is in screen saver mode (it goes completely black after thirty seconds) and to the right it displays the defined “buttons”
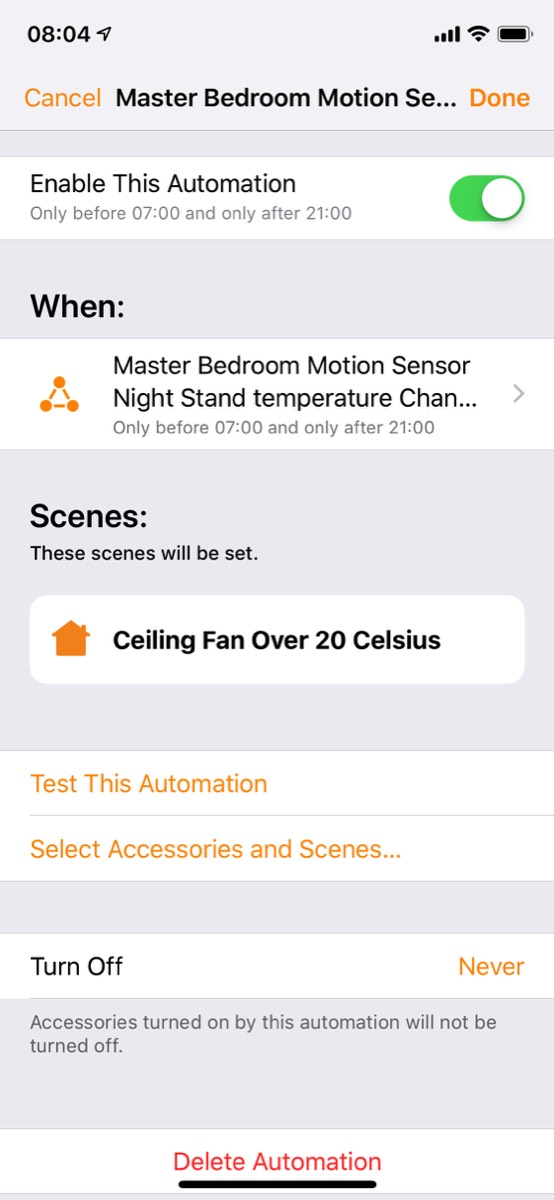
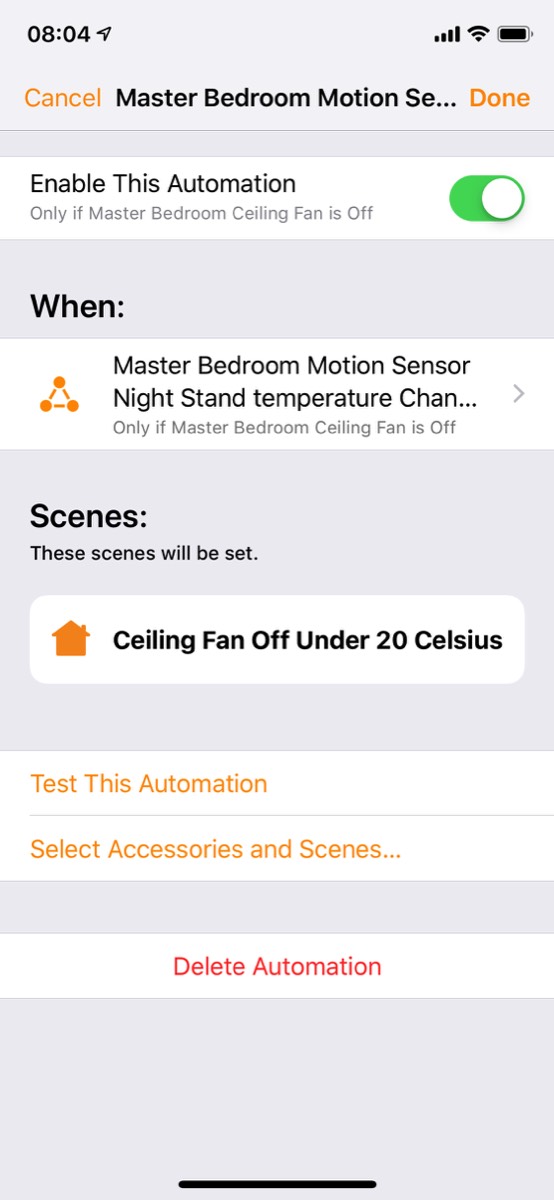
Since the HomePod also measures temperature (and light brightness), I use its measurements to control the fan. This has been programmed in the Eve app, since it allows routines using both triggers and conditions. It is now set up so that when the temperature exceeds 20 degrees Celsius, the fan is turned on, and correspondingly off again when the temperature drops below 20, see screenshots below.
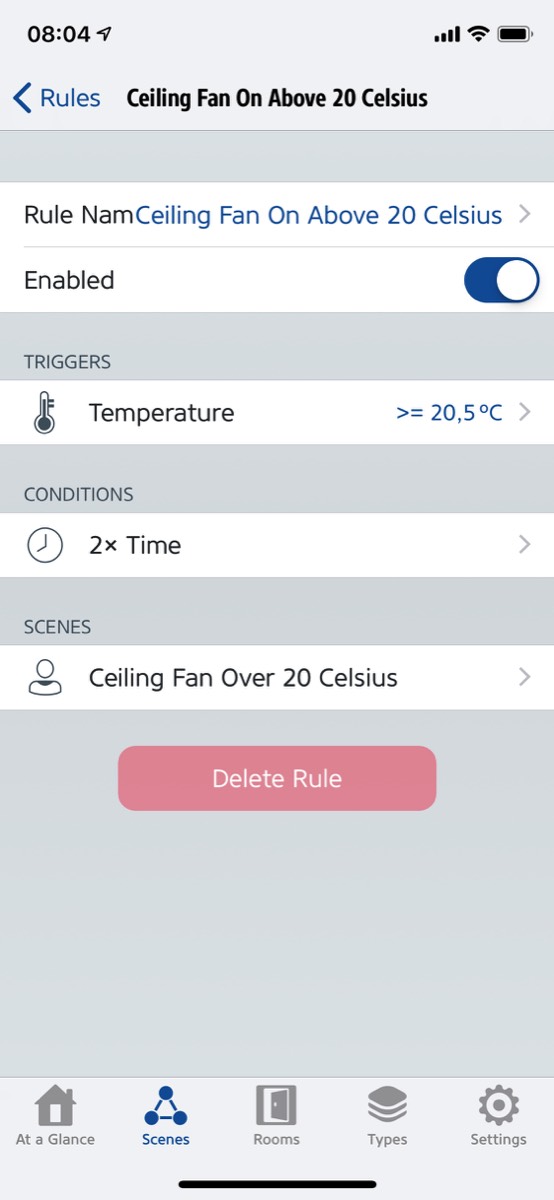
Programming set up in the Eve app, on the left, where the ceiling fan turns on if the temperature, measured by the Hue motion sensor, goes above 20 degrees Celsius and the time is between 21:00 and 07:00 (to avoid running the fan during the day when we are not in the room)
In the Home app, on the right, these conditions are shown even if they cannot be set up in this app
Corresponding rule turns the fan off if the condition is met that it was one and the temperature falls below 20 degrees (also this has been programmed in the Eve app)
After the spring of the manual blinds suddenly broke, I saw no reason to replace it with another manual one. Instead, yet another set of IKEA Fyrtur blinds was installed, see picture below. As elsewhere in the house, this work flawlessly, with the little remote control placed on one of the night stands.
As the seasons changed, we realized that we only used a few “settings” in terms of how closed the blinds were. An Aqara combined climate sensor, with display, and smart switch has been installed on the nightstand, as shown above. This has been programmed with these “closed settings” for each of the three buttons (as well as a couple of other scenes). This makes it much easier to achieve the desired position of the blinds.
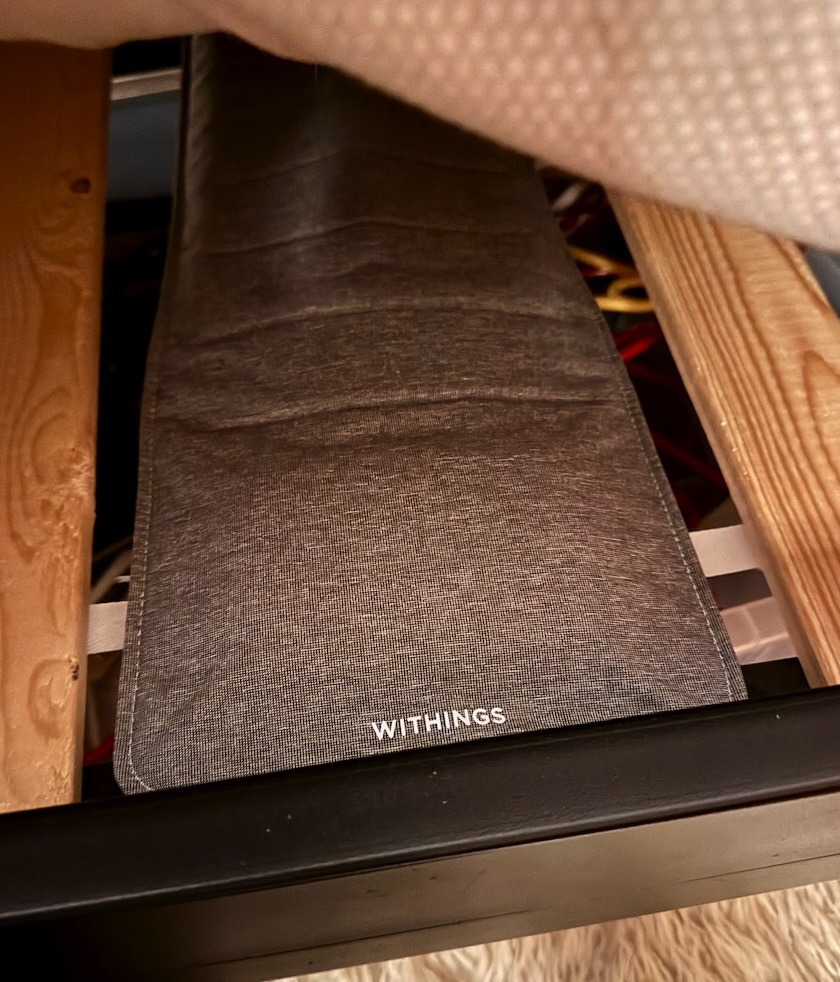
The last years, smart phones and watches have made it possible to measure a number of parameters related to health and life style. This also includes sleep quality, for which smart watches are especially suitable. This does, however, require some planning of when to charge the watch and it can be uncomfortable to wear a watch all night. It is therefore convenient that there are dedicated sensors for measuring various aspects of sleep quality, and we such a sensor, called Withings Sleep. It is placed underneath the mattress, see picture below, and starts measuring as soon as it detects someone getting into bed. The measurements can either be viewed in the dedicated Withings app or in the Apple Health app, since the measurements are exported to it.
Withings sleep sensor
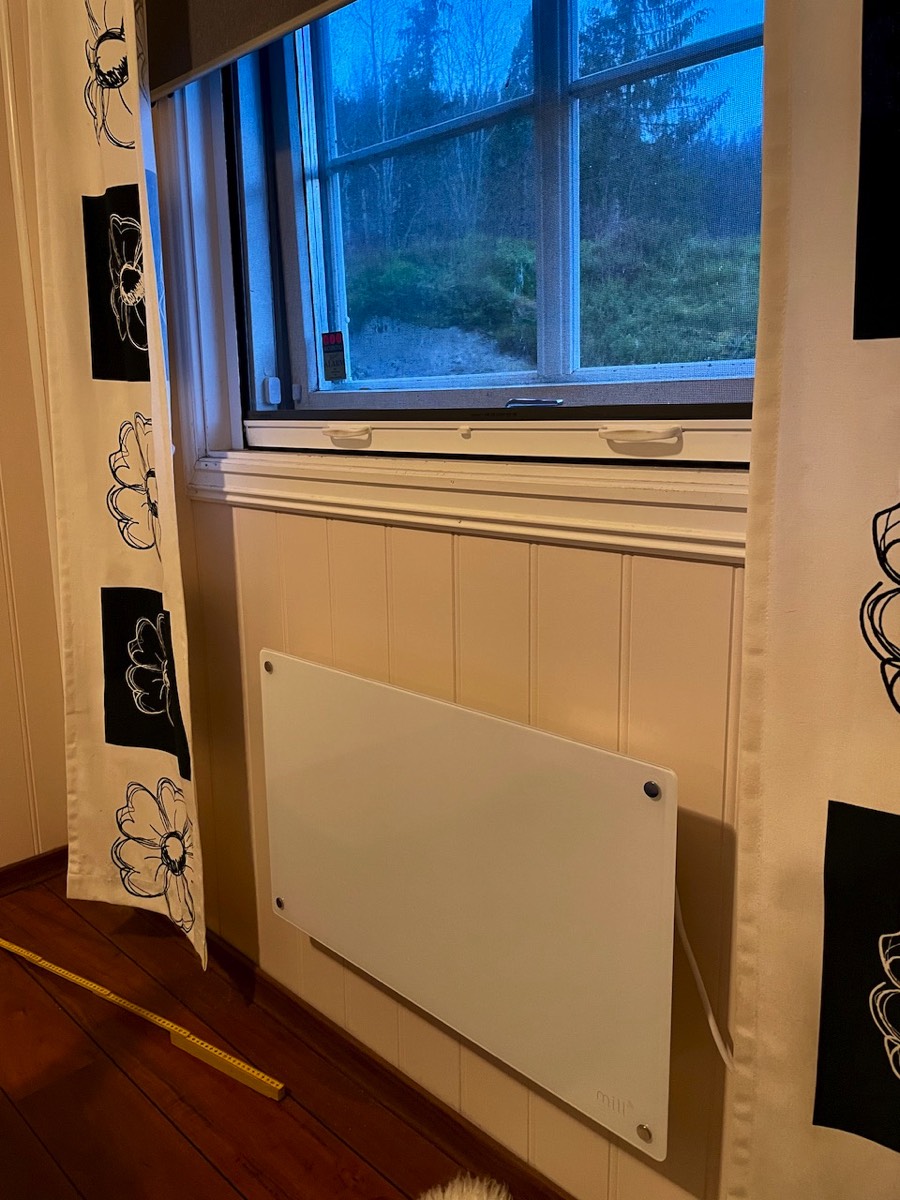
After we got a dog, with rather thin coat, who likes going to bed in the master bedroom early in the evening, we realized that during winter, it would often be on the chilly side, even with the window closed. We therefore installed a Mill panel heater here, see picture below, of a similar type to one we had previously installed in the office (see more about Mill and the functionality of these smart heaters there). Also this has been combined with an Aqara window sensor and programmed so that it turns off when the window is opened and on again when the window is closed again.
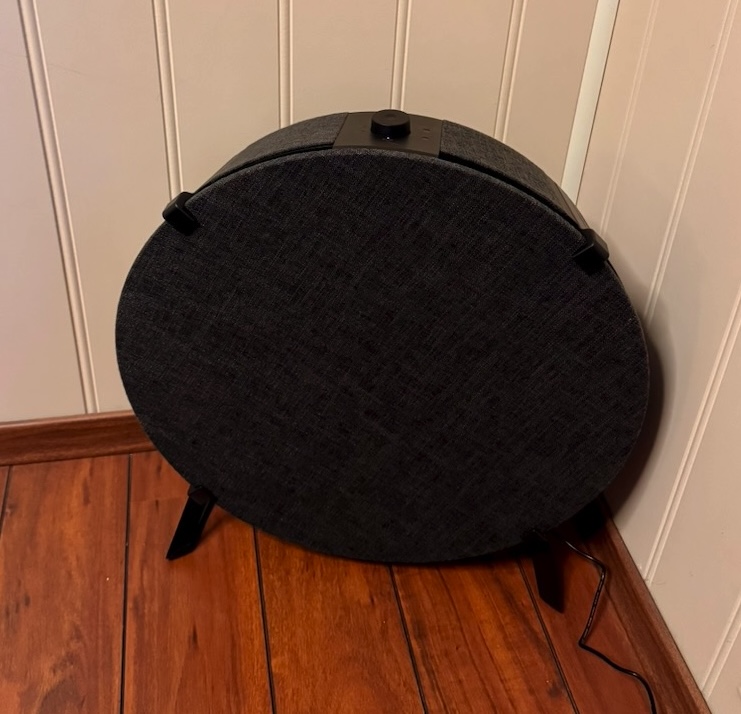
Since of the inhabitants in the house has pollen allergy, we eventually installed an air purifier her, an IKEA Starkvind, see picture below. It mostly minds itself, but can also be controlled from Apple Home.
Meross smart air purifier
Also in this room, there is a Verisure smoke detector, see picture below, but has been mentioned under other rooms, measurements of temperature and humidity can no longer be brought into Apple Home.

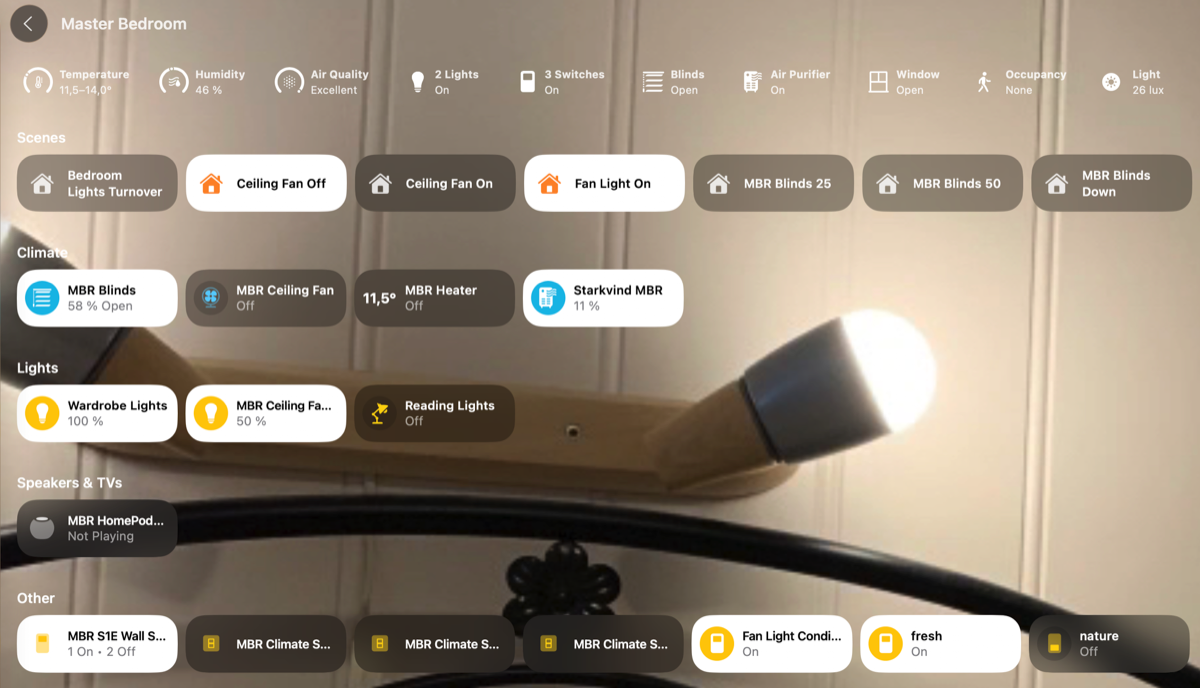
A complete overview of the devices in the room is shown in the screenshot below.
All devices in the master bedroom