Library
This room contains solutions for the following systems (notice that on phones, the table might only be displayed in landscape mode):
| System Type | Components |
|---|---|
| Lighting |
|
| Climate Control |
|
| Appliances |
|
| Security and Alarm |
|
| Pet Care | None |
| Control and Automation | None |
Description of the solutions in this room
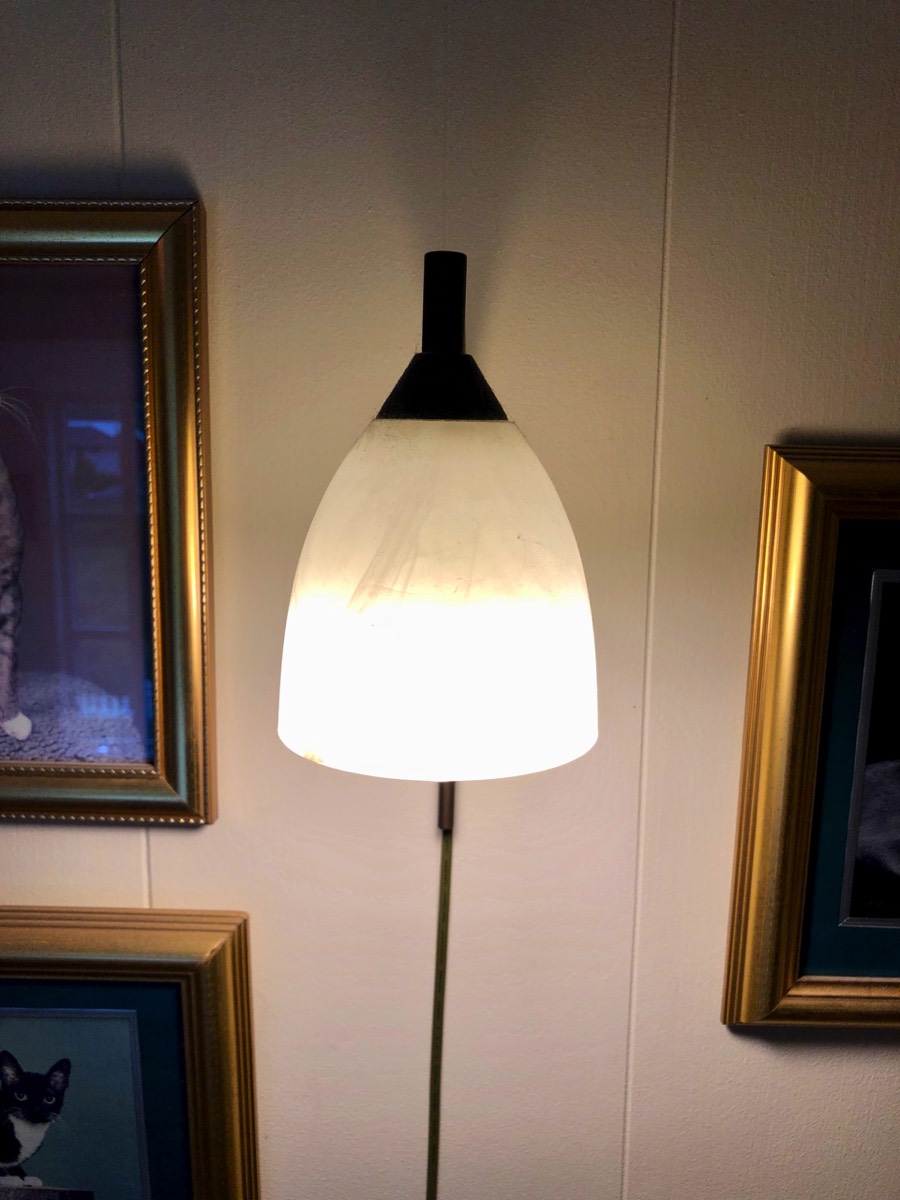
It is arguably pretentious to call this room a library; truth be told, it is really a hallway on the first floor, but after we moved in and put two book shelves here, it ended up as the library… Despite its fairly modest physical dimensions, this room contains a good deal of components related to lighting, and like many other rooms, it has been a gradual process to find solutions (and afford them) to upgrade different light sources. The first and easiest project was a wall lamp, where the old bulb could simply be replaced by an IKEA Trådfri E14 smart bulb, see picture below. A note; this bulb is the one utilized as “condition” in the programming of the upstairs bathroom lights to decide whether they should be turned on at full brightness (the wall lamp is on) or as night light (the wall lamp is off).
Wall lamp with smart E14 bulb
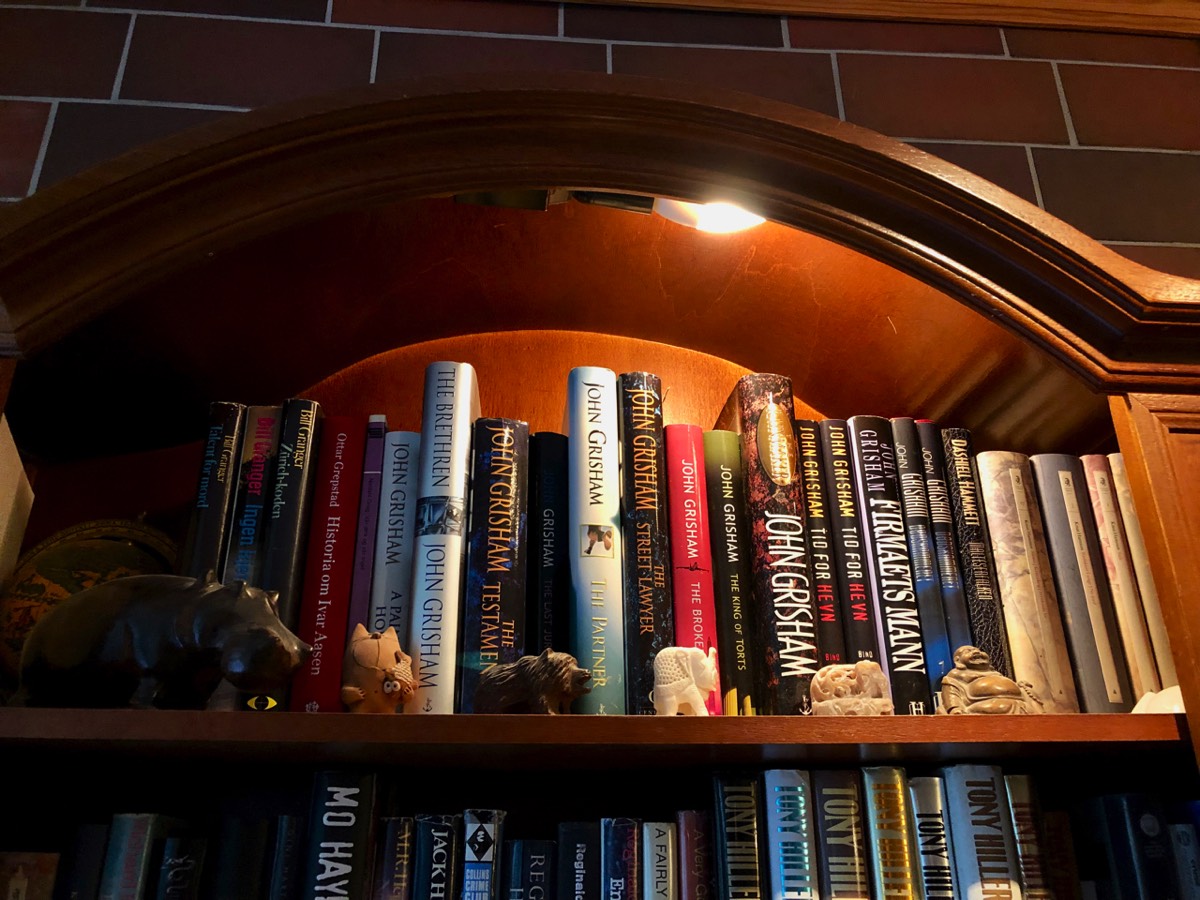
The next, relatively easy to solve, were lights in the mentioned book shelves. Each of these has a small lamp mounted in the «ceiling» of the shelf. The socket is of the E14 type, but the bulbs are very small, of the type typically used in ovens. Fortunately, there was just enough room to fit a Philips Hue E14 chandelier bulb, and even if these touch the wood of the shelf, these LED bulbs generate so little heat that this poses no problem, see picture below.
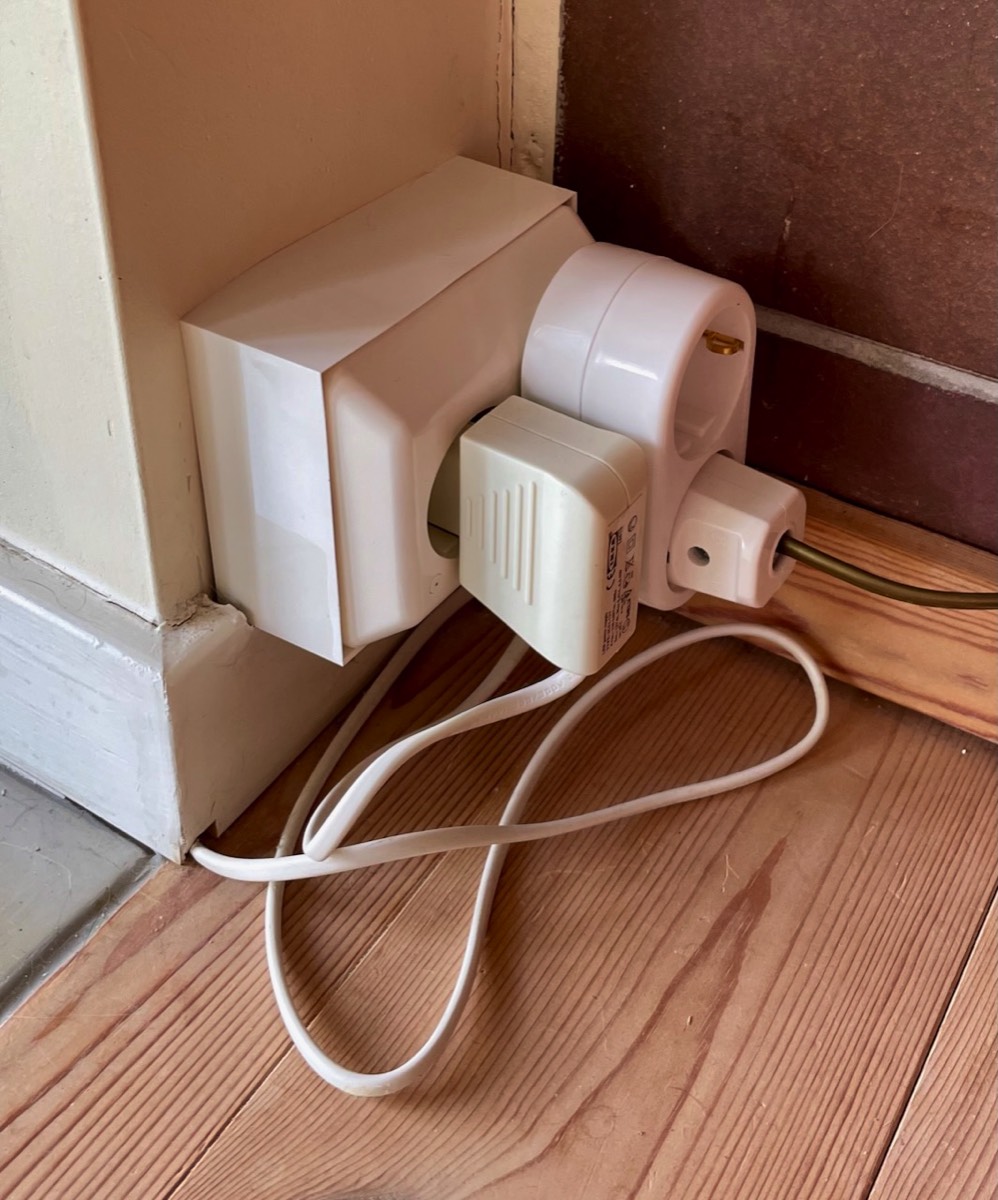
Next, we have a collection of four small LED spot lights installed in the window ledge of the floor-to-ceiling window, see picture below. These lights do not have changeable bulbs and replacing them would not be straightforward so the solution was at first an IKEA Trådfri plug. This protruded quite much from the wall and was a little in the way, especially for the vacuum cleaner. So when Connecte launched a smart power outlet, the existing one was replaced by one, see picture below. This has several advantages; it sticks less out from the wall and since only one of the two outlets is smart, the other one can be used just like any other outlet. The outlet is based on Zigbee and connected Homey and from there to Apple Home.
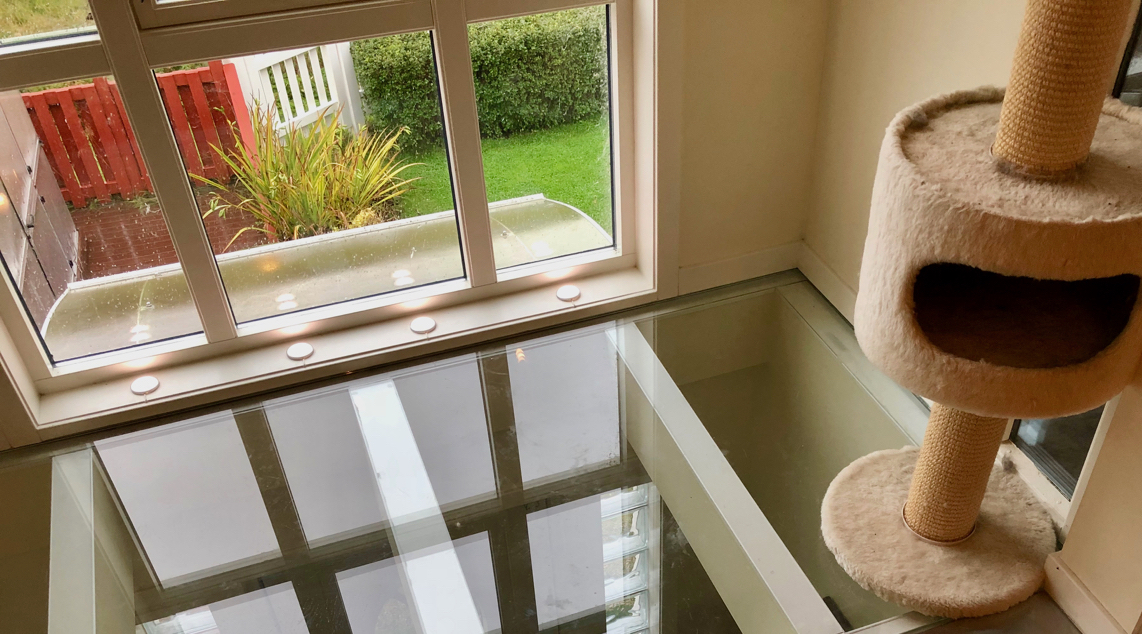
LED lights in the window controlled by a Connecte smart power outlet
At this stage, there were still several light sources in the room without obviously easy to implement solutions, see pictures below. Two of these, a painting light and a set of spot lights (with halogen bulbs) in the ceiling, are connected to the same wall switch. For both of these, simply changing the bulbs was not possible; the painting light uses a LED strip and there are no smart versions of the small spot halogen bulbs. An option could have been to replace one or both lights with smarter versions, but at this point there were few alternative to choose among (today, I could have solved this through an IKEA Trådfri Maglehult picture light, connected to an IKEA Trådfri Driver, and a Philips Hue Runner triple spotlight, but this would have been much more expensive). Another path could have been using a smart plug, as the wall switch controlling these two lights turn on/off the power to a double wall outlet just underneath the ceiling. I could have used one smart plug to connect both lamps to this using a double expansion socket (which would result in quite an ungainly and very visible “christmas tree” of sockets and plugs).
Row of spot lights with Gledopto smart bulbs, see description below

In the end, the solution was an Aqara smart wired wall switch, see picture below. This is now, however, only a backup solution if anyone should turn off the switch by a mistake.
Some years after installation of the Fibaro relay, two of the spotlight bulbs, of the type GU5.4, had to be replaced and these are quite expensive even in a “non-smart” version. This was an opportunity to check whether smart bulbs with this type of socket had been launched, which was the case, although none with Apple Home support. I landed on bulbs from Gledopto for sale at a reasonable price, see picture above. They are based on Zigbee and connected to Homey and from there into Apple Home. They have colored lights and work very well.
This, however, triggered a reevaluation of the solution for the painting light, as I wanted to avoid using the Aqara smart switch to cut the power to the spotlights, as this would disconnect the bulbs (and in the worst case cause connection problems every time they would be turned on). The answer was to connect the painting light to a smart plug, which was more elegant than if both these light sources would have to be plugged into it, see picture above. This allows also this light to be controlled independently and the Aqara switch is now in practice only a backup solution, which also ensures that we can still control the lights from anywhere even if someone should by accident turn off the manual wall switch.
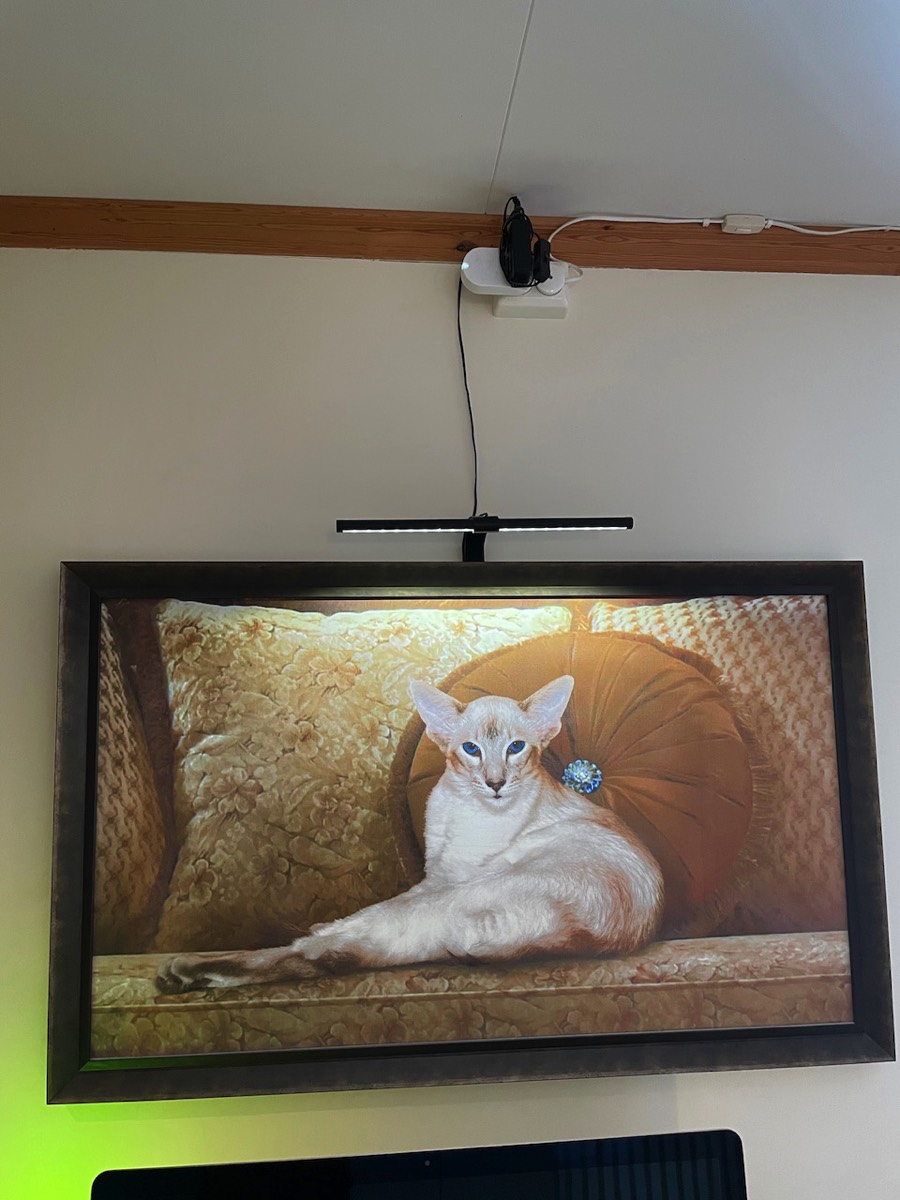
The last two light sources in this room were two downlights mounted in the ceiling, which were quite expensive lights installed by an electrician when we built an extension to the house. These also had bulbs that could not be replaced by smart ones, and they are controlled by a wall dimmer switch. At this stage, there were no suitable smart dimmer switches that could have replaced the old wall switch (today, it would have been easier to “smarten up” these downlights by installing a Koogeek dimmer switch), but Philips Hue had launched their Milliskin recessed spot lights. These turned out to be of the right size to replace the old ones, and they were easy to install and connect, see picture below. They have worked very well, and be dimmed either using the wall dimmer or from a smart phone/tablet/etc.
Philips Hue downlights, primarily controlled using the Home app, but they can also be turned on/off and be dimmed using the wall switch
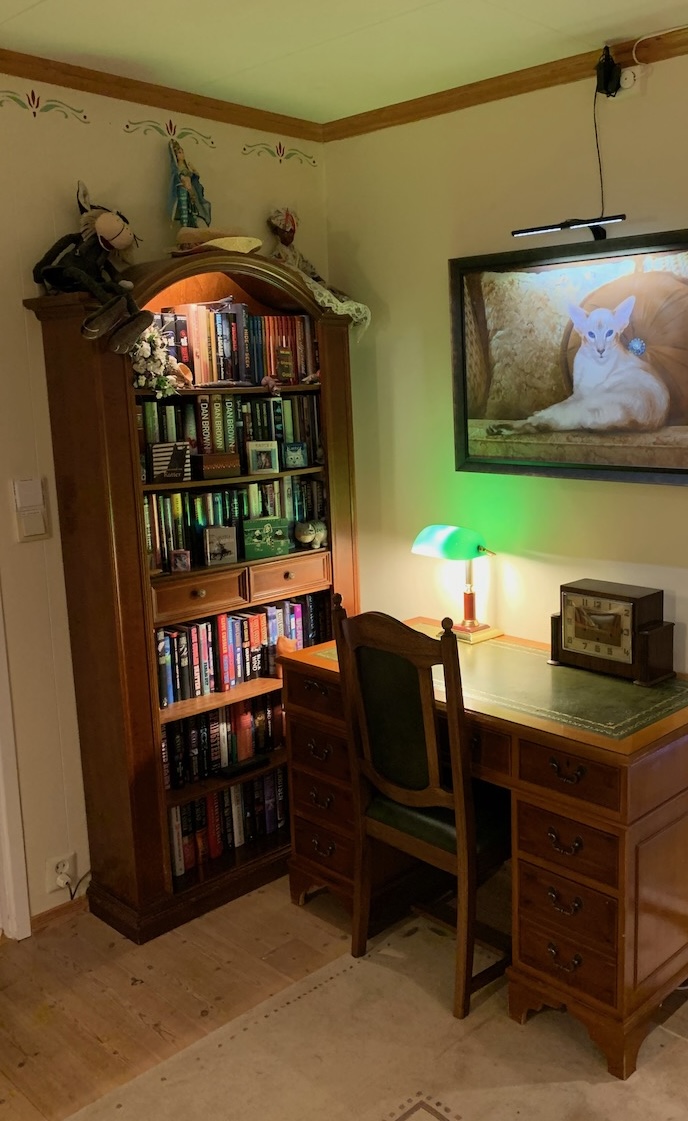
Later, we got a desk for this room, and that got a desk lamp, see picture below. An IKEA Trådfri E27 smart bulb has been installed in the lamp, and it can be turned on/off with buttons on the wall switch described above and it is part of some scenes described below.
Smart bulb in the desk lamp
How are these different light sources in this room controlled? First of all, they are included in different Apple Home scenes. A couple of them are included in the “Good Morning” scene that is run at 06:30 in the morning, a couple more turn on in the afternoon as part of the scene “Afternoon Lights” while the last lights come on 1 hour before sunset in the “Evening Lights” scene.
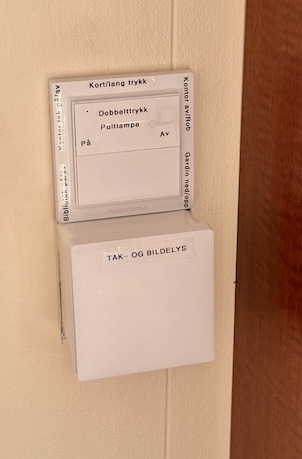
In addition to being part of scenes, all of the lights can of course be turned on/off using the Home app or Siri. Furthermore, on the wall outside the upstairs bathroom adjoining the library, we have installed an Aqara S1E smart wall switch with display, see picture below, which replaced the traditional wall switch that controlled the lights in the bathroom. This can control three physically connected devices and can in addition be set up with up to six “wireless switches” on the screen. Here, I have utilized this to not including the physical circuit powering the bathroom lights among the switches shown on the screen, to avoid having someone accidentally turning off the power to the smart lights so that they lose connection. Instead, the switch is exploited by showing the maximum of six screen buttons, which control various light combinations/actions, including the ceiling fan in the master bedroom next door.
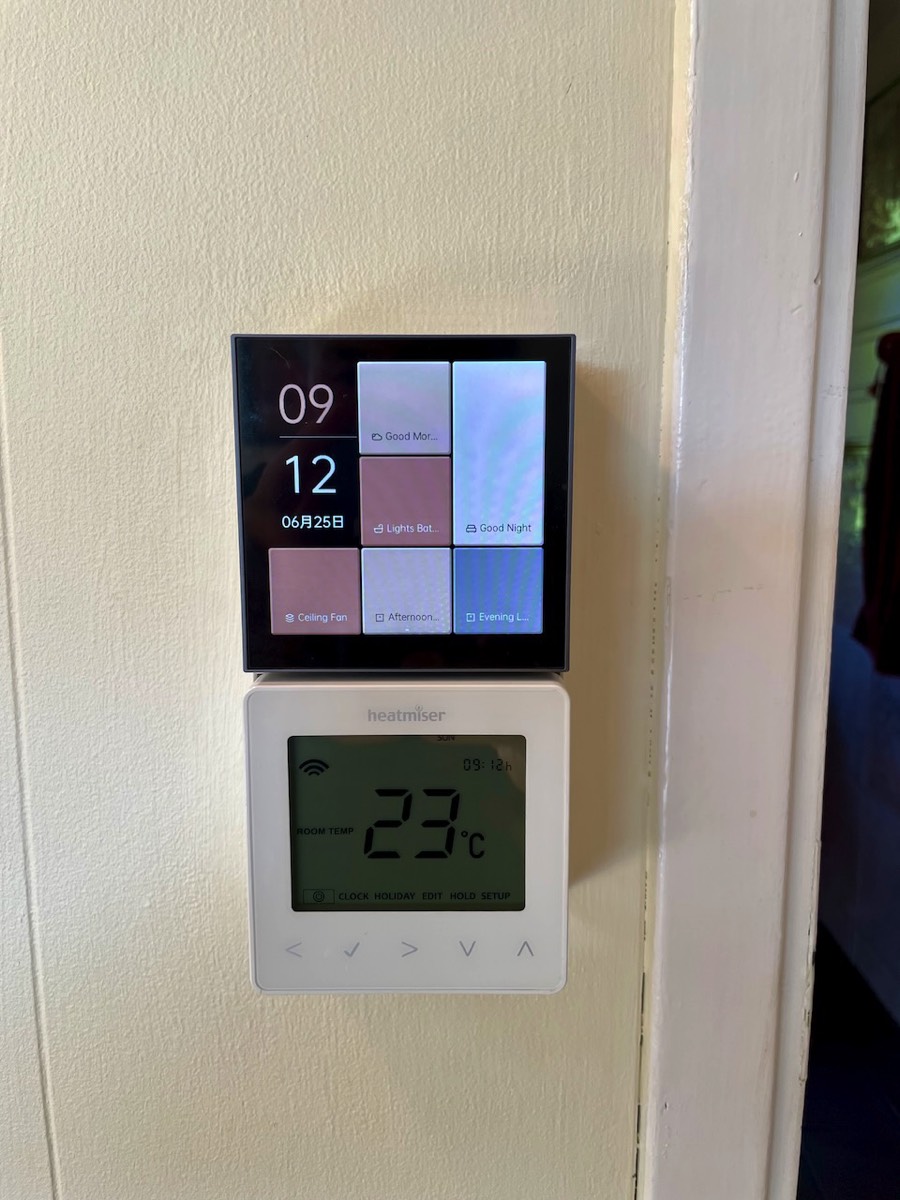
We have an additional wireless switch here, on the wall by the door leading into the office, this is a 4-scene version, see picture further up. It partly controls the lights in the office and in the library, but a couple of the buttons have also been programmed to start the robot vacuum cleaner and run the blinds down/up.
In the library, we have a large bay window that goes from floor to ceiling. This gives us a nice view, but it also offers our German Shepherd and guard dog Ronja a perfect view to the fields and road outside. If cows, cats, pedestrians, cyclists, etc. are observed, she thinks we must be alerted to this, something that can get a little too much sometimes. It was therefore good news when IKEA’s smart blinds finally became available after several delays. These come in two versions, one that lets light through (Kadrilj) and one “blackout” version (Fyrtur), and the solution we ended up with here was the Fyrtur since the thinner one would give Ronja too much of a view. The conditions for installation were not ideal, though, partly the roof above the window is slanted and partly there are pictures on the sides of the window, both of which prevented installation one the outside of the window recess. Furthermore, the width of the window is also “wrong” at appr. 135 cm, which the blinds come in widths at intervals of 20 cm. In our case, we got the 140 cm version and shortened it (IKEA provides no instructions on how to do this, but online videos confirm that this is fairly easy), see picture below.
IKEA Fyrtur blinds, primarily installed to prevent “guard dog noise”
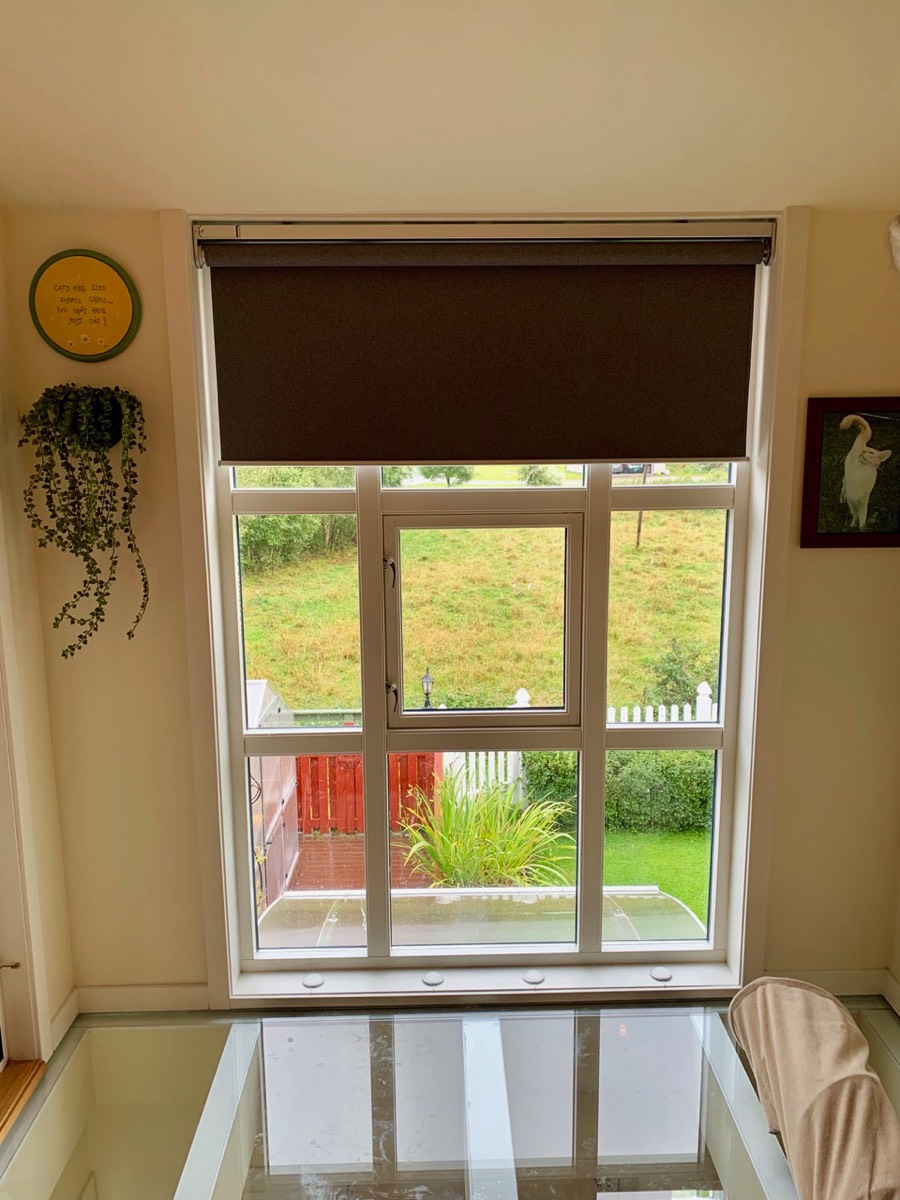
In principle, the installation, both physical and app setup, should be straightforward, but it gave me some problems. First, the Zigbee range extender must be connected, next the attached remote control, and finally the blinds. Everything worked well until the last step, which simply would not complete, but after moving the range extender and keeping the pairing button depressed for more than a minute, it finally worked. The blinds can be operated using buttons on the device itself, the mentioned remote control (which we still have not put in any permanent place), and from the Smart Home app. A coupe of days later, both the blinds and the remote control showed up as “Disconnected devices” and had to be re-added.
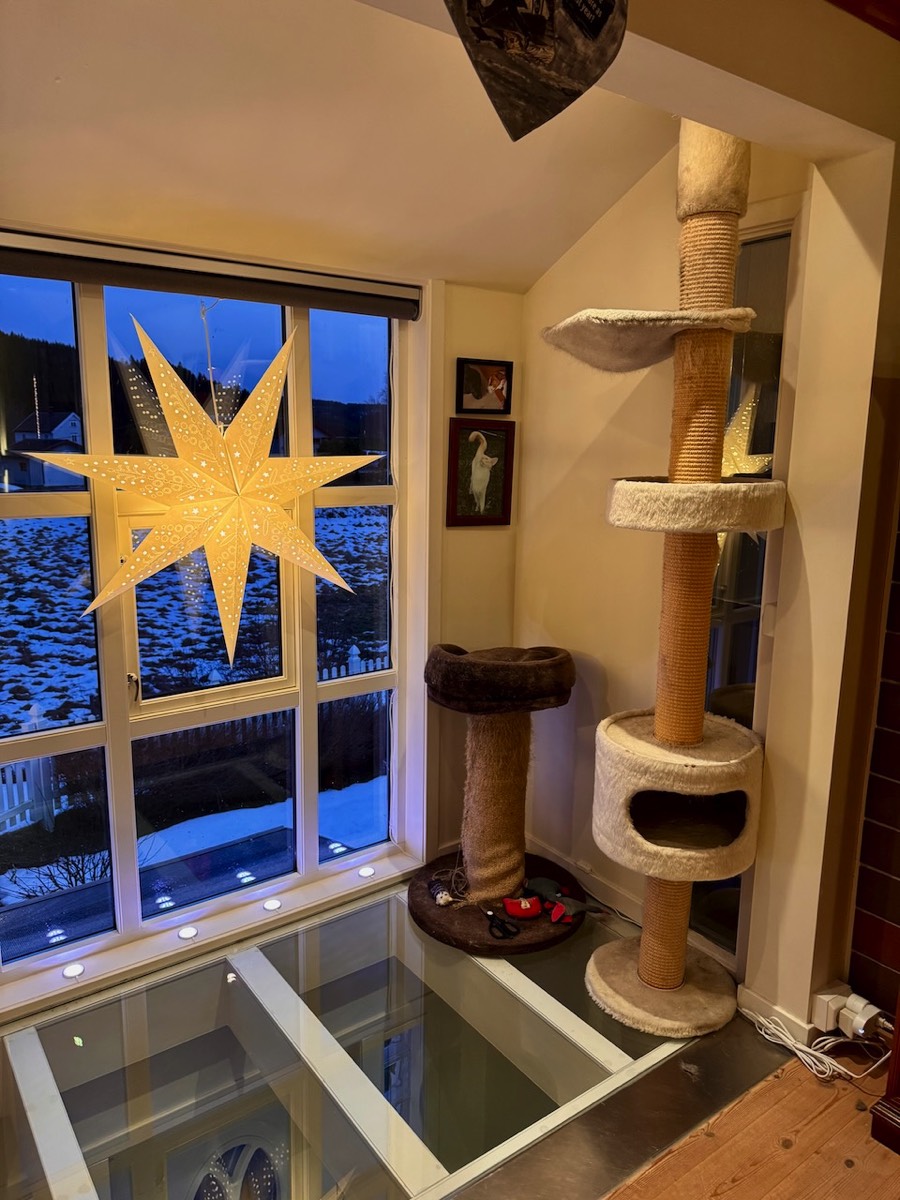
During advent, there is also an advents star in this window, see picture below. This has a regular light bulb and is therefore controlled using an IKEA smart plug.
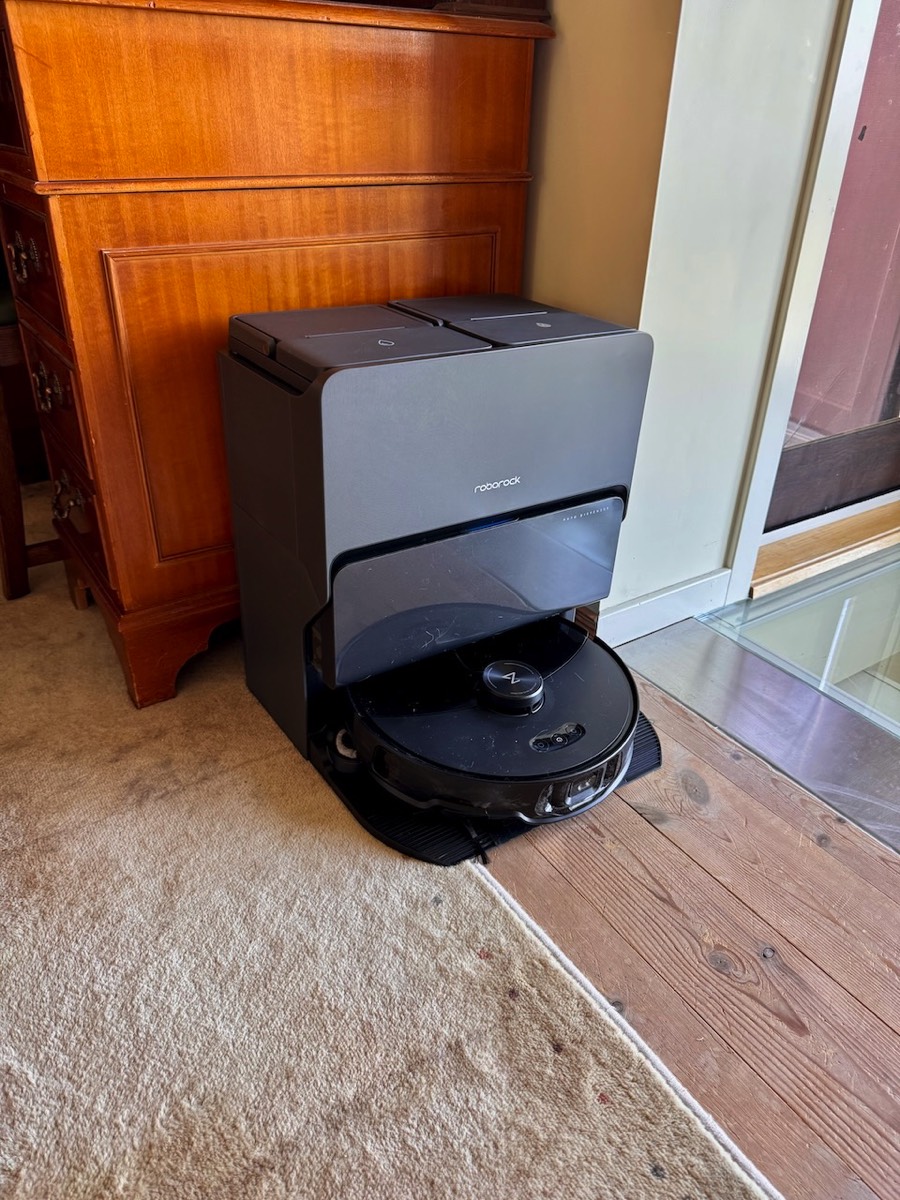
Even if it operates in large parts of the house, the charging station for our robot vacuum cleaner, a Xiaomi RoboRock S8 Max Ultra, is located here in the library, see picture below. Here it was easy to reach a power outlet and have sufficiently open area around the charging station, and since the animals spend much time here it is a logical room to clean first. The experiences with the robot are (this is written not too long after acquiring it) good; it made an intelligent first mapping of the rooms of the house and their obstacles, it is easy to control using either buttons on the device itself or from the Roborock app, and it finds incredible amounts of dust. It also has a mop function, and via Matter, it integrates directly into Apple Home.
Left, the RoboRock in action, heading “home” to the charging station, and right, screenshot from the Mi Home app showing the map of where the robot is working
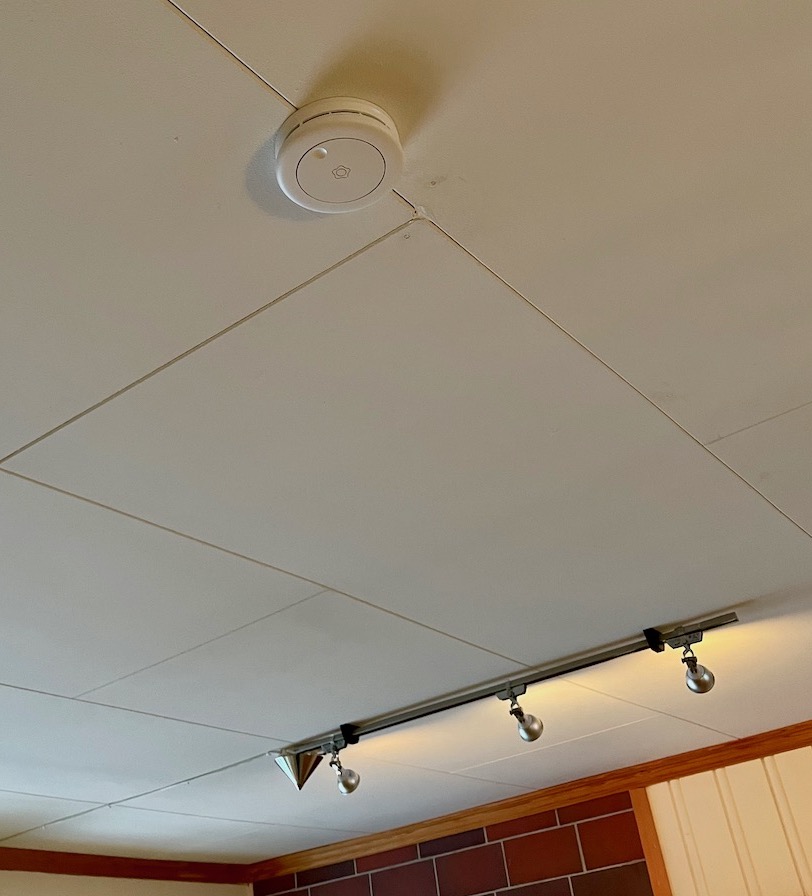
The library also has an Aqara door sensor, see picture below. As explained for the living room, this door sensor is included in programming that ensures that the heat pump/inverter is turned off when a door or window is opened (and turned on again when all the involved doors/window are closed). There also also two Verisure components here; a door sensor as shown above the Aqara sensor below, as well as a smoke detector. The latter also measures temperature and humidity, but which no longer can be integrated into Apple Home.
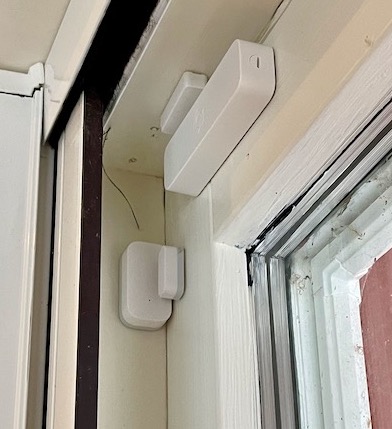
Left, Aqara door sensor installed under the Verisure sensor, right, Verisure smoke detector
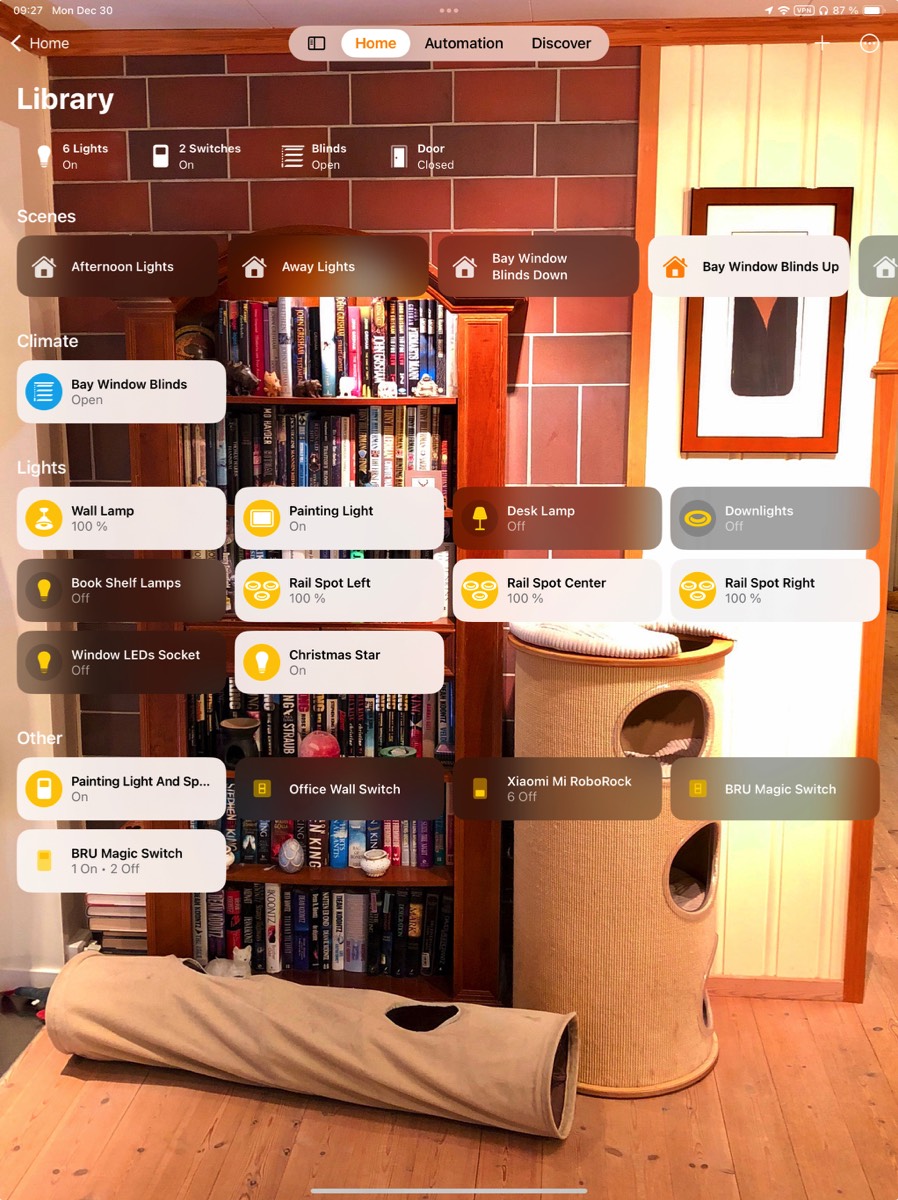
The devices in the library are shown in the screenshot below.
Room view in the Home app for the library, with its light sources and various other devices