Living Room
This room contains solutions for the following systems (notice that on phones, the table might only be displayed in landscape mode):
| System Type | Components |
|---|---|
| Lighting |
|
| Climate Control |
|
| Home Entertainment |
|
| Security and Alarm |
|
| Pet Care |
|
| Control and Automation |
|
Description of the solutions in this room
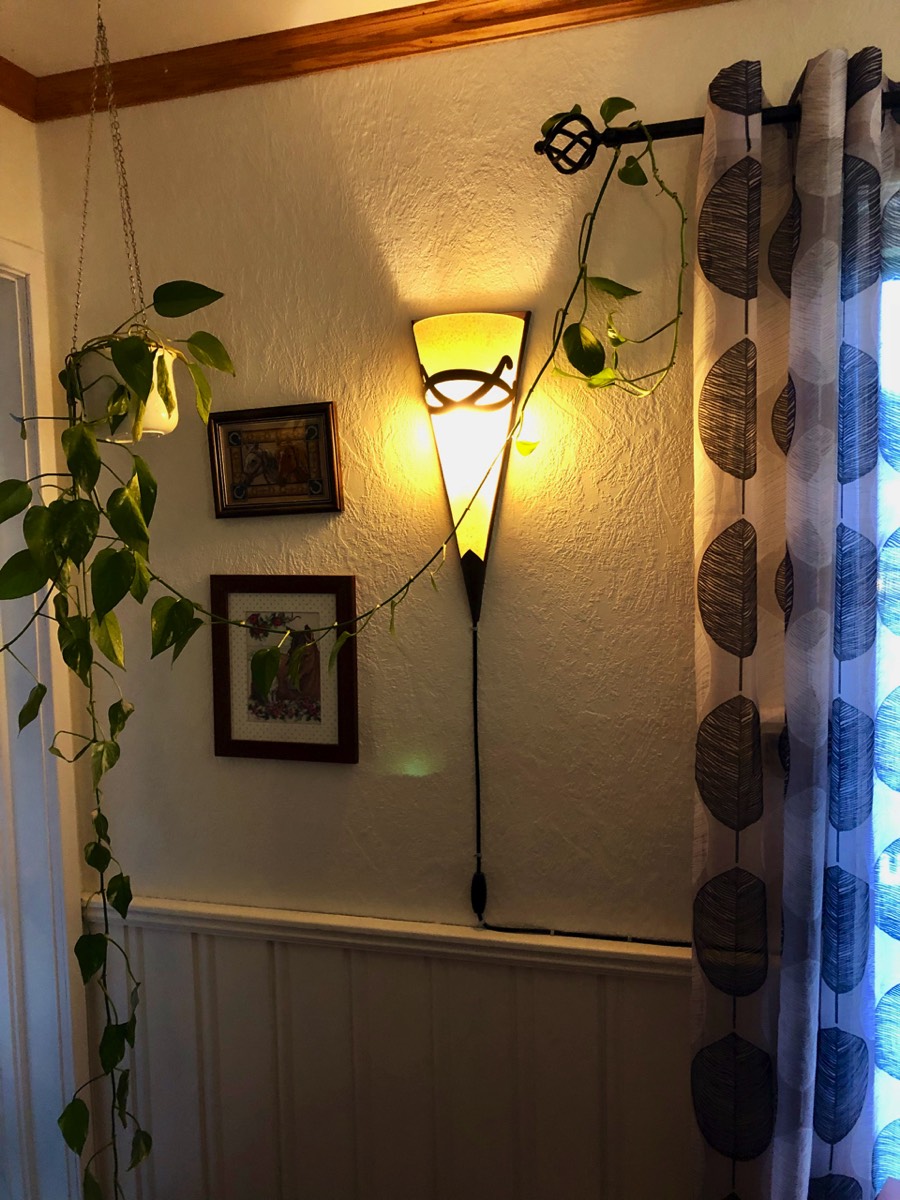
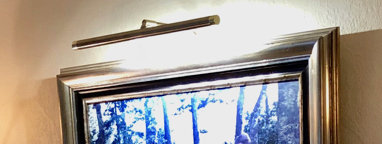
The lighting in the living room was one of the first areas I tackled at the outset of my smart journey and I did encounter quite a few challenges. This was partly due to the fact that several of the products now available in the market did not exist when I started this effort and partly due to my skills being limited. The lighting solutions have therefore gradually evolved. Where we had existing lamps with traditional bulbs using E14 or E27 sockets, i.e., the most commonly used sockets, and where the lamp shades allowed this, the old bulbs were replaced by smart ones, se pictures below. However, this was the case for only three of all the light sources in this room; one could fit a Philips Hue E14 candle bulb, whereas in two identical wall lamps, IKEA Trådfri E14 bulbs could be installed, even though the mounts for the shades had to be stretched a little.
Lamp behind the TV where the old bulb could be replaced by a smart candle lamp
Furthermore, we have an aquarium, lit by LED tubes integrated into the lid, see picture below. This is controlled using an Namron smart power strip behind the aquarium, also shown in the picture below. In this power strip, also the pump and heater for the aquarium are plugged in, so that they can be turned on/off when needed.

Left, aquarium with LED tubes in the lid, right, the Namron power strip

A challenge related to the aquarium is that on warm summer days, the water temperature can get higher than what is ideal (something we can see by the aid of a thermometer attached to the aquarium wall), and it does not help if the lights are turned on and contributing to the warming of the water. We have solved this partly by only having the lights on early in the morning and late at night during the summer. But we have also installed an Ecowitt WN30L temperature sensor, consisting of a small “base station” with a display and a probe that ca be used in water, see picture below. The base station is placed on the wall next to the aquarium so that the probe reaches into the water. It is connected to Home Assistant and from there into Apple Home, where two routines have been created, one to turn off the lights at temperature above 26 degrees and the other to turn the light on below 26 degrees.

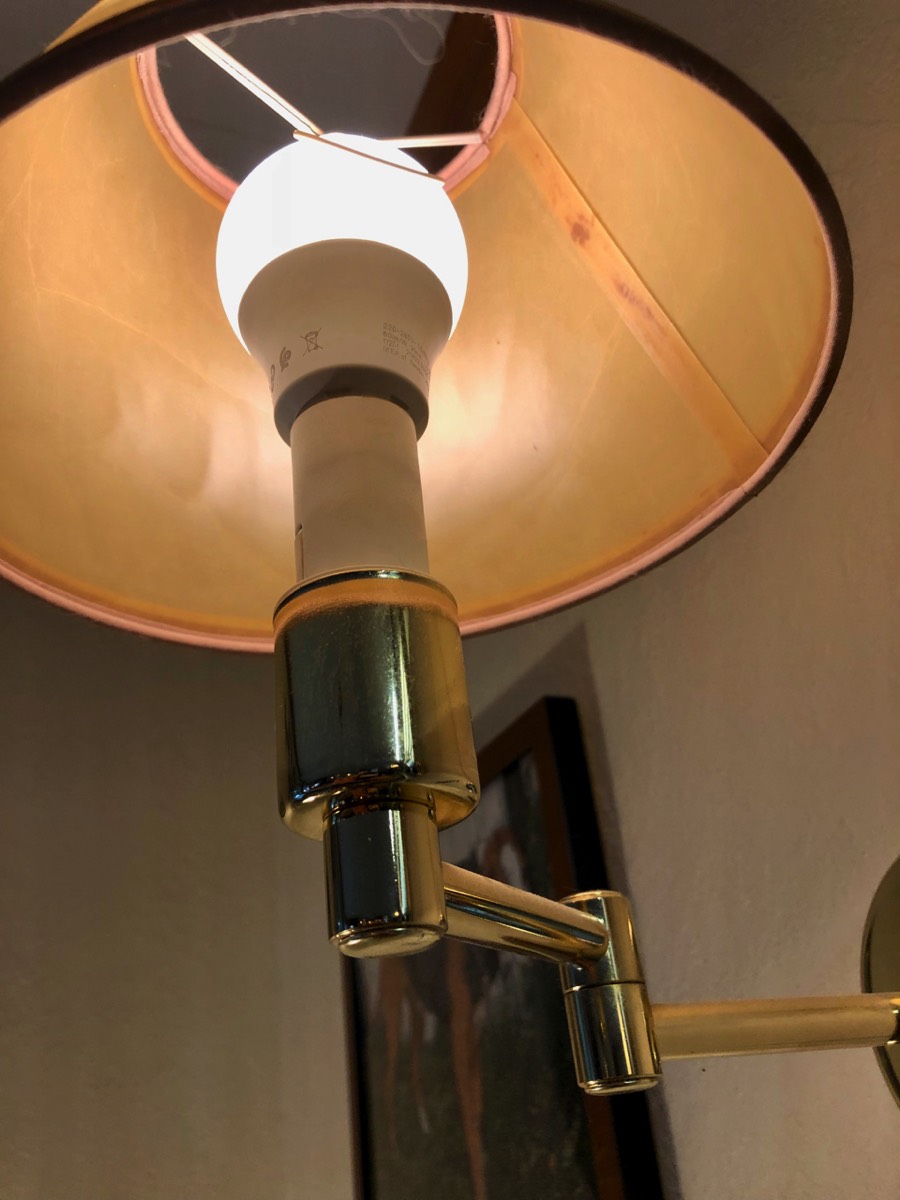
The next light to “attack” was a table lamp. This one had an E27 traditional lamp with small bulb and a shade fixed to the lamp with a clip-on fitter. This fitter was simply too small to force onto a smart E27 bulb, but we solved this by installing a Philips Hue E27 White bulb and replaced the shade with one that has a slip UNO fitter, i.e., where the fitter rests on the socket and is held in place by the bulb, see picture below. This turned out to be a good solution where a smart bulb is too large for the current shade.
Lamp where the old shade with clip-on fitter was replaced by a shade with a slip UNO fitter
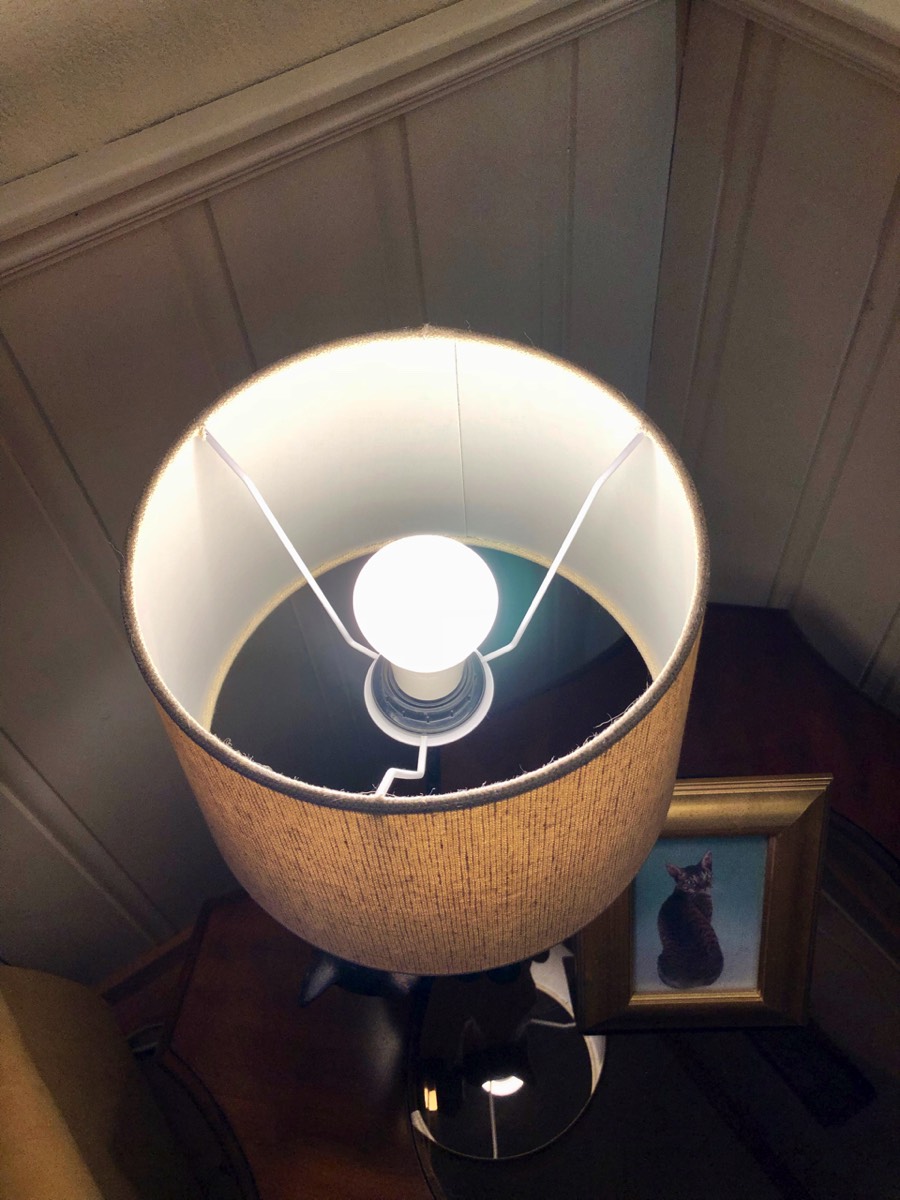
Another lamp, which we had two of in the living room, had an E14 socket bulb, but there was so little room underneath the shade that it was simply not possible to fit a smart bulb. For a long time, these lamps were controlled by smart plugs, but both have been replaced by new lamps. This was triggered by my wife founding a “cat lamp”, see picture a little further down. This has a Philips Hue E27 White Ambience and is placed on a sideboard, together with various other electronics. The other lamp was replaced by a more modern one from IKEA, with an IKEA Trådfri E14 bulb, see picture further down.
Our experiences with the smart bulbs from both Philips Hue and IKEA Trådfri are that these are very stable. We have had cases where a bulb, from both manufacturers, have displayed as “unavailable” or “unreachable”, but this is normally easily fixed by restarting the app or turning off and on again the bulb. We do, however, see some cases where IKEA app must be restarted or is unable to connect to the gateway, while this is almost never the case with the Philips Hue app.
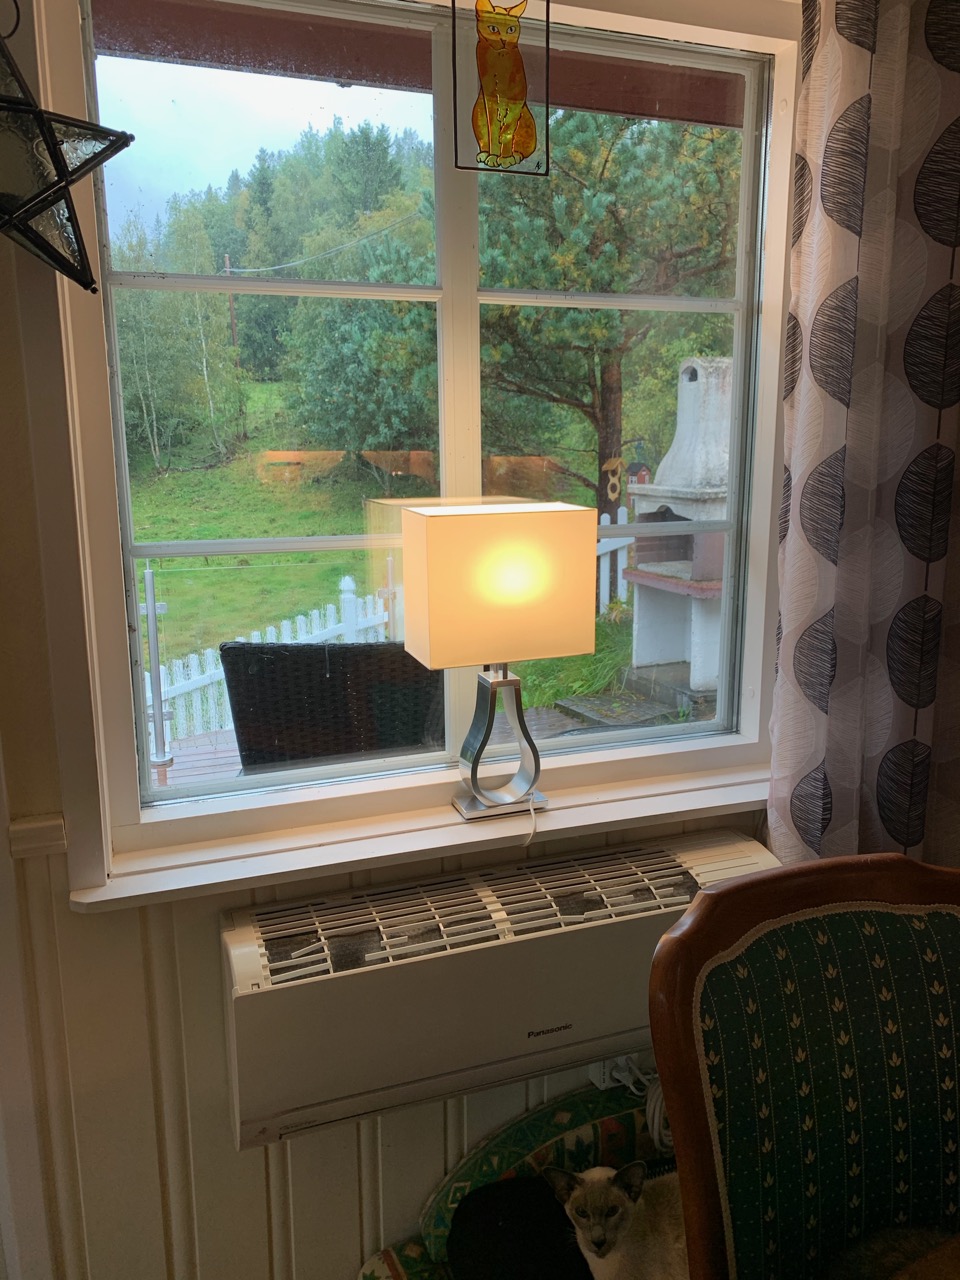
Then it got a bit more complicated, all the remaining light sources in the living room either had light bulbs that had no smart versions (small halogen bulbs, tailored LED lights) or shades that were too small for smart bulbs and which could not be replaced. Some of these were replaced by new lamps, see pictures below, or controlled using the Namron power strip behind the aquarium.

To the left, a table lamp with smart bulb and lamp on top of a cabinet with a bulb type for which no smart version exists, the latter solved using Namron smart power strip placed behind the aquarium
To the right, new window lamp with a smart bulb
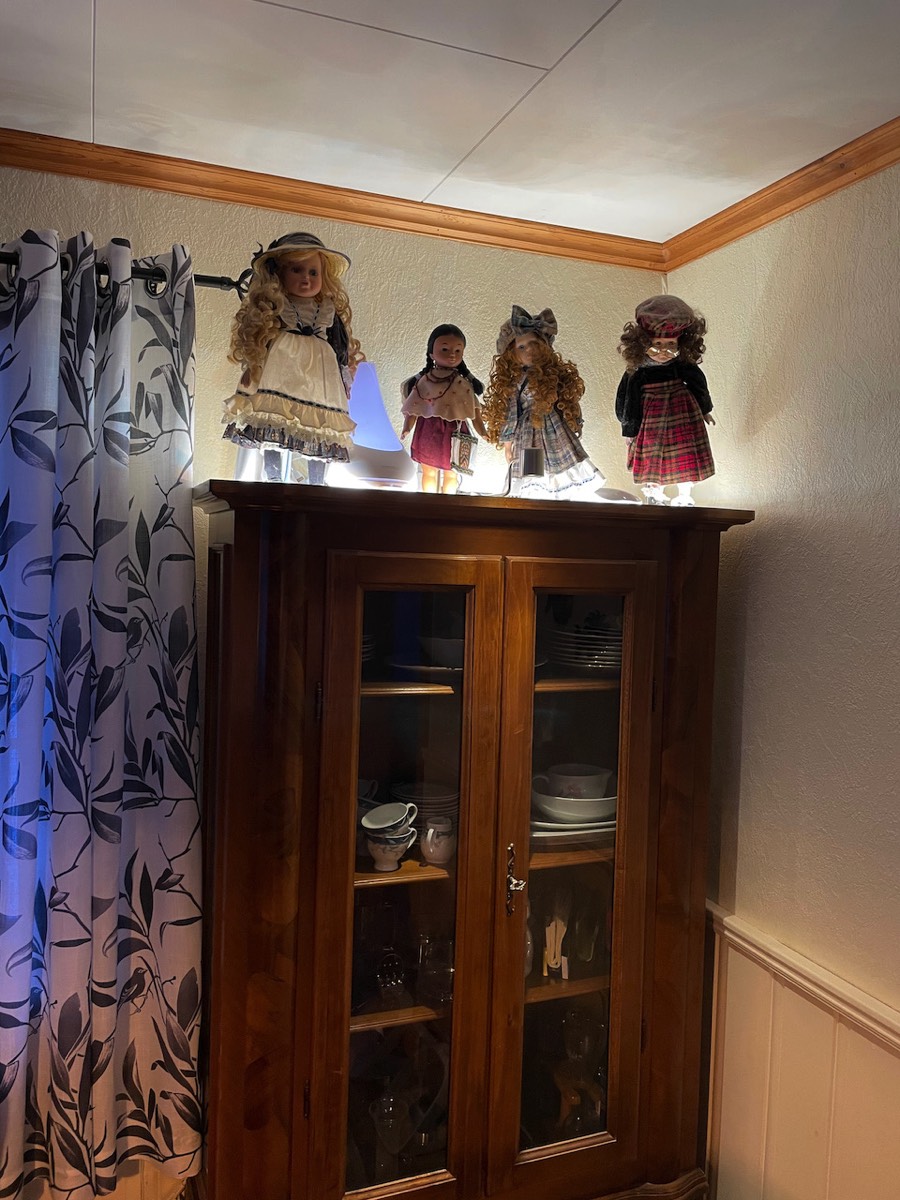
In addition to making existing light sources smart, we have also installed a couple of new light sources on top of a china cabinet in an otherwise somewhat dark corner, see pictures below. First, a Philips Hue white and color ambiance LightStrip Plus provides a nice light and since the color can be changed, it gives the opportunity to change the light depending on the season. Next, there is an IKEA Urshult lamp for cabinets/shelves, which is controlled by an IKEA Trådfri Driver, more about this product below.

As new products have been launched I have both managed to eliminate some of the most “striking” extension cords and control lights independently instead of jointly with others. The means to achieving this was partly the so-called IKEA Trådfri driver (which comes in editions for three and ten light sources), which made it possible to replace a smart plug-controlled light on top of a china cabinet with an IKEA Format lamp, see picture below.
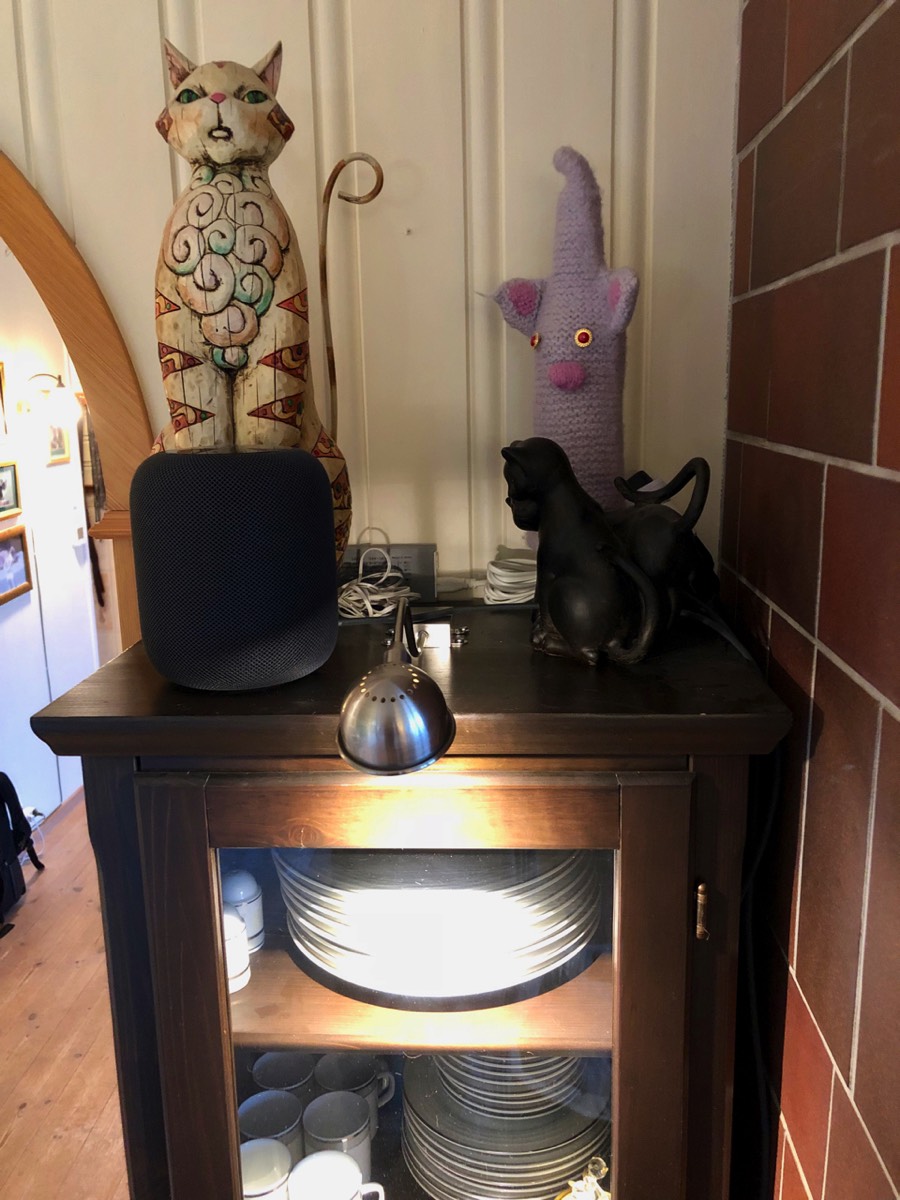
IKEA Format lamp installed on top of a cabinet, with the IKEA Trådfri driver in the background (and the Apple HomePod in front)
Three other lights where it was impossible to install smart bulbs are controlled using a smart power strip, see picture below. This is a most useful type of product, which has four power outlets and two USB A ports, which can all be controlled independently. This, it can replace four individual smart plugs; we have connected to this one a floor lamp, a painting light, a set of two window lights, see pictures below, and during Christmas also holiday lights are connected. Furthermore, we have two charging cables for iPhones connected to the USB ports that make it easy to charge by the sofa. Previously, we had a Koogeek smart power strip here, but this used WiFi for communication and it was somewhat unstable and sometimes being offline. We therefore migrated to this one from Namron, which uses Zigbee. A disadvantage is that it is not natively compatible with Apple Home, but connected to Homey, it is exposed directly to Apple Home.
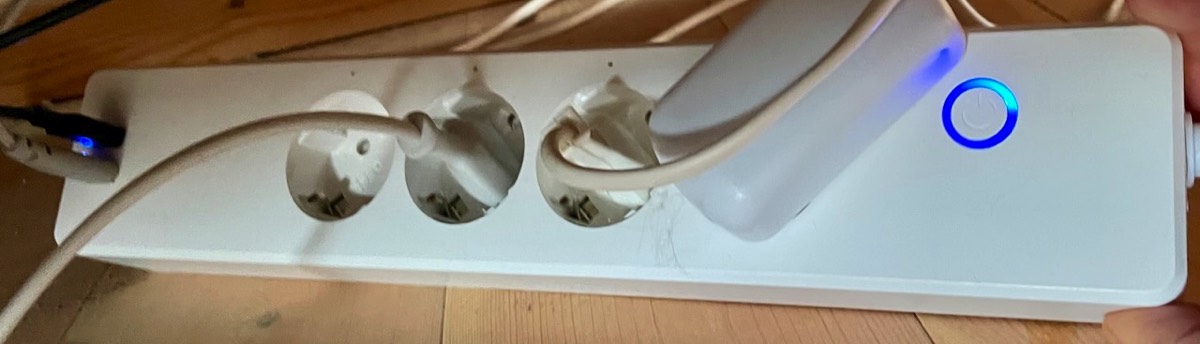
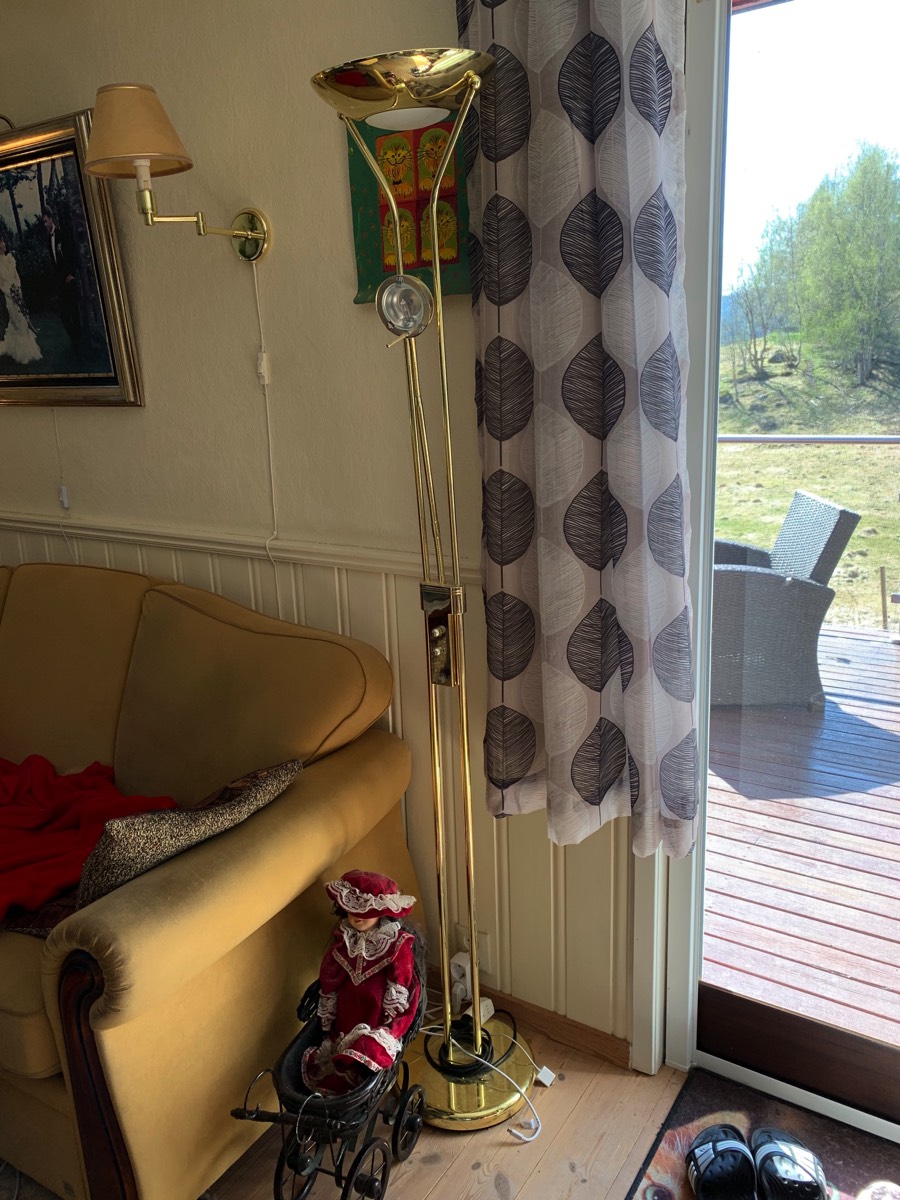
Floor lamp, window lights, and painting light that could be solved using a smart powerstrip
We had for quite some time been on the lookout for a ceiling fan that also had a light source and in addition was smart enough to be integrated into the smart home. For a long time, there have been such that are even compatible with Apple Home, but only for the North American market. In 2024, I discovered that such products had been launched that were built on the Tuya platform, and when this now also plays nice with Apple Home through Homebridge, this project could finally be completed. We ended up with a fan called Lindby Paavo, see picture below, which is both bright (up to 1,600 lm) and with a fan that makes very little noise. It can be controlled using Smart Life app, with an enclosed remote control, and even through Apple Home, where all functions work perfectly.
We have also installed an Aqara climate sensor with display og three buttons here, see picture below, primarily to control the ceiling fan/light. This has been programmed so that one button turns the ceiling light on/off, another the ceiling fan on/off, and the last opens/closes a sunscreen (described further down)

Left, Lindby smart ceiling fan with LED light, right, Aqara climate sensor/switch

In terms of programming/automation, the lighting in the living room (and much of the rest of the house) is set up as follows:
The scene “Good Morning”, which is activated at 06:30 every morning or by using the command “Hey Siri, Good Morning”, turns on a couple of lights in the living room (as well as a few others in the kitchen and library)
In the afternoon, some additional lights are turned on, but I have experimented throughout the years to find a good solution for:
Originally I had set up two programs with some different lights for summer and winter time, and these were activated partly based on the sunset and partly on a fixed time, but the result was that lights would often turn on too early or late compared with the actual light levels inside the house
Therefore, a Philips Hue motion sensor was installed, in the conservatory, and the light level measurements it provided were used to time this scene, but it was challenging to determine the suitable lux level to trigger the scene
In the end, I have ended up with a somewhat more complicated solution, but which works well:
There is a Homebridge plugin, homebridge-automation-calendar, which provides a large number of opportunities for defining “sensors” that give different values for factors like seasons, months, time of day, etc.
My need was to control the lights in a more fine-grained fashion based on sunset throughout the year, so that in the lighter months of the year the lights turn on perhaps 2-3 hours before sunset, while in the darker months at sunset
This is achieved by obtaining values from 1-12 (for each month) and set up routines where the activation time related to sunset is tailored, and which turns on a virtual switch called “Afternoon Lights Condition” (see screenshot below)
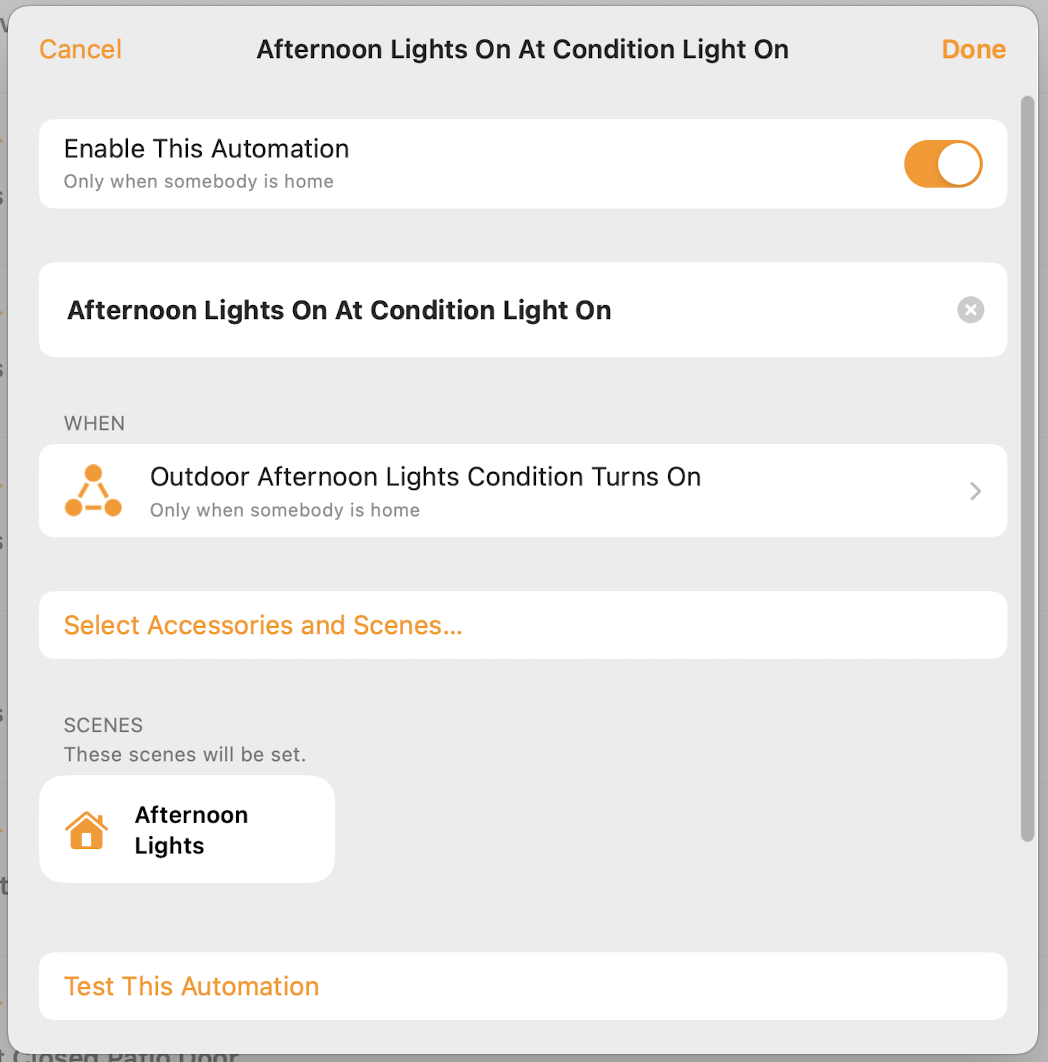
⁃ Then another routine for this visual switch is set up so that when it turns on, the scene “Afternoon Lights” is turned on (see screenshot below) ⁃ The virtual switch is, by the way, turned off at midnight so it is ready for the next day
Equally for the evening lights, this is done the same way:
Here the scene “Evening Lights” is activated, which turns on furthermore lights in the rooms we use the most
This is done using another virtual switch, “Evening Lights Condition”
Otherwise, it works exactly the same way as for Afternoon Lights, just later in relation to sunset
bare senere i forhold til solnedgang
The lights in the aquarium are programmed to turn on/off as fixed times, but with longer periods turned on during winter than summer
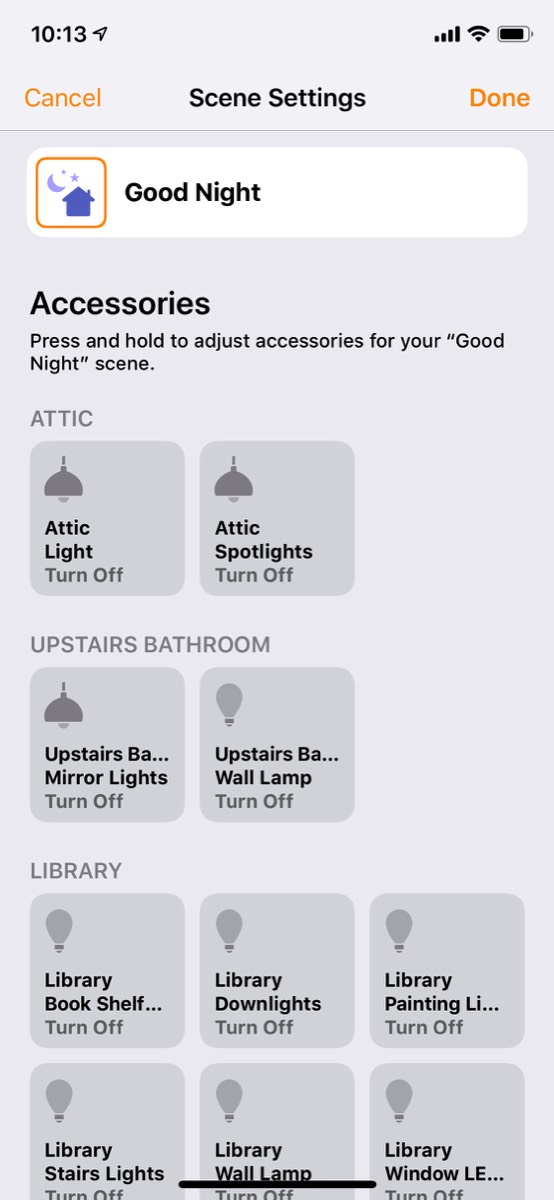
The scene “Good Night”, which is activated by by using the command “Hey Siri, Good Night”, turns off all the lights in the living room and the rest out of the house (except for outdoor lights) as well as the home entertainment system (it could also have been programmed to turn down the temperature a couple of degrees, but since the cats hate being cold, we have not implemented this...).
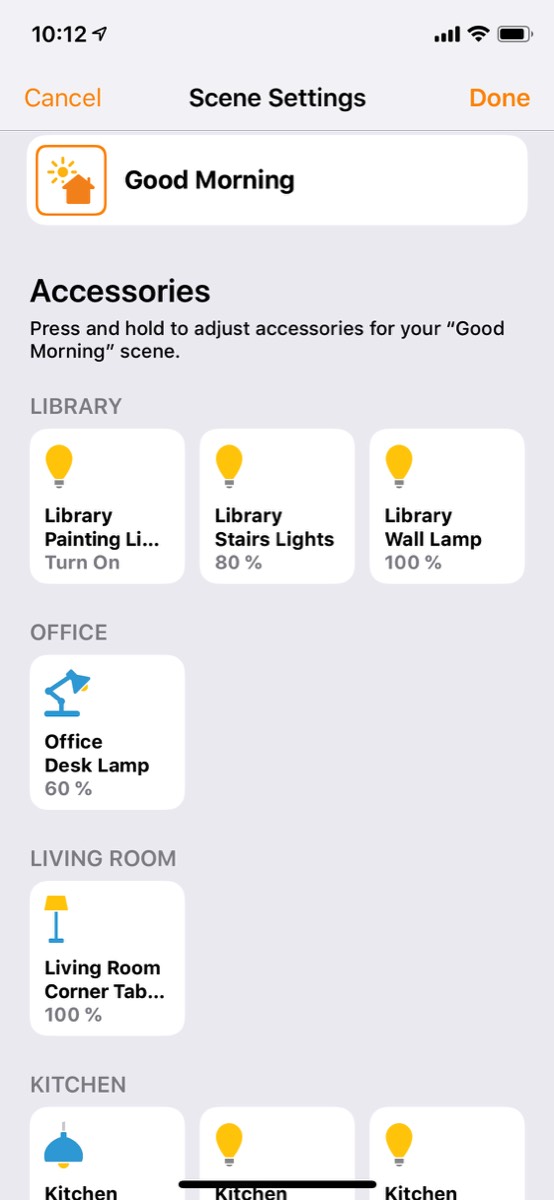
The "Good Morning" scene, which is activated at 06:30 or by saying Good Morning to Siri
The scene "Afternoon Lights", which is activated at suitable times in the afternoon, this varies around the year
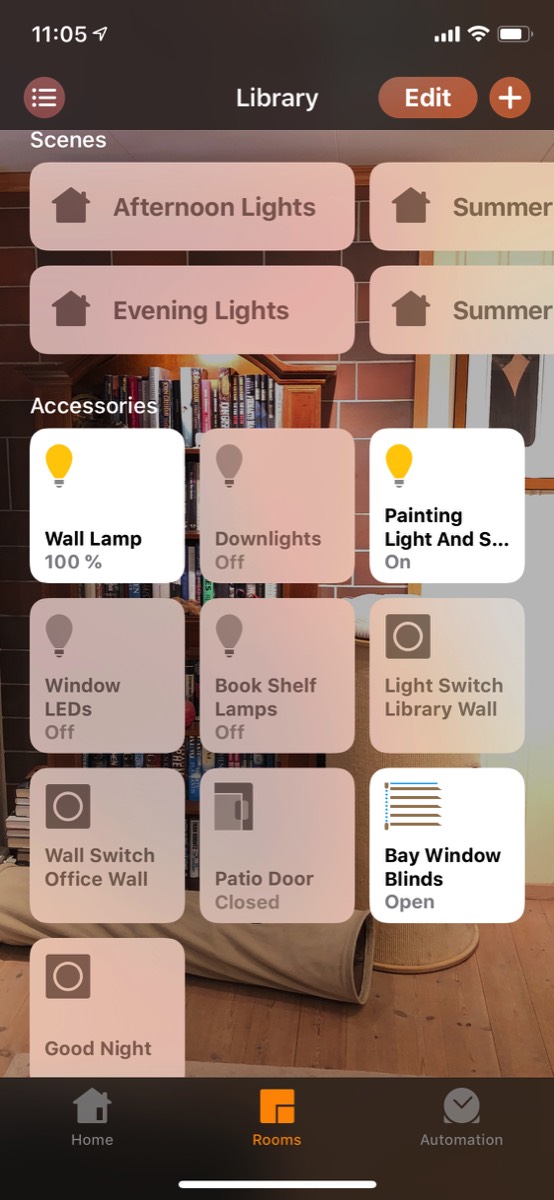
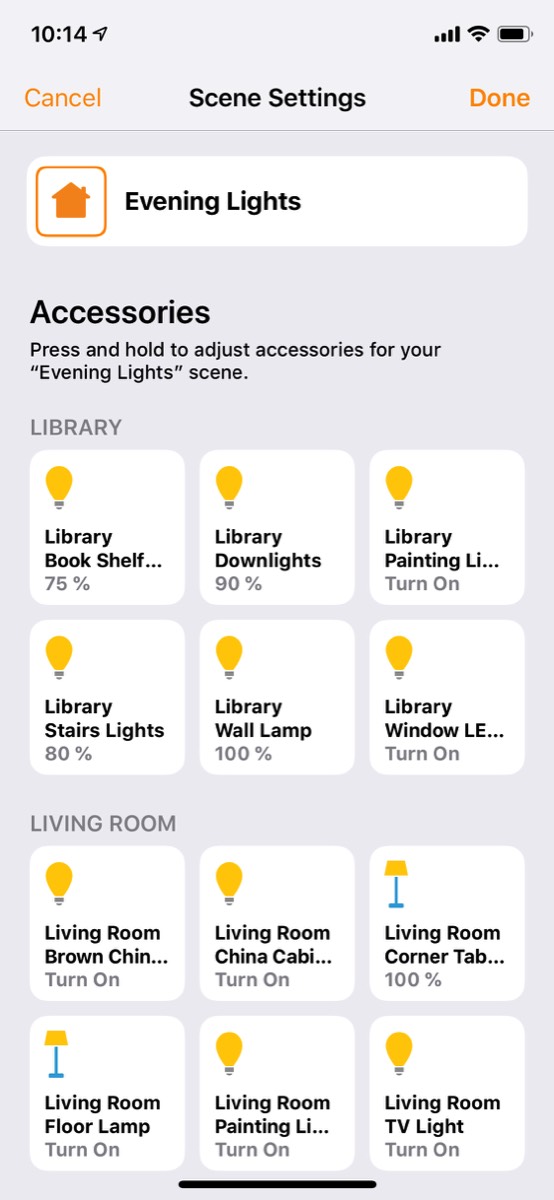
(Parts of) the scene "Evening Lights" (it includes more lights which are not shown in the screenshot), which is activated one hour before sunset, no matter which time of year it is
(Parts of) the scene "Good Night", which is activated by saying Good Night to Siri or by using the Hue switch outside the door to the bathroom upstairs
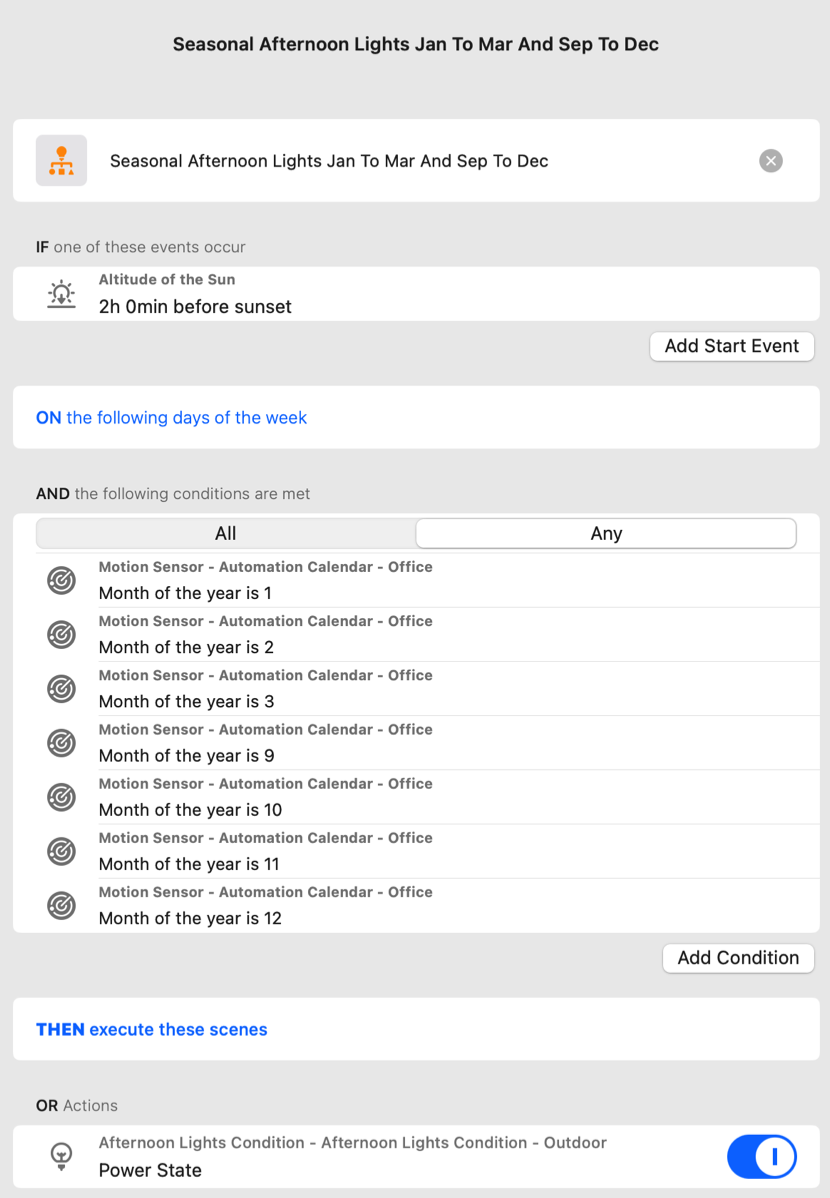
The routine that activates the virtual switch Afternoon Lights Condition 2 hours before sunset if the month is between September to March (such a routine must be defined in an too like ControllerForHomeKit)
The routine where the scene “Afternoon Lights” is activated when the virtual switch turns on
I have also considered creating a “vacation program” that turns on/off random lights (and preferably also audio) throughout the day, but have so far not seen the need for this.
With the house full of cats, using real candles it out of the question, including scented candles, even if we could sometimes wish to use one of those. And in fact we can, since SwitchBot has launched a smart lamp with a heating bulb that “melts” the candle so that it releases its scent. The candle truly melts so that wax floats on top of it, something the cats could definitely make a mess out of, so the lamp has been put on top of a tall cabinet, see picture below. With Matter support, the lamp can be controlled from the Apple Home app, and it is also connected to Home Assistant. The latter has proven useful, since the candle warmer sadly is quite unreliable; it will often lose the connection to either WiFi or to Apple Home/Home Assistant via Matter. An effective solution has been as follows: Connect the candle warmer to power via an IKEA smart plug and create a routine in Home Assistant that detects when the candle warmer becomes unavailable and then turns off the smart plug for a minute before turning it on again. This fixes the problem, until next time it appears.

We have also tried to pgrade the Christmas tree lighting, first after Twinkly announced a firmware update that gave Apple Home support to many of their fancy lighting products. We purchased a so-called Strings chain of 250 LED lights, that can be set up in the Twinkly app to create many nice light effects. Sadly, a couple of the cats got so obsessed with the wires to these lights that the string had to be moved outdoor and a new attempt was made with a Govee “light tube”, see picture below. Partly the connection between the LEDs is more solid and partly we have learned to run the wire from the power supply into the top of the tree, so this one seems to survive. It can also be set up with nice “scenes”, but is not as advanced as Twinkly’s solution, where one uses the camera on the phone to let the app see how the lights have been strung around the tree. It does not have support for Apple Home either, but this is handled through Homebridge.
Govee Christmas lights, that can be set up to run amazing effects

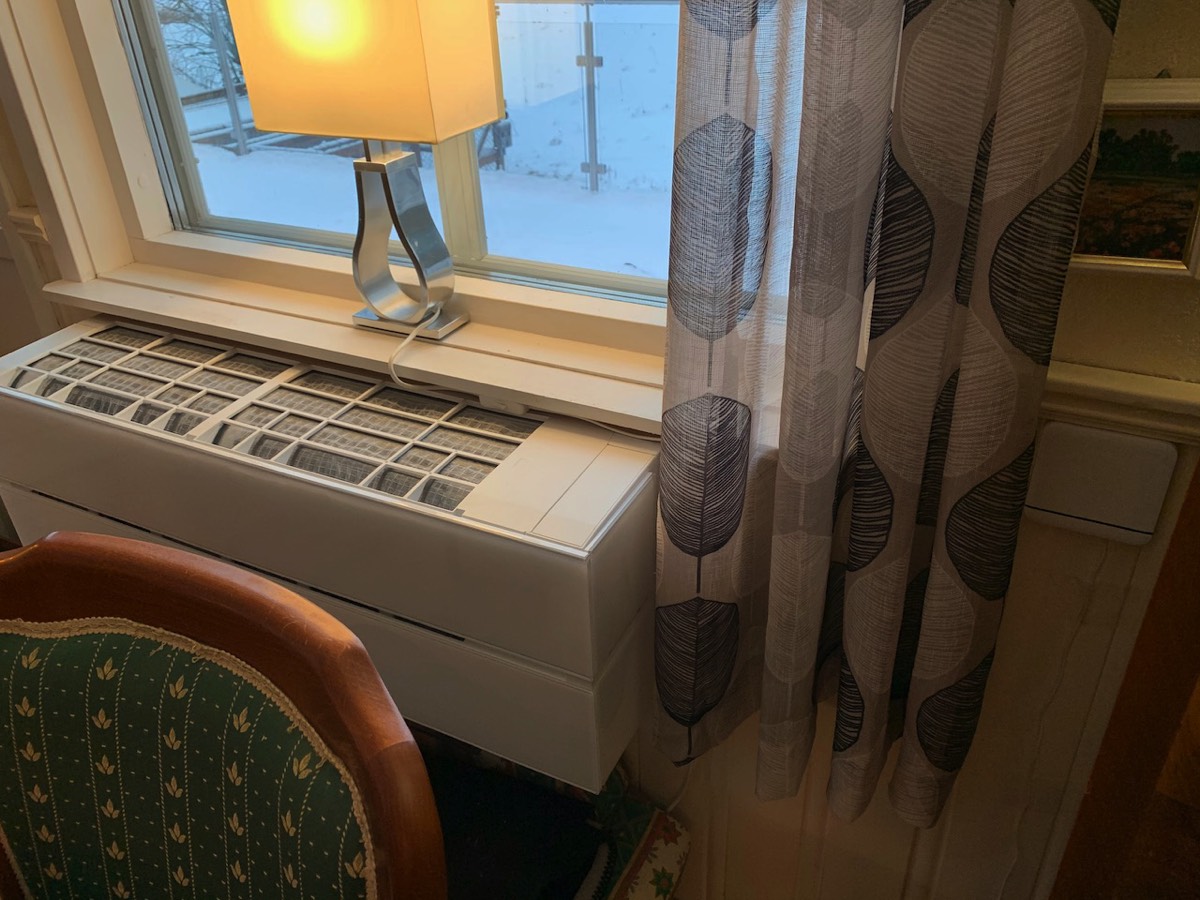
Here in Norway. climate control typically means heating rather than cooling and the main device for heating in our living room (and house, really) is a Mitsubishi Black Diamond heat pump/inverter. This heat pump is WiFi connected and can be controlled using an app on a phone/computer, but only as a stand-alone device. For better integration into the smart home, we use a solution that emulates the signal from the remote. There are different alternatives in the market; we ended up with a Sensibo Sky, where the decisive factor probably was that this product is sold through a company called Tibber. This is essentially a Norwegian company that sells electric power, but also offering innovative ways for customers to keep track of their power consumption as well as save power. Our experiences with the Sensibo Sky were fairly good, but it did not have Apple Home support and I there had to resort to a Homebridge plugin. Even this worked fairly well, but as explained a little further down, we wanted a setup where the inverter would turn off if a door/window was opened and on again when closed. This saw quite frequent errors, with the heat pump turning to cool mode when restarting, and I suspect that this had to do with the Apple Home integration.
So when tado launched a new version of its air condition controller, tado° Smart AC Control V3+, which was also Apple Home compatible, the solution was to upgrade to this, see picture below. This has some functionality beyond what the Sensibo Sky could offer, like weather forecast adaptation, more extensive statistics, and even built-in open window detection (this latter did not, however, manage to detect an open door or window at some distance from the unit). It should be said that there were some initial setup issues, in that the default AC mode is cooling, so that at temperatures above the target value, the inverter goes into cool mode. There is very rarely a need for this here in Norway and it consumes much power, so I had to get this changed to heating being the default mode, which was not completely intuitive. Otherwise, my only complaint is that the enclosed double-sided tape was a bit weak when placing the device on wooden paneling.
After I set this up, people have developed both a Homebridge plugin and a Homey app for MELCloud, which brings the heat pump into Apple Home, without having to go via the tado device.
The heat pump mostly tends to itself; it is typically set to the temperature around the clock and around the year. It would be easy to create temperature profiles for lower the temperature during night/other times with less need for heating, but we have not done so out of fear for reprisals from the cats. What we do want to avoid is that the heat pump is in heat mode when a door or window is open, as this will have the heat pump trying to compensate for the cooling effect and just wasting energy. I have therefore implemented a solution where the heat pump is turned off if a door or window is opened, and this utilizes data from a number of sensors:
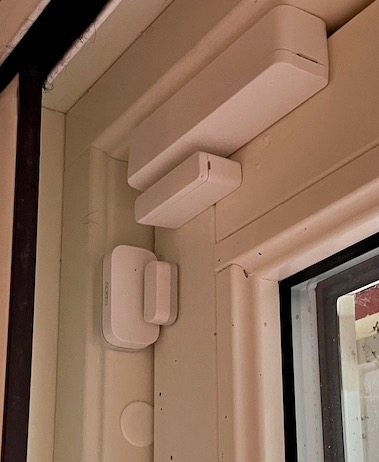
Either one of two Aqara door sensors for patio doors here in the living room and the adjoining library
Aqara window sensor in the office, but this is combined with an Aqara door sensor on the office door, so that the heat pump only turns off if the window is opened and the door is open
Velux/Netatmo skylight in the conservatory
See pictures of some of the sensors below, and a video explains the details of how this has been done.
Aqara door sensor installed under the Verisure sensor
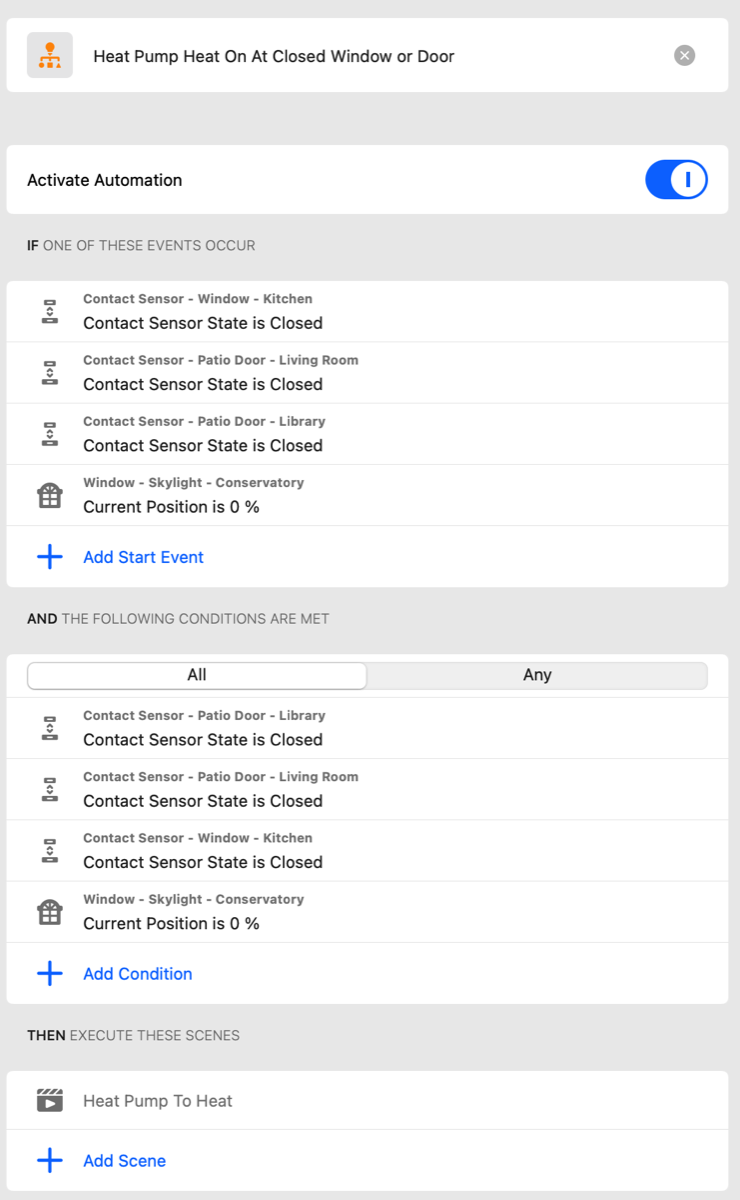
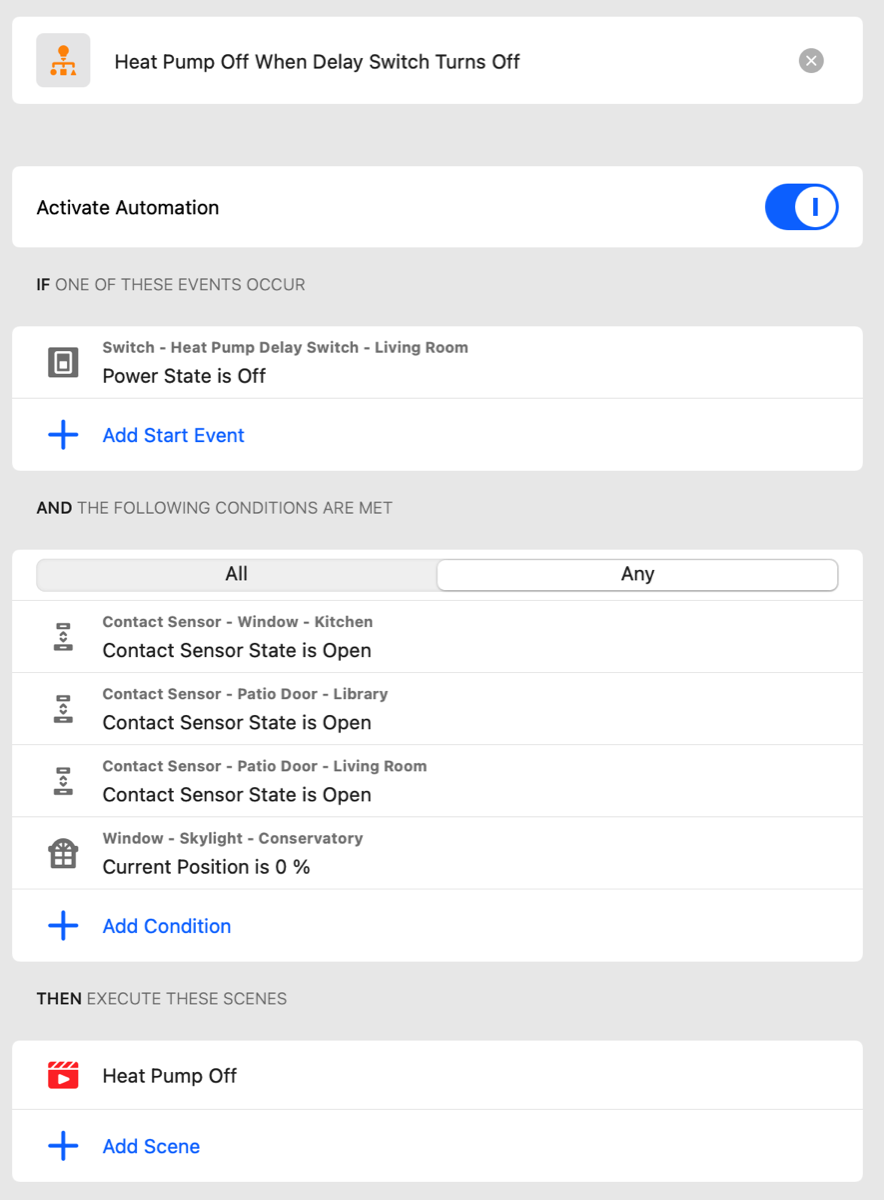
Having the heat pump turn off when opening a door/window was for a long time a simple “two-step” program, see screenshots below. However, we also want the heat pump to turn on again automatically when the open door or window is closed again (in the beginning, I had not set it up this way and it would often happen that we forgot to turn on again the heat pump after having aired the living room). This is a little more complicated and an example of having to resort to other apps, allowing a more extended “trigger-condition-action” logic. This allows creating more advanced programs, and I have now set this up in the ControllerForHomekit app, see screenshot below. When one of these door/window sensors is closed, the routine checks whether all the other sensors are also closed, and if so, the heat pump is turned on again.
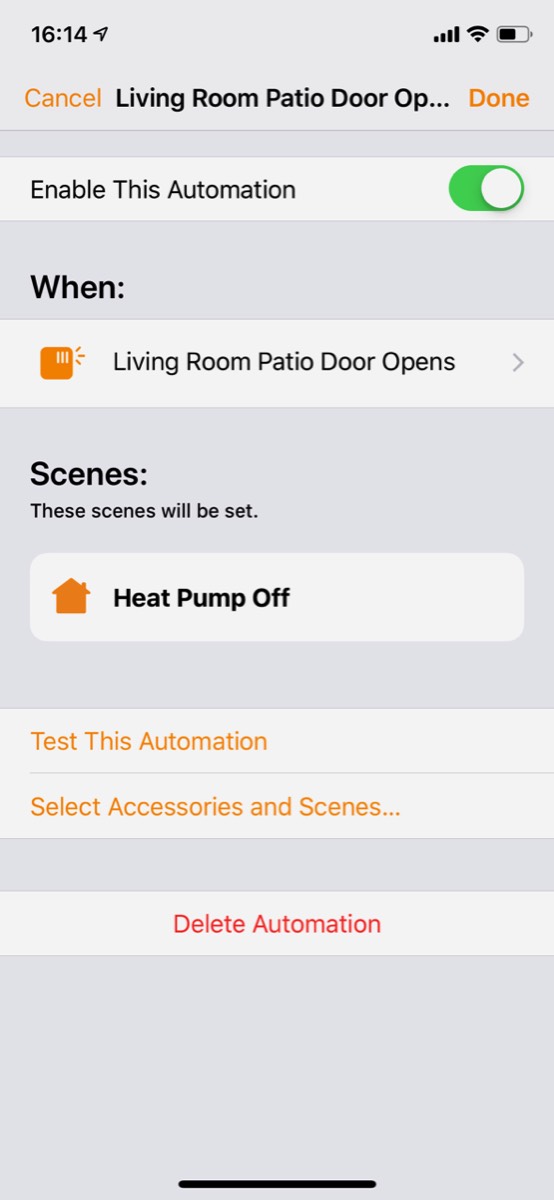
On the left, simple rule programmed in the Home app, where the heat pump is turned off if the living room patio door is opened (there are identical rules for the other doors/windows)
On the right, more complicated rule (which must be created in an app that allows more complex rules, even if it can afterwards be viewed and modified in the Home app) which responds to a signal from a door/window that it is closed, checks if the other doors/windows are closed, and if so, turns the heat pump on
The automation to turn off the heat pump when the patio door was opened did not work as well as I hoped; when only exiting or entering through the door, the automation fired straight away to turn off the unit. However, the actually turning off took some time, so when the door closed again shortly after, this was still in process. This meant that the heat pump did not always react to the signal to turn on again. I therefore first created a combination solution of Apple Home and Shortcuts, such that an open door sensor signal triggered a Shortcut that ran a delay of 30 seconds before turning off the heat pump. This did work, but I later realized that this could more easily be solved using a virtual countdown switch in Homebridge. This appears as a switch in Apple Home and it is turned on whenever one of the patio doors open (an open window could also turn it on, but it practically never happens that these are open and closed again straight away), and it stays on for one minute before it turns off. The algorithm is programmed so that when the virtual switch turns off, it checks whether the patio door is still open. If so, the heat pump is turned off, but if the patio door has been closed again, the heat pump remains on, see screenshot of the programming in ControllerForHomekit below.
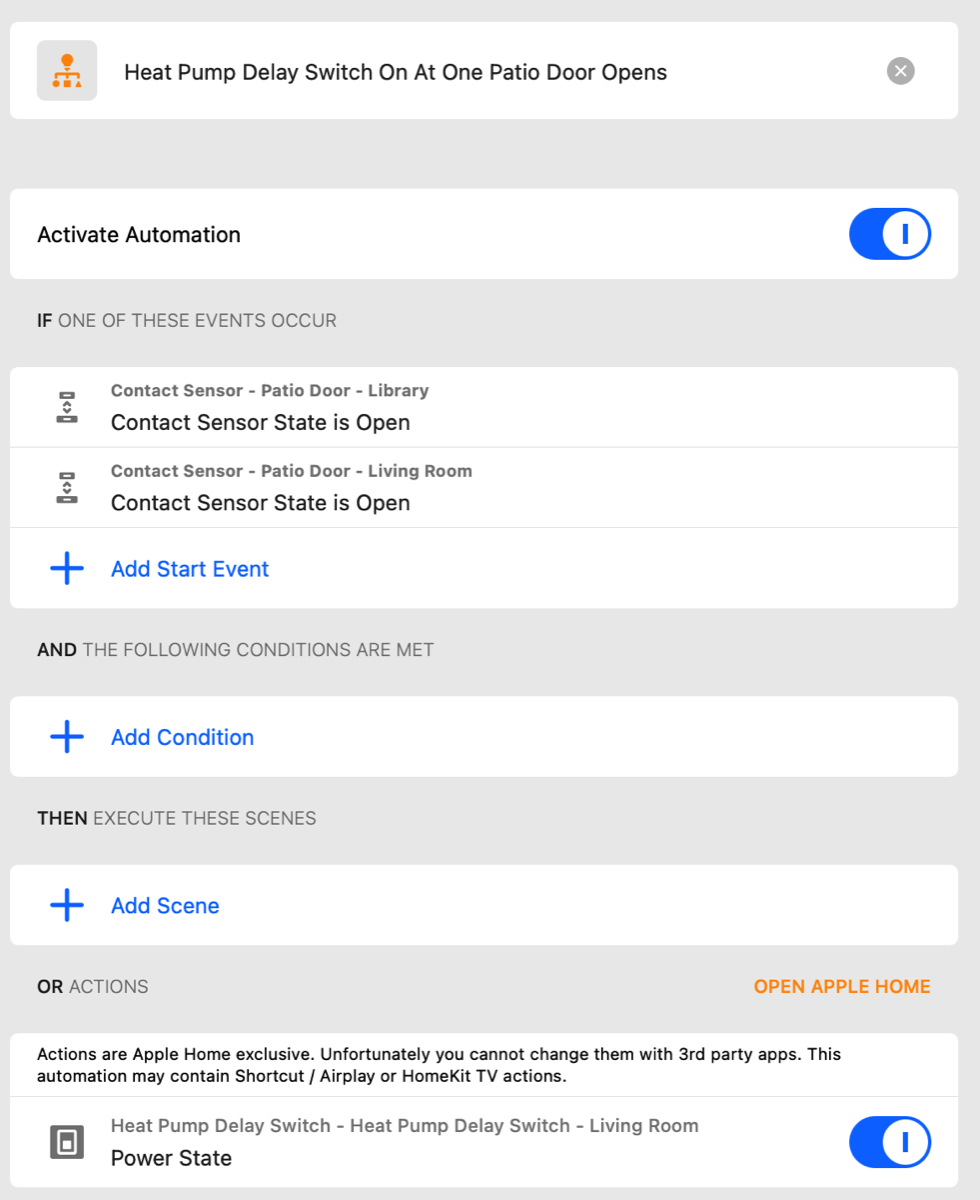
Programming where the virtual switch is turned on if the patio door is opened, while on the right the routine to turn off the heat pump if the door (or a window) is still open
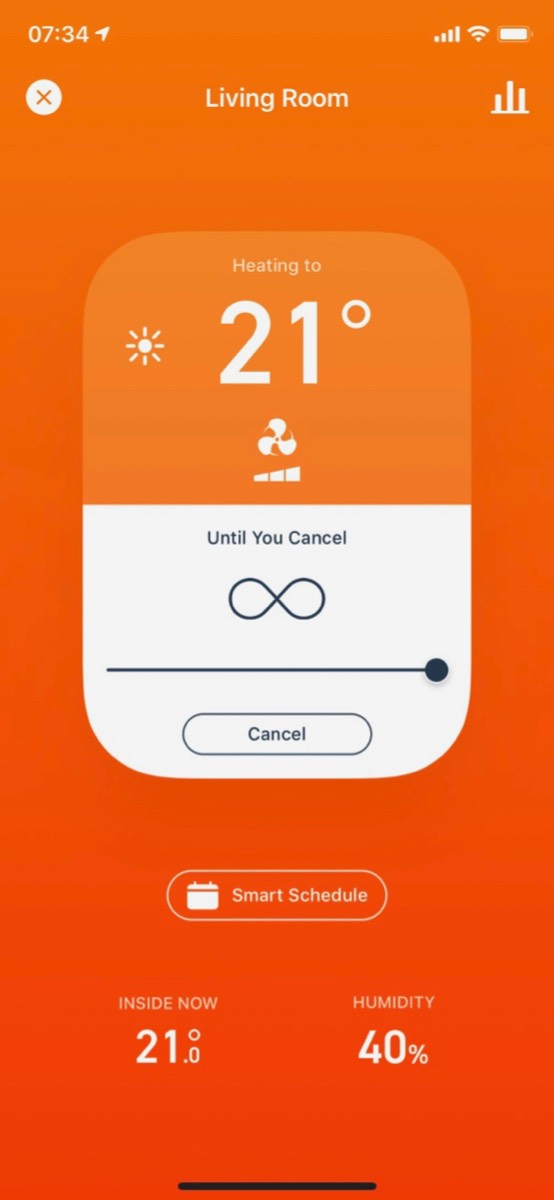
The tado app is mostly clean and intutive, see screenshots below.
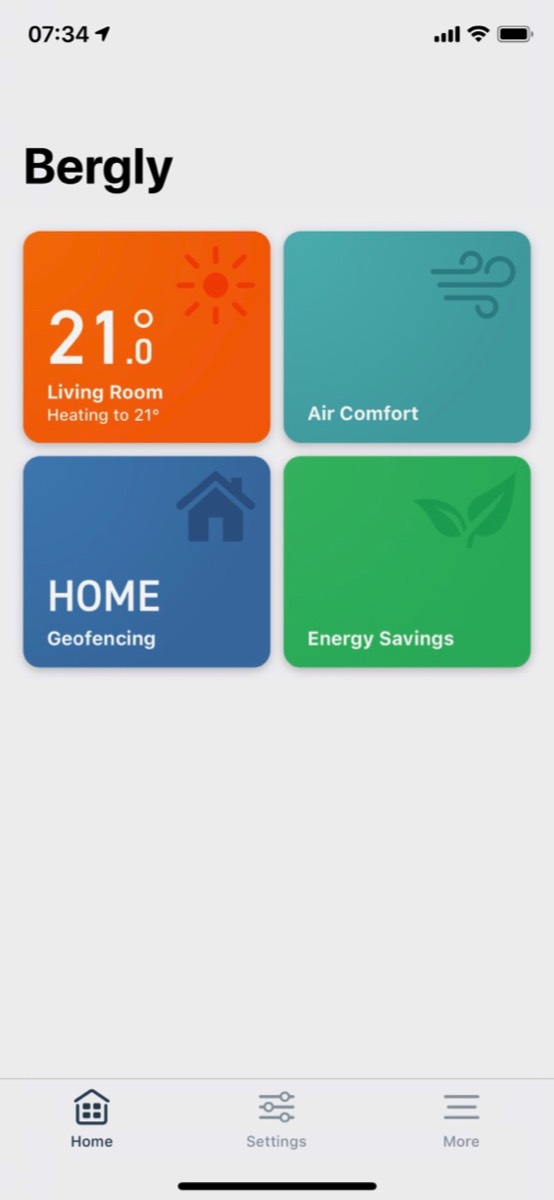
Screenshot from the tado app, with status overview to the left and the interface for changing mode and temperature to the right
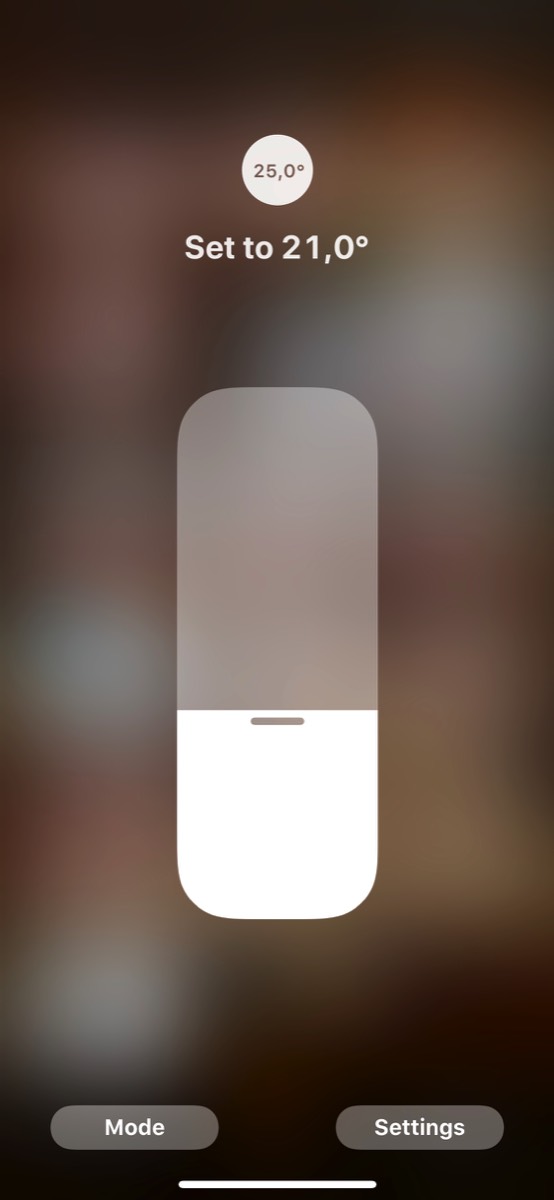
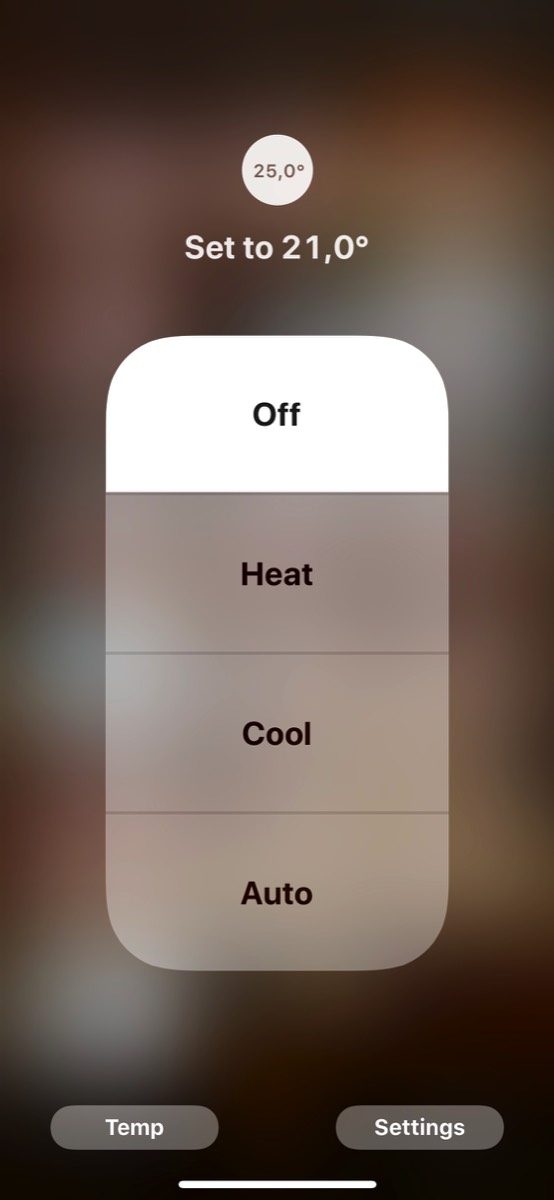
In the Home app, the heat pump shows up like this, where temperature and mode must be set in two separate interfaces
Interface for changing the heat pump mode in the Home app
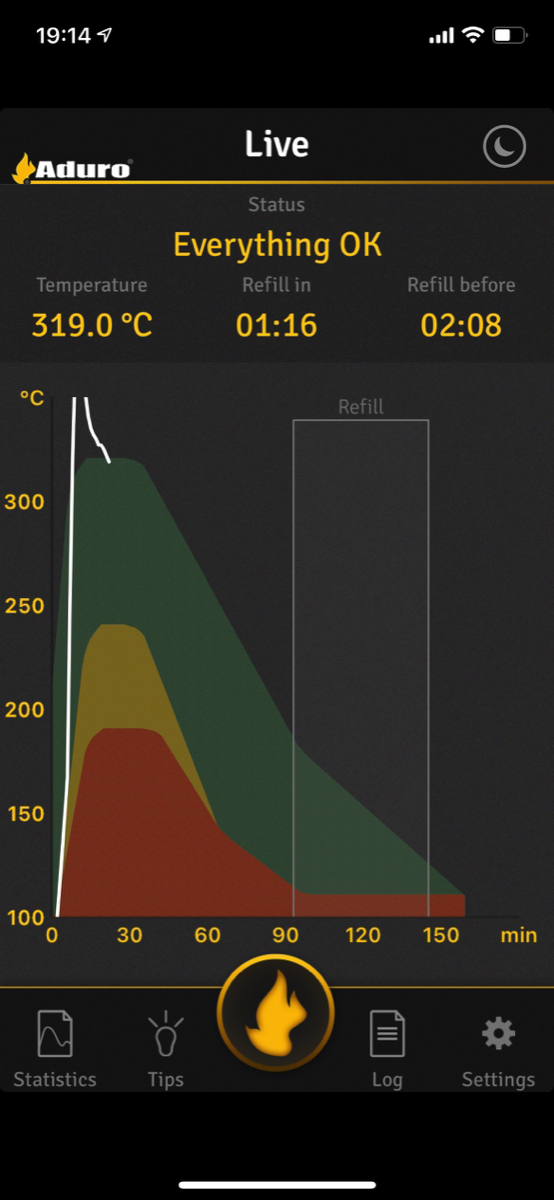
On very cold days, we supplement the heat pump by burning wood, and after a very old stove was replaced with a modern Aduro 1.1 stove, also this has become smart now. As an accessory to this stove, it is possible to install something called an Aduro Smart Response, see picture below of the visible part (a battery housing), which is a sensor that reads key data about the burning process. This is connected to a smartphone using bluetooth and makes it possible to track the stove temperature (see sample screenshot below) and get notified when more wood should be added. This makes is very easy to maintain optimal conditions for best yield from the wood.
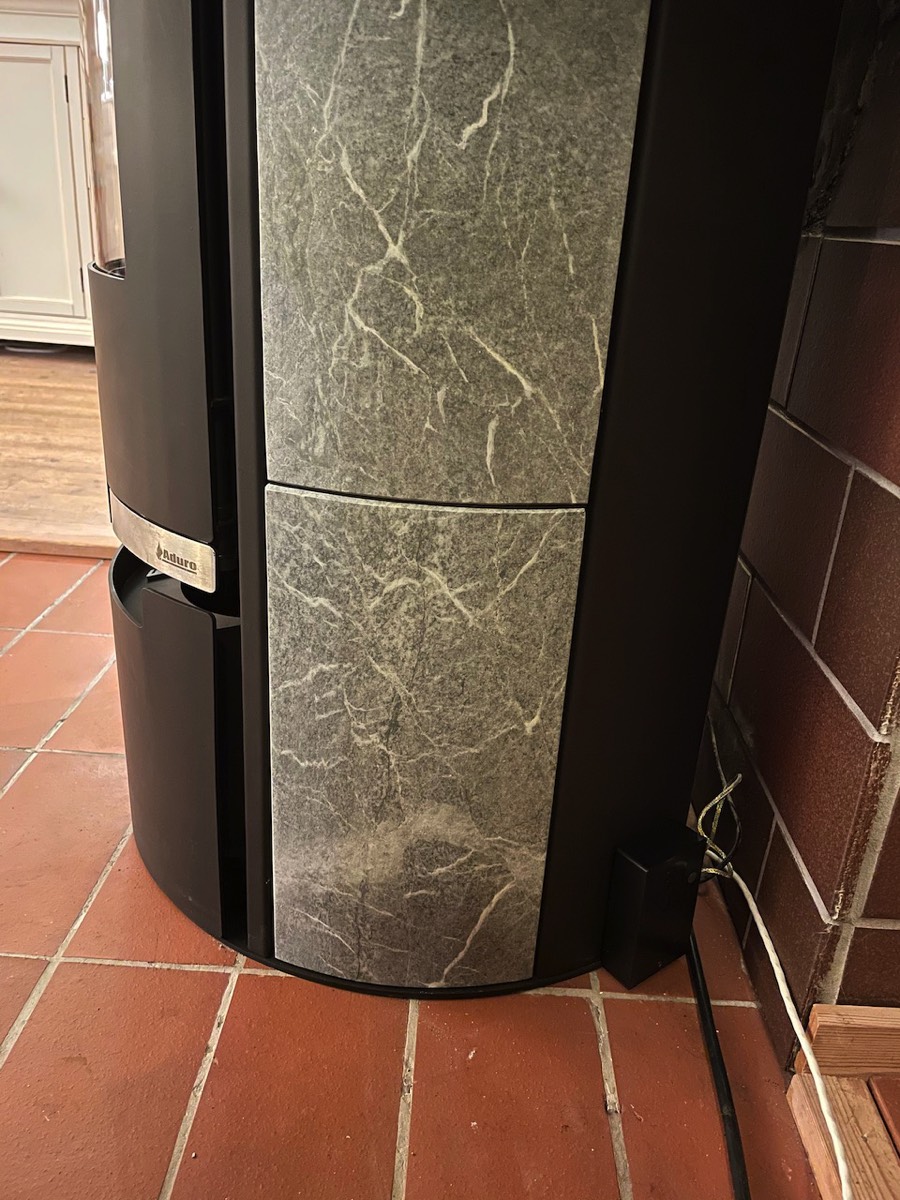
The visible part of the Aduro sensor, the rest is inside the stove
Screenshot from the Audio app
In the category of climate control, we also have an Ecowitt weather station, where the gateway for this, a GW1000, has been placed on top of a cabinet in the living room, see picture below. This serves partly as a gateway for a connected weather sensor outdoor and it partly provides some data about the climate in this room. It should also be mentioned that this Ecowitt station replaced a similar device from Netatmo, which both had issues with the WiFi and where the outdoor module in the end just stopped working.

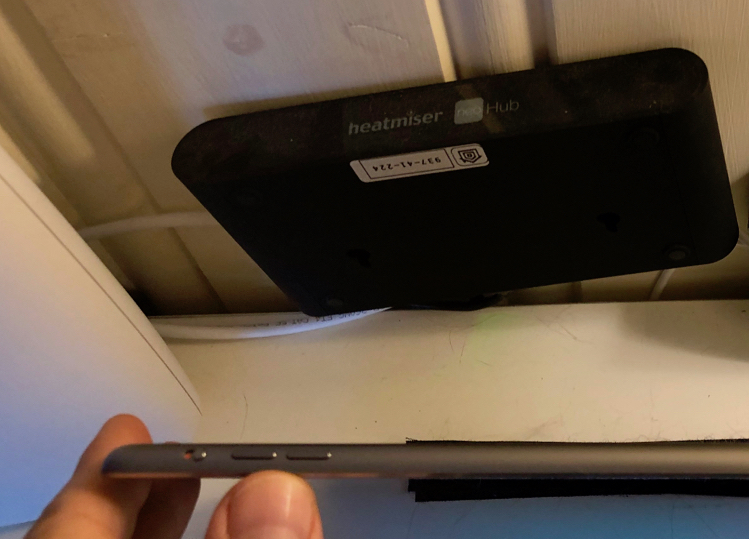
The next device related to climate control is the base station for our six Heatmiser neoStat-e thermostats, called Heatmiser Neo Hub, see picture below. The hub isn’t especially interesting in and of itself, but an important reason for chossing these Heatmiser thermostats was that the version 2 of the hub supports Apple Home. The first weeks after installation, we had some problems where it would be disconnected and had to be restarted, and sometimes the Heatmiser app has been logged off. Mostly, though, this Heatmiser system has worked very well.
The Heatmiser Neo Hub is mounted on the wall using velcro tape, behind the iPad used as a digital photo frame
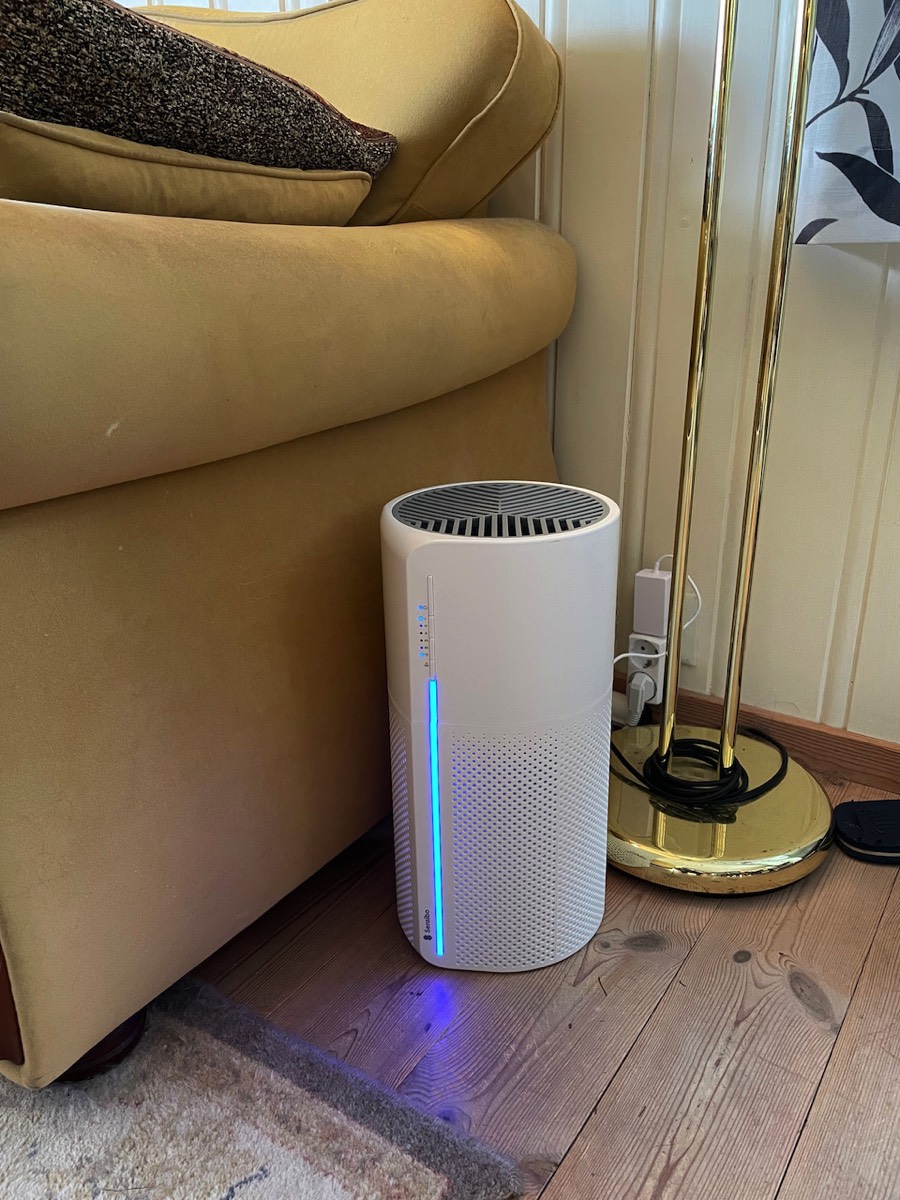
With one of us being allergic and with patio doors often open, an air purifier is useful. We first acquired one from Xiaomi, but after a while this started to make so much noise we moved it to the basement living room. After this, several air purifiers with support for Apple Home have been launched, and we have purchased a Sensibo Pure, see picture below. It was easy to set up, is better looking than the one from Xiaomi, and it seems like the filter will last longer before needing a replacement.
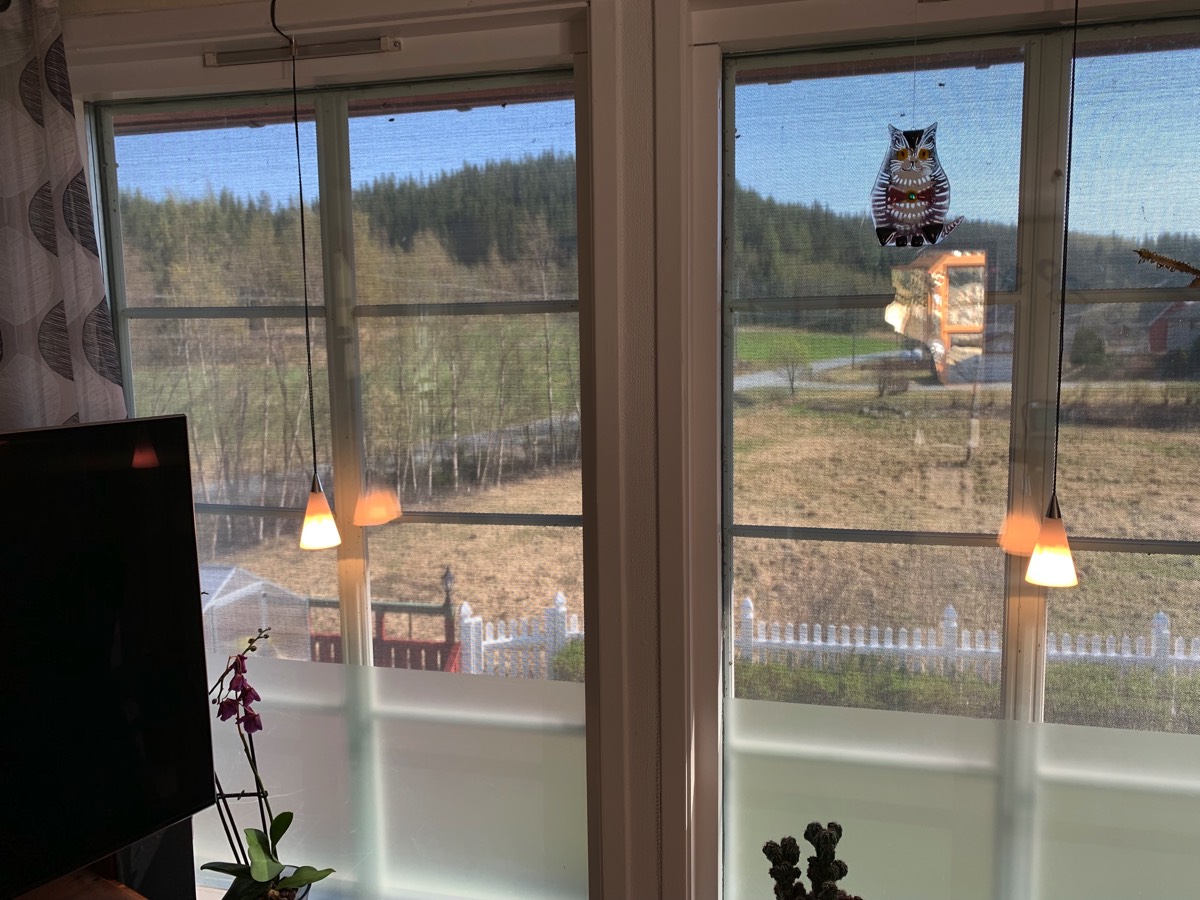
After changing TV and rearranging the location of the TV in the room, sunlight on the screen became annoying. We therefore installed two IKEA Fyrtur roller blinds to cover south-facing windows, see picture below. It only took a little adjusting of the distance from the wall to the curtain rods and they fit perfectly, and they block light very well.
Fyrtur blinds

The last solution within climate control, but which also borders on home entertainment, is control of sun protection. We had an old-fashioned awning covering three large windows in the living room, but it was sensitive to wind and we had it replaced with an exterior shade, se picture below. This could be installed for control either from the existing wall switch, from an RF remote control, or with a Somfy control solution allowing control from a smartphone. Since none of these solutions neither were compatible with Apple Home (although Somfy has been promising Apple Home support for some time) nor could be integrated using Homebridge, we chose to install only the shade itself and connect it to the manual wall switch (and to an existing Sonneboy automatic sun/wind control unit). This worked quite well; the shade went down when the sun got to a certain brightness and down again when it got less bright or the wind got too heavy. We could also control it manually, but the wall switch was located a bit hard to reach behind the TV.

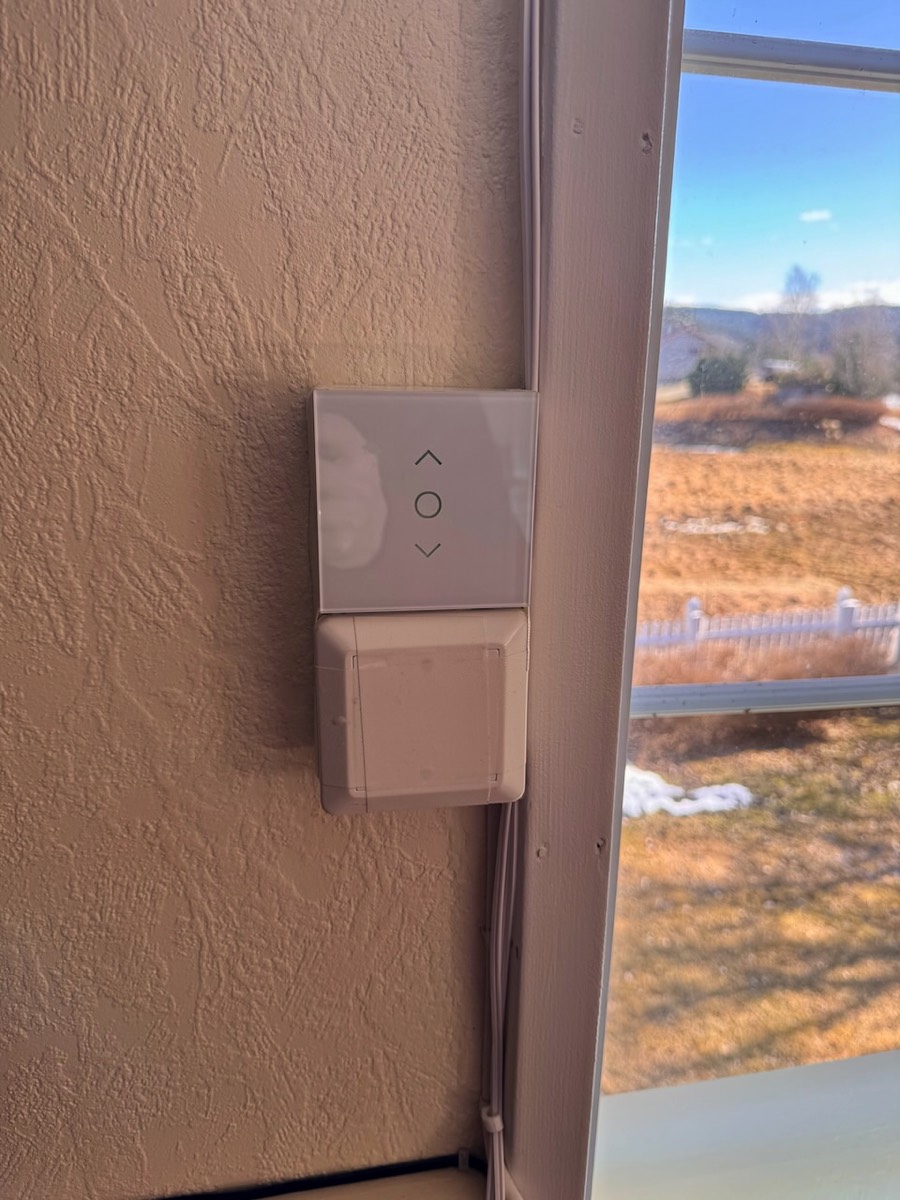
For a long time the solution was a Fibaro Roller Shutter 2, connected to Homey, and Apple Home integration through HomeKitty. This worked quite well, but the relay uses Z-Wave and for some reason, Z-Wave devices connected to Homey would often disappear from Apple Home. In the mean time, Meross had launched an integrated up/down switch and control relay, which is also compatible with Apple Home. Thus, the Fibaro relay was replaced by one of these, installed in a double wall box, to allow space for the switch and all the wires, with the lower part covered by a lid, ses picture below.
Meross sun screen switch
The challenge of this setup has been to find a solution for integrating all these sensor signals into one platform/programming app. Several options were investigated, and eventually a couple of developments could be exploited:
Light level and temperature measurements are collected directly from the Hue outdoor sensor.
Wind measurements are collected from the Ecowitt wind gauge and is used as a condition for whether the sun screen should be run up or down depending on wind conditions.
The status for whether we are watching TV or not is still collected from the Harmony hub.
In the end, the whole setup is programmed as follows, in Home Assistant:
If the light sensor measures a light level above 35,000 lux, meaning fairly bright sunlight, fore more than 10 minutes, it is above 3 degrees Celsius (to avoid potential problems with ice in the railings), and the wind is not above 40 km/h, the shade is closed (and if the light level falls below 35,000 lux for 10 minutes, it opens again)
If the light sensor measures a light level above 25,000 lux when the TV is on (meaning it makes watching TV more difficult), it is above 3 degrees Celsius, and the wind is not above 40 km/h, the shade is closed (and if the light level falls below 25,000 lux for 10 minutes, it opens again)
If wind speeds exceeding 40 km/h are measured and the screen is down, it opens
In any case, the shade is opened an hour before sunset, regardless of the conditions
Getting the whole setup and programming to work took some tweaking of lux levels and conditions, but in the end, I am glad to have found a solution that works very well. In addition, we have realized that it can be convenient to have an easily accessible switch available for manual operation, in case we want to run the screen down or up outside of the parameters defined in the programming. This is really quite easy to do by talking to Siri or using the Home app, but the wife likes physical buttons. Since the wall button is awkwardly located behind the TV, I have installed a small and nifty Aqara Wireless Mini Switch, which can be programmed with different actions for short/long/double press. This has been placed on the window ledge, see picture below, and runs the sun screen up/down at a click.
Similarly, we realized that it would be useful to be able to control the sun screen and some lights with a switch when seated in the sofa. Thus, an additional Aqara Wireless Mini Switch has been placed on the corner table by the sofa, see picture below, which controls the sun screen and some lights.
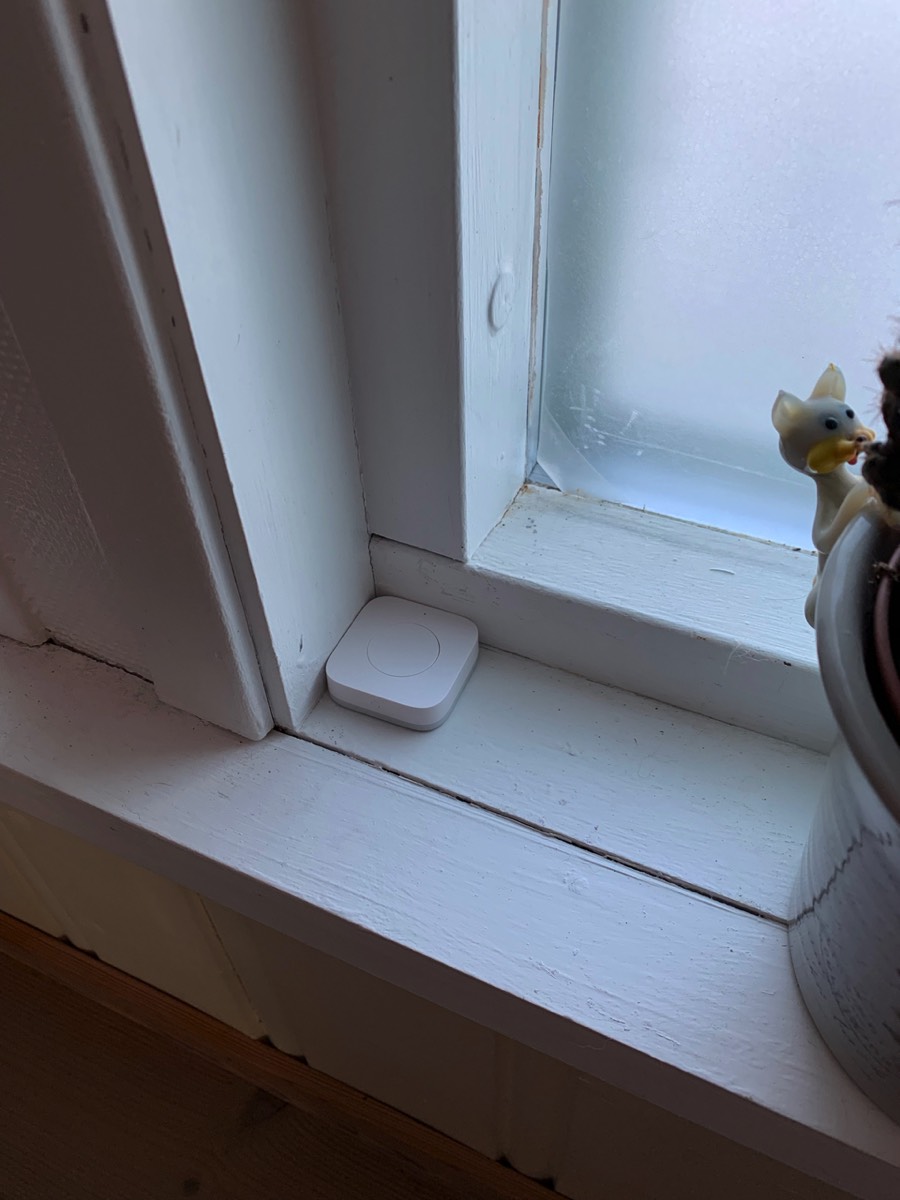
Aqara wireless switches for manual control of the sun screen and lights

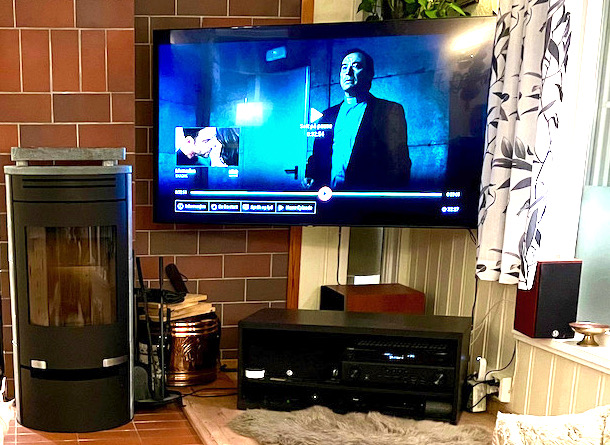
Moving on to home entertainment solutions, our system consists of a few components; set top box from altibox, Samsung TV, Yamaha receiver, Sony PlayStation 3, and an Apple TV 4K. Except for the Apple TV, the other units are not especially smart, despite there being a phone/tablet app for the receiver, but which does little more than constitute an additional remote control. The TV can also be connected using Homey and Homebridge.
Since it is desirable to exploit data about whether we are watching TV or not in controlling the sun screen described above, and since it is generally useful being able to control the home entertainment system fra a smart phone/tablet/etc., I have found workarounds:
Partly, there are Homebridge plugins for respectively Samsung and Yamaha. In the beginning, I used these, but this was far from ideal. The plugins were not working as expected and sometimes Samsung or Yamaha changed some parameter/interface making this even more unstable so that at best, I could sometimes see whether a device was on or off.
What works fairly well is that there is an app for Harmony for Homey, and via HomeKitty, this connects the devices to Apple Home. This allows seeing the status of devices/programs and turn them on/off. Unfortunately not all the functionality present in Homey comes over to Apple Home.
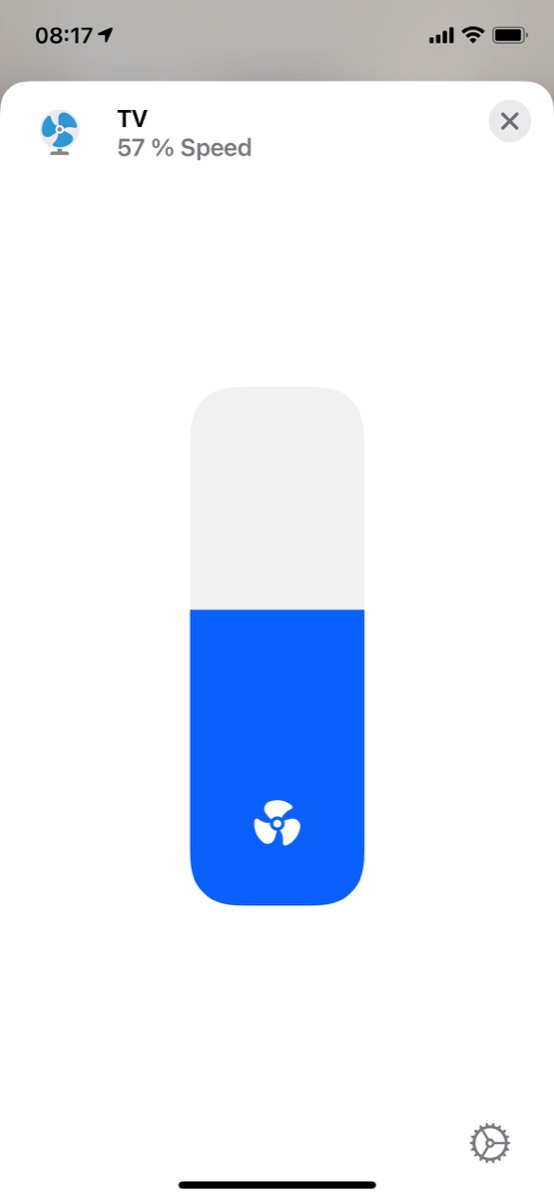
I especially miss the possibility to control the volume of the Yamaha receiver in Apple Home, but through a different Homebridge plugin for Yamaha I have gotten this to work. A litt strangely, the volume control appears as a fan and the fan speed is set between 0 and 100%, see screenshot below, but as long as you learn which % levels are suitable for different situasjons, this works well. The best is being able to just talk into the room and ask Siri to change the volume.
Adjustment of the Yamaha receiver volume in Apple Home looks like a fan (and we have named it TV since it is easier to ask Siri to turn up the TV volume than the Yamaha receiver)
Furthermore, both the Apple TV and the HomePods er key devices in the integrated smart home by working as Apple Home hubs. This means that commands sent from iPhone/iPad (an iPad can also work as a hub)/Watch/Mac go via these on their way to the device to be controlled. If you have not tried such a smart speaker with voice assistant, I truly recommend it. Compared with operating a smart phone/tablet, it is much more convenient just talking and have devices/scenes turn on or off. We use it quite often to trigger scenes or turn on/ff devices. While not perfect, we also experience very few cases where Siri on the HomePod fail to understand our commands. And it is very satisfying getting up in the morning and saying "Hey Siri, Good Morning" and getting an immediate response in the form of lights turning one and polite feedback from Siri.
Ellers er det en del basestasjoner her, koplet til en UniFi switch, sammen med et UniFi U6 Pro aksesspunkt montert i taket, se bilde under, og koplet til hovedruteren på kontoret med cat6-kabel via loftet.
Furthermore, a number of base stations are placed here, connected to a UniFi switch, together with a UniFi U6 Pro access point mounted on the ceiling, see picture below, and connected using cat6 cable running through the attic.
There isn’t too much to say about the Philips Hue bridge, this is the Pro version, and it takes up little space and has proven to be very stable in operations. As with the other base stations, it is connected to the internet using an ethernet cable, which is why these different base stations are spread out throughout the house where there are UniFi access points with free ethernet ports. The base station for the Arlo camera in the conservatory has also been put here, since it requires cabled connection, and it integrates the camera into Apple Home.

Left UniFi access point
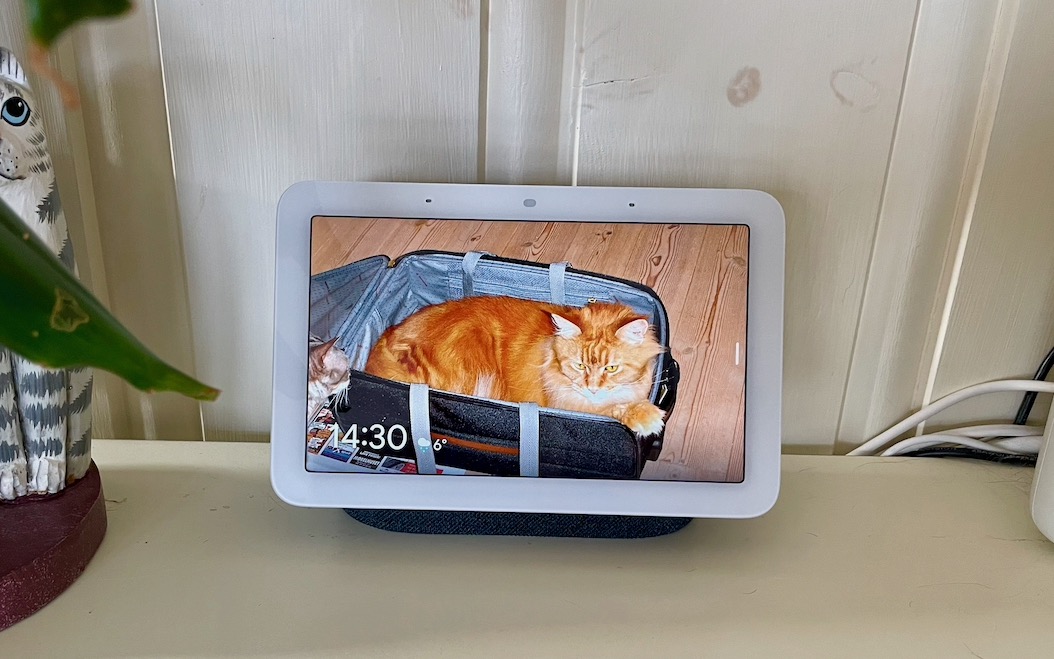
Right: This sideboard has gradually become a “tech center”, shown here are the Hue bridge, the Heatmiser Neo Hub, the Arlo base station, and a Google Nest Hub, which primarily works as a digital photo frame (replacing an old iPad that served the same purpose, but which stopped working)

We also have another base station here. When I finally took the plunge and acquired an Amazon Echo Dot (see picture below), this was close to 100% motivated by the wish to be able to voice control the garage doors via Tailwind (see more under garage). Since this can now be done via Siri Shortcuts and NFC tags, we moved the Echo up to the living room. When moving it, I also made a serious attempt at setting up the Alexa ecosystem as a real alternative to Apple Home. This has been a useful exercise which has partly both confirmed that it works quite well and does what it actually can do, but also that it has its limitations compared with Apple Home when it comes to which devices are supported (at least of the devices we have, despite the marketing saying they should work with Alexa) and the possibilities for more advanced programming. What it does offer is a backup solution if Siri for some reason or other cannot complete the whole Good Night scene, then “Alexa, good night” can succeed in turning off the remaining lights. As mentioned above, we had for a long time an iPad that worked as a digital photo frame (and partly also as “control panel” for HomeKit), but it was so old that it eventually stopped working. Instead of acquiring another iPad, which even secondhand is quite expensive, a Google Nest Hub was installed, see picture below. It serves primarily as a screen for showing photos, but is also set up such that supported smart devices can be controlled from it.
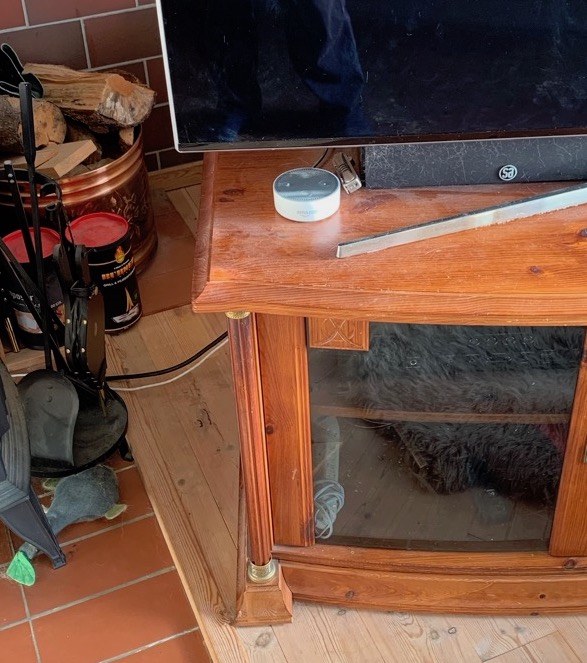
Left, Echo Det, and right, Google Nest Hub
Furthermore, we have a Logitech Harmony Hub, with an associated Harmony Elite remote control. On one hand, the Harmony can connect directly to Philips Hue and control light sources from Hue, but more importantly, it is integrated into Apple Home. For a long time, this integration was achieved directly via Homebridge, but after Logitech updated the Harmony Hub firmware in December 2018, this can no longer be done (although it is rumored that Logitech might have reversed this). However, going the route via Homey, where the Harmony Hub can be added as a device, and then to Homebridge, it still works. Via the Homebridge plugin for Homey, all defined Harmony activities appears as “devices” in the Home app, see screenshot below. These can thus be turned on or off using Home/Siri/etc. and, more importantly, be included in programs/scenes. Our primary Harmony activities turn on all the involved home entertainment devices/sets the right inputs to watch respectively TV using the cable box, media via Apple TV, or play PlayStation. These activities are included in for example the “Good Night” scene in HomeKit so that the whole system is turned off when we pack it in for the night. An added bonus is that the TV can be turned on at random times to make it sound like we are home when in fact we are away.
In the living room, the central unit for the Verisure alarm system has been installed, together with a motion sensor with camera and a smoke detector, which also measures temperature and humidity, see pictures below.
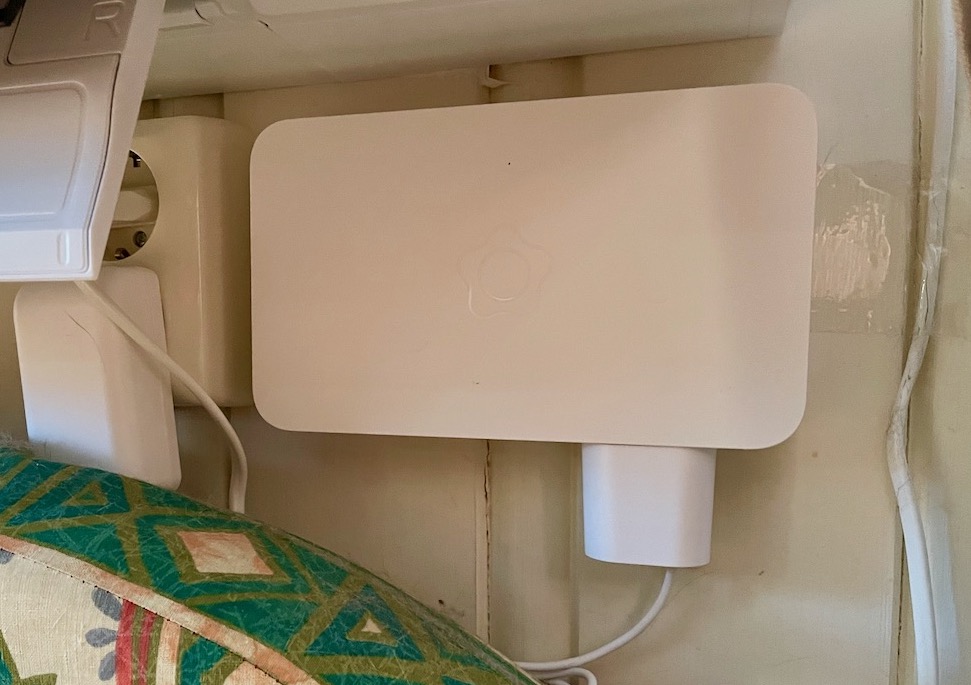
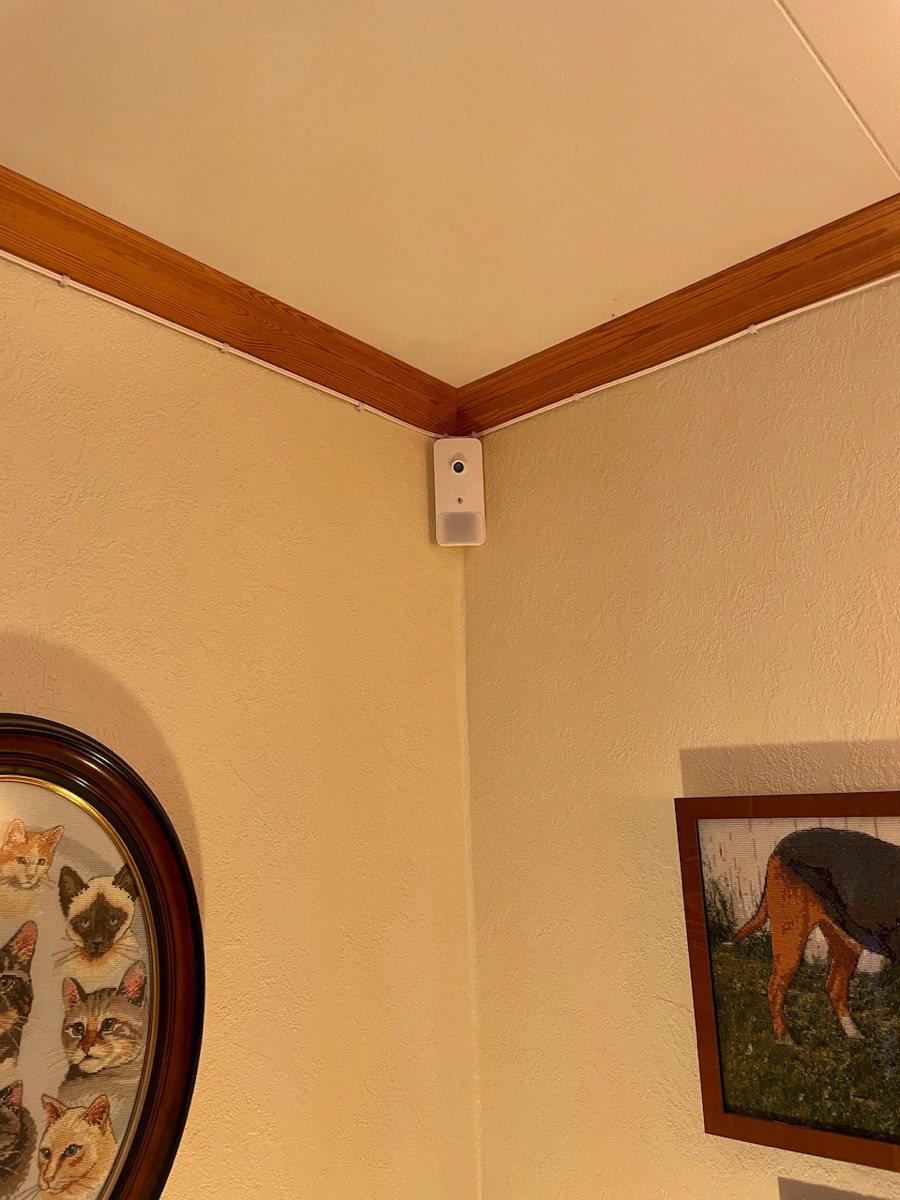
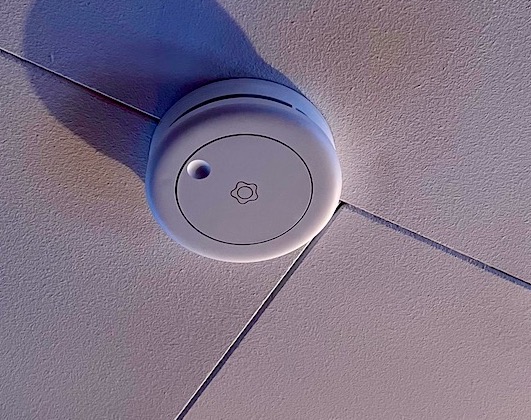
Verisure components; main unit, motion sensor, and smoke detector
As the most “technology-heavy” room in the house, the room view for the living room is quite crowded:
